


UniPRO
152810
User Guide
Page 29
MGig1 to SEL1
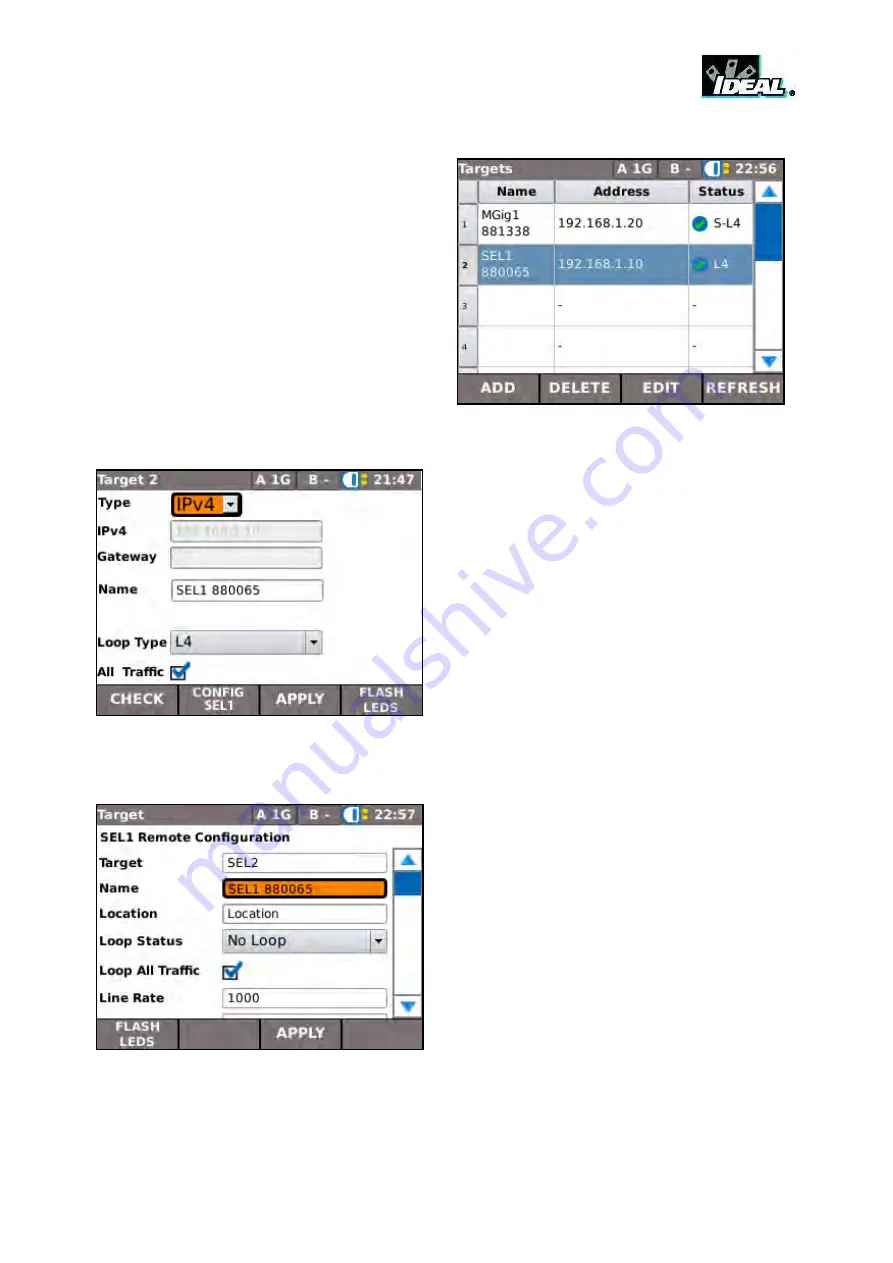
From the home screen select SETUP (F4) and
then select the TARGETS icon. All SEL1
handsets (and any other devices) previously
discovered will appear on the Targets list as
illustrated in Fig 34. Highlight the SEL1 you wish
to control and select EDIT (F3), the screen
changes from ‘Targets’ to ‘Target #’, Fig 35, and
the SEL1s main details are listed. Select
CONFIG SEL1 (F2) and all of the SEL1s
configurable details appear, Fig 36. Configure
SEL1 as required and select APPLY (F3). The
SEL1’s configuration will be updated and the
SEL1 handset will reboot.
Fig 34
Fig 35
Fig 36
When an additional SEL1(s) has been connected to
the network and it does not appear on the Targets
list:- Select ADD (F1) and a pop up dialog gives you
the choice of searching for IDEAL targets or configure
the search manually. Select SEARCH from the pop
up dialog and after a scan the ‘Discover’ screen is
shown on the display, highlight the additional SEL1
and select SELECT (F3). A new target screen
appears where you can reconfigure some of the new
target’s details before you add it to the target list.
Select APPLY (F3) and the ‘Targets’ screen is shown
on the display again but with the new target added.
SEL1 Loop layer
The SEL1’s loop layer can be changed without the
need to reconfigure as follows: Highlight the SEL1 on
the Targets list (Fig 34), select EDIT (F3) and the
‘Target #’ screen is shown on the display, Fig 35.
Loop Type can be set from a drop down menu.
Choose the Loop type you require and whether to
loop all traffic, select APPLY (F3) and the loop layer
on the SEL1 changes immediately.
Summary of Contents for UniPRO MGig1
Page 1: ...UniPRO MGig1 User Guide 152810 Iss 1 UniPRO SEL1 ...
Page 67: ......


