background image

OPERATION 

BEFORE USE: 

1.


Remove all the packaging materials. 

2.


Remove the glue and labels on the appliance. 

3.


Clean  the  Fry  Pan  Basket  and  Fry  pan  thoroughly  with  hot  water,  a 
nonabrasive sponge and a mild dish detergent or in the dishwasher. 

4.


Wipe  the  inside  and  outside  of  the  appliance  with  a  wet  cloth.  Do  not 
immerse the appliance in water. 

NOTE: 

This appliance cooks using hot air. Do not fill the basket with oil


PREPARATION 

1.


Place the appliance on a level, even, and stable heat-resistant surface. 

2.


Place the Fry Pan assembly (including the Fry Pan Basket) in the Air Fryer. 

3.


Plug the appliance into a standard wall socket. The power plug is included 
in the package. 

NOTE: 

Do not cover or block the vent located on the top of the Air Fryer. Doing 

so can prevent proper ventilation and will adversely affect the cooking results. 


SHAKING FOOD 

Some foods require shaking halfway through cooking. To properly shake the food, 
hold the handle, remove the Fry Pan assembly from the appliance, and shake. Once 
the food has been adequately shaken, slide the Fry Pan assembly back into the Air 
Fryer. 


CARE & MAINTENANCE 

Clean the appliance after every use or in between a large number of batches. 
The Fry Pan Basket and the Fry Pan have a non-stick coating. Do not use metal 
utensils or harsh abrasives when cleaning as this can damage the coating. Unplug 
the appliance and make sure it cools completely. 
 

NOTE

: To remove the Fry Pan assembly, place on a heat resistant surface to help 

cool the appliance quicker. 


Use a damp cloth to wipe the outside of the appliance. 


Clean  the  Fry  Pan  Basket  and  inside  components  with  a  nonabrasive 
sponge, hot water and mild detergent. 
 

NOTE

: If you place the Fry Pan assembly into the dishwasher, use the top rack only. 


Summary of Contents for AF9223

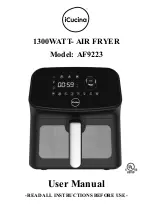
Page 1: ...1300WATT AIR FRYER Model AF9223 User Manual READ ALL INSTRUCTIONS BEFORE USE...

Page 2: ...nces There should be at least 3 inches of free space for the back side left right sides and the upper side of the appliance Do not place anything on top of appliance 12 Extreme caution must be used wh...

Page 3: ...vided to reduce the risk of becoming entangled or tripped over Please use care when using a longer detachable power supply cord or extension cord If a longer detachable power supply cord is used 1 The...

Page 4: ...PARTS AND ACCESSORIES 1 Control Panel 2 Hot Air Outlet Vents 3 Frying Basket 4 Handle 5 Fry Pan Assembly...

Page 5: ...on a surface that is horizontal even and stable This appliance is intended for normal household use It is not intended to be used in environments such as staff kitchen of shops offices farms or other...

Page 6: ...per ventilation and will adversely affect the cooking results SHAKING FOOD Some foods require shaking halfway through cooking To properly shake the food hold the handle remove the Fry Pan assembly fro...

Page 7: ...pt to cycle through dishwasher The outer surface may be cleaned by wiping carefully with a damp dishcloth or sponge Make sure unit has cooled completely prior to cleaning COOK GUIDE Menu selection mod...

Page 8: ...ess the MENU option and then rotate the knob left and right to choose the preprogrammed function In the working state press the power button the heating tube will stop working all the indicator lights...

Page 9: ...is touched the icon will flash Use the rotary knob to choose the preprogrammed setting Press down the center of the START STOP knob to perform the selected function After the function is finished the...

Page 10: ...to damages resulting from accidents abuse misuse damage caused by shipping or failure to follow safety instruction The warranty is valid only for first quality goods purchased from an authorized resa...

Page 11: ......

Reviews: