Click an icon to enable it, and the selected smart function will be highlighted. Click it
again to cancel the selection.
If the icon
on the interface, click it to enable the smart function switch.
●
Enable smart plan through
Add Plan
.
Select a preset point (if using a PTZ) from the
Add Plan
the interface. The smart plan for the
point is displayed.
1. Click the corresponding icon to enable a smart function.
The selected smart function is highlighted. Click it again to cancel the selection.
Step 3
Click
Save
.
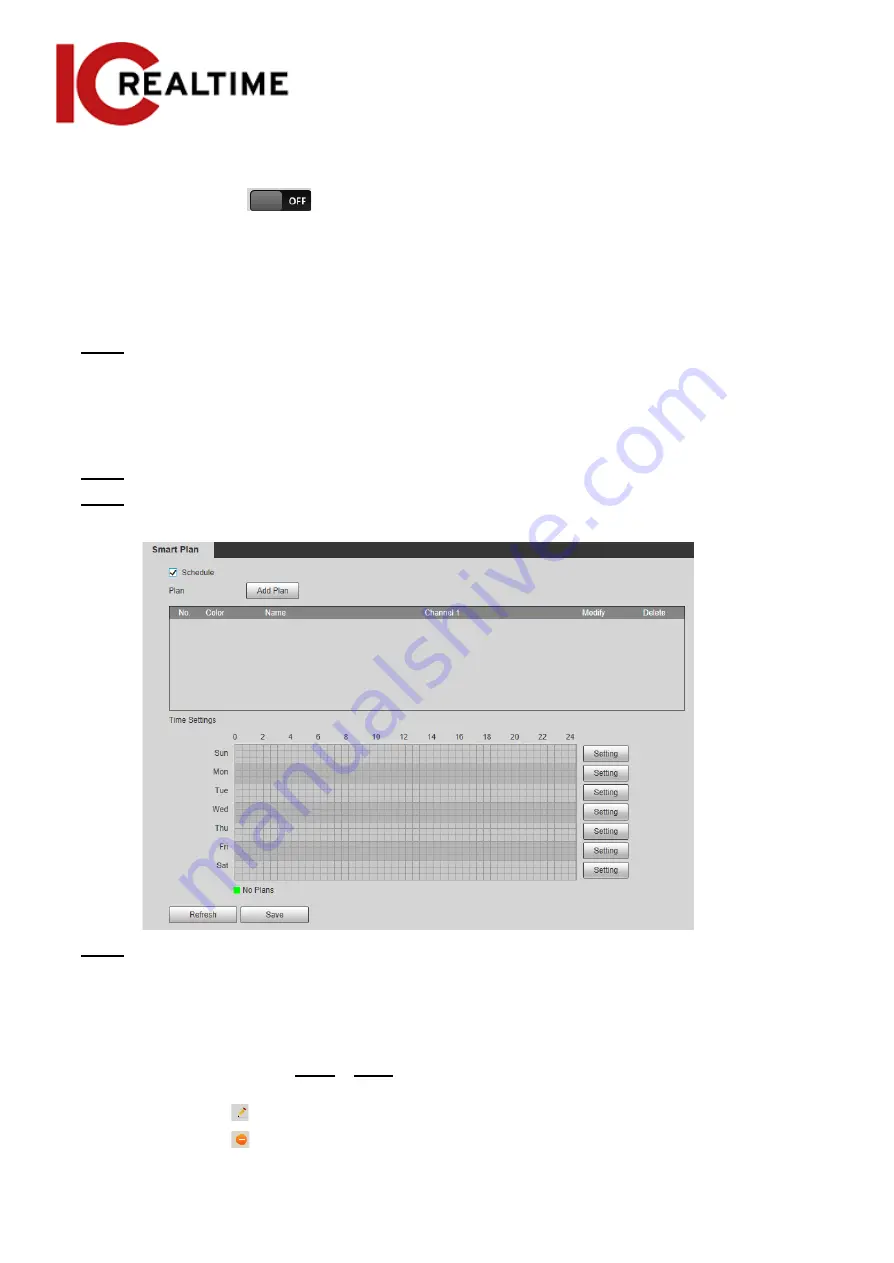
Schedule
This section configures the time period when the Smart Plans will be active.
Step 1
Select
Setting
>
Event
>
Smart Plan
.
Step 2
Enable
Schedule
.
Figure 5-28 Schedule
Step 3
Click
Add Plan
.
1. Rename the plan as needed.
2. Select smart plan. Other plans which are incompatible with the one that you selected
will turn gray.
3. Click
Save
.
4. (Optional) Follow Step1to Step3 to add more plans. You can add 10 plans at most, depending
on the IPC model.
●
Click
to modify the plan added.
●
Click
to delete the plan.
136


