background image

ii

FOREWORD

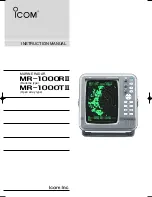
Thank you for purchasing Icom’s

MR-1000RII/TII MA-

RINE RADAR. 

The radar is designed especially for fishing boats. It
has powerful transmission power, 10 inch CRT display
and many other advanced features. 

If you have any questions regarding the operation of
the radar, contact your nearest authorized Icom Inc.
dealer.

IMPORTANT

READ ALL INSTRUCTIONS 

carefully and com-

pletely before attempting to operate the marine radar.

SAVE THIS INSTRUCTION MANUAL.

This

manual contains important safety and operating in-
structions for the MR-1000RII/TII.

EXPLICIT DEFINITIONS

The following explicit definitions apply to this instruc-
tion manual. 

PRECAUTION

R

NEVER

let metal, wire or other objects touch any

internal part of the radar.

R

NEVER

place the radar within the reach of chil-

dren.

R

NEVER

expose the display unit to rain, salt water

or any other liquids.

NEVER

connect the radar to AC or more than 42 V

DC. This will damage the radar.

AVOID

using the radar near any magnetic materials,

such as a loudspeaker or a large power transformer,
as this can cause distortion of the CRT display. 

AVOID

placing the display unit in excessively dusty en-

vironments.

AVOID

placing the display unit near heating equipment

or in direct sunlight or where hot or cold air blows di-
rectly onto it.

AVOID 

using the scanner unit in areas where the tem-

perature is below –25˚C (–13˚F) or above +70˚C
(+158˚F). 

AVOID 

using the display unit in areas where

the temperature is below –15˚C (+5˚F) or above +55˚C
(+131˚F).

AVOID 

using strong solvents such as benzene or al-

cohol for cleaning the radar, as they may damage the
surfaces. 

BE CAREFUL!

SART

signal may not be detected and may

not be displayed on the screen depending
on the 

SEA

RAIN

or 

IR

settings.

Follow the settings as below to detect the
SART signal on the screen.

q

Select the screen range between 6 NM
to 12 NM with 

[+/–]

. (p. 2)

w

Set the 

[GAIN]

as high as possible. (p. 3)

e

Set the 

[SEA]

to minimum. (p. 3)

r

Set the 

[RAIN]

to minimum. (p. 3)

t

Turn the 

[IR]

OFF.

y

Turn the 

[STRETCH]

OFF.

WORD

WARNING

CAUTION

NOTE

DEFINITION

Personal injury, fire hazard or electric 
shock may occur.

Equipment damage may occur.

If disregarded, inconvenience only. 
No risk of personal injury, fire or 
electric shock.

MR-1000R2_T2.qxd  04.2.24 10:22  Page 3

Summary of Contents for MR-1000R2

Page 1: ...INSTRUCTION MANUAL MARINE RADAR MR 1000R Radome type MR 1000T Open array type...

Page 2: ...y unit Qty q NMEA connector NS1008 8P 1 w Spare fuse FGB 10 A 1 e Spare fuse FGB 5A for over 24 V power supply 1 r DC power cable OPC 928 1 t Viewing hood 2363 HOOD 1 y Mounting bracket 2363 ANGLE A 1...

Page 3: ...loudspeaker or a large power transformer as this can cause distortion of the CRT display AVOID placing the display unit in excessively dusty en vironments AVOID placing the display unit near heating...

Page 4: ...Tracking Aid 18 ATA menu setting 18 ATA operation 19 Plotting marks 19 Course and speed vector 19 Plots 20 8 BASIC RADAR THEORY 21 23 Side lobe echoes 21 Indirect echoes 21 Multiple echoes 22 Minimum...

Page 5: ...vigation Dealer HIGH VOLTAGE High voltages of up to 3 500 volts are used in this equipment Although prudent measures for safety have been adopted sufficient care must be taken in the operation mainten...

Page 6: ...EO menu y ZOOM FUNCTION ZOOM p 11 Push TARGET and TRAILS si multaneously to toggle the ZOOM function ON and OFF ZOOM function expands the target to 2 times normal Move the cursor to the target then tu...

Page 7: ...eacti vate the RAIN function RAIN indicator 8 disappears 6 MAN OVERBOARD MOB Push to mark the man overboard point on the screen When a crew member falls overboard push MOB for 1 sec to display the MOB...

Page 8: ...eens are available NUP and CUP screens require external bearing data p 39 TM screen requires bearing data and LOG or position data 0 HEADING LINE p 9 Heading line indicates the ships bow 1 ALARM ZONE...

Page 9: ...the trail time 3 HEADING INDICATOR Shows the heading bearing readout The HDG readout indicates the bow of the ship s bearing in a clockwise direction from north 4 IR INDICATOR p 11 Eliminates or redu...

Page 10: ...M 15M or Select the plot interval and vector time FUNCTION DRING OFF Turn the fixed range ring display OFF ON Turn the fixed range ring display ON DWPT OFF Non display the way point on the screen ON D...

Page 11: ...EA data incorrect varia tion data may entered p 39 MANUAL Revise magnetic variation manually Push to select MANUAL then push Set the revise value with Push or MENU to abort the menu DBRG INPUT NMEA NM...

Page 12: ...unit might be damaged Turning power ON OFF q Push POWER to turn the power ON The initial screen appears and warming up time is counted down on the screen The magnetron inside the scanner unit warms up...

Page 13: ...a line that shows your ship s bow direction This marker will appear in the center of the screen when the Head up screen H UP is se lected The heading marker can be hidden when the desired target is lo...

Page 14: ...fted in a desired direc tion and can be enlarged partially This is useful when the Head up is selected and you want to enlarge the bow direction display or the center of the screen shifts in the direc...

Page 15: ...magnified electronically for easier viewing of small targets p 6 q Push MENU to open the VIDEO menu w Push to select STRETCH then push to turn the function ON ZOOM function The ZOOM function expands t...

Page 16: ...volutions then stops for 1 min and then re peats this sequence while the power save function is activated DSetting the scanning standby time q Push MENU four times to call up the INT SETTING menu w Pu...

Page 17: ...Long pulse function To magnify the blips for easier viewing of small targets the long pulse and echo stretch p 11 functions are available When the long pulse is used in the 3 4 to 2 NM range this fun...

Page 18: ...he range between the ship and the target is indicated in the VRM readouts When the VRM1 and EBL1 are displayed the center of VRM2 appears at the intersection point of the VRM1 and EBL1 The VRM2 disapp...

Page 19: ...I of the FUNCTION menu see p 6 P S 0 to 180 Bow direction when PT SB is selected in the EBL PI of the FUNCTION menu see p 6 0 to 360 T True or magnetic bearing when select ing TRUE in the EBL PI of th...

Page 20: ...M2 readout is a measure of target move ment which can be converted into relative target speed For example when a 6 min trail time is selected multi plying the distance by ten gives the relative averag...

Page 21: ...ALM and alarm zone disappear from the screen i To activate the alarm function again with the same programmed zone push ALM ALM and pre programmed alarm zone appears Fig 2 Using the function with power...

Page 22: ...ct the tar get identification number type which appears at the right side of the mark Push to select the ap propriate type OFF No number appears SEL Number appears by the selected mark only ALL All nu...

Page 23: ...the tar get then push TARGET for 1 sec TARGET is pushed for changing the display of EBL VRM etc to target information In order to choose target which displays information cursor is united with target...

Page 24: ...Plots Plot displays past position of targets every 1 min as 3 dots q Target goes straight w Target turns right e Target reduces speed r Target increases speed q w e r 7 ATA 20...

Page 25: ...the lobes If a target reflects this radiation it will be dis played on the screen as an echo Side lobe echoes usually occur at short ranges and as a result of large strongly reflective targets They ca...

Page 26: ...ection at short range is very important Minimum range is determined primarily by transmitter pulse length vertical beam width and height of the scanner unit The shorter the transmission time the quick...

Page 27: ...lar obstruction Shadow sector Target resolution Target resolution is determined by the horizontal beam width and transmit pulse width Sometimes it is difficult to detect two targets which are separate...

Page 28: ...p to the nearest grounding point on the boat The distance between the GND terminal and the ground point should be as short as possible CAUTION Incorrect cable connection may dam age the radar DC input...

Page 29: ...E stated in the se rial No seal on the rear panel away from the com pass and navigation receiver e Select a position where there is no danger of salt or fresh water spray or immersion r Select a locat...

Page 30: ...to obtain best performance with maximum range t If you install two or more radar in one boat install one above and one below y The mounting surface must be parallel with the boat s waterline u If the...

Page 31: ...Scanner unit disassembly y Connect the power cable black and red end to the power unit connector 2 Be sure to follow the fol lowing diagram carefully u Tighten the sealing nut then replace the radome...

Page 32: ...m range t If you install two or more radar in one boat install one above and one below y The mounting surface must be parallel with the boat s waterline u If the height is insufficient to install the...

Page 33: ...ig 2 Fix the PA cable with the rouped cable tie as illustrated in Fig 2 y Clamp the system cable with the cable clamp metal fitting using a screw near the sealing connector Be sure to clamp it tightly...

Page 34: ...r an equivalent one to the motor bearing 3 if required Manufacture ESSO Type BEACON 325 e Connect the grounding wire to the ground plate with the supplied terminal if required Fig 5 NOTE When using th...

Page 35: ...pushing and holding MENU turn power ON to display the test pattern To return to normal operating condition turn power OFF then ON again DPara simulation screen The MR 1000RII TII has para simulation s...

Page 36: ...play RECALL and SAVE w Push to select RECALL or SAVE e Push SURE is displayed r Push to perform t Push to cancel When recall is performed without saving a setup it will become an initial value at the...

Page 37: ...on may be helpful when the scanner has not been mounted exactly in the direction of the bow q Line up the bow of the boat with an identifiable tar get w Push TX SAVE to display the target on the scree...

Page 38: ...E section becomes high lighted ePush to choose the selectable screen ranges with or on the display rPush to skip from the range selection or push to cancel skipping tPush MENU to return to the normal...

Page 39: ...12 35 ERROR MESSAGE Message Condition BRG INPUT FAIL 1 The Azimuth signal is interrupted An alarm tone is emitted within 5 sec and the display reverts to H UP mode in approx 1 min TRIG SIGNAL FAIL 1 I...

Page 40: ...the rubber packing and replace it if necessary DPainting MR 1000TII only To prevent the corrosion paint the surface of the scanner body except the antenna unit twice a year or more DMounting Check the...

Page 41: ...netron MAF1421B Modulator FET switching Duplexer Circulator Tuning system Automatic manual selectable Intermediate frequency 60 MHz IF Band width 10 MHz 3 MHz Dimensions 607 243 H mm 2329 32 99 16 H i...

Page 42: ...UX Power supply requirement 10 2 to 42 V DC Power consumption at wind velocity zero Approx 60 W MR 1000RII Approx 70 W MR 1000TII Usable temperature range 15 C to 55 C 5 F to 131 F Relative humidity L...

Page 43: ...a bow it does not receive as direction data Moreo the influence of measurement position accuracy or a current an actual bow it may differ from a direction 15 39 EXTERNAL DATA LIST EXTERNAL DATA INPUT...

Page 44: ...97 5 mm 3 27 32 in 195 mm 7 11 16 in 250 mm 9 27 32 in Radius is 3 5 mm 1 8 in Radius is 3 5 mm 1 8 in 30 mm 13 16 in 60 mm 23 8 in 100 mm 315 16 in SX 2713 2779 Display mounting bracket template...

Page 45: ...Ship s bow direction Radius is 6 mm 1 4 in EX 2714 Radome template 90 5 mm 39 16 in 90 5 mm 39 16 in 150 5 mm 515 16 in 45 5 mm 125 32 in...

Page 46: ...Ship s bow direction EX 2780 Open array type template 131 mm 55 32 in 131 mm 55 32 in 190 mm 715 32 in Radius is 6 mm 1 4 in...

Page 47: ...1 1 32 Kamiminami Hirano ku Osaka 547 0003 Japan A 6317H 1EX q Printed in Japan 2003 2004 Icom Inc...

Reviews: