


2
When using the GPS Logger function, check the following items.
Set the Recording Interval and Recording Sentence as necessary.
1. Inserting a microSD card (User supplied).
2. Check that the GPS signal has been received by the GPS icon on the transceiver ( lights).
3. Confirm the GPS Logger function is set to ON.
↓
Setting completed (You can start the GPS Logger function)
D
Setting the GPS record interval
Set the recording interval of the GPS Logger function.
If you set a short recording interval for walking, the same location will be recorded, so change the setting
according to the means of travel. You can also reduce battery consumption by increasing the recording interval.
L
The recording intervals that can be set may differ, depending on the transceiver you are using.
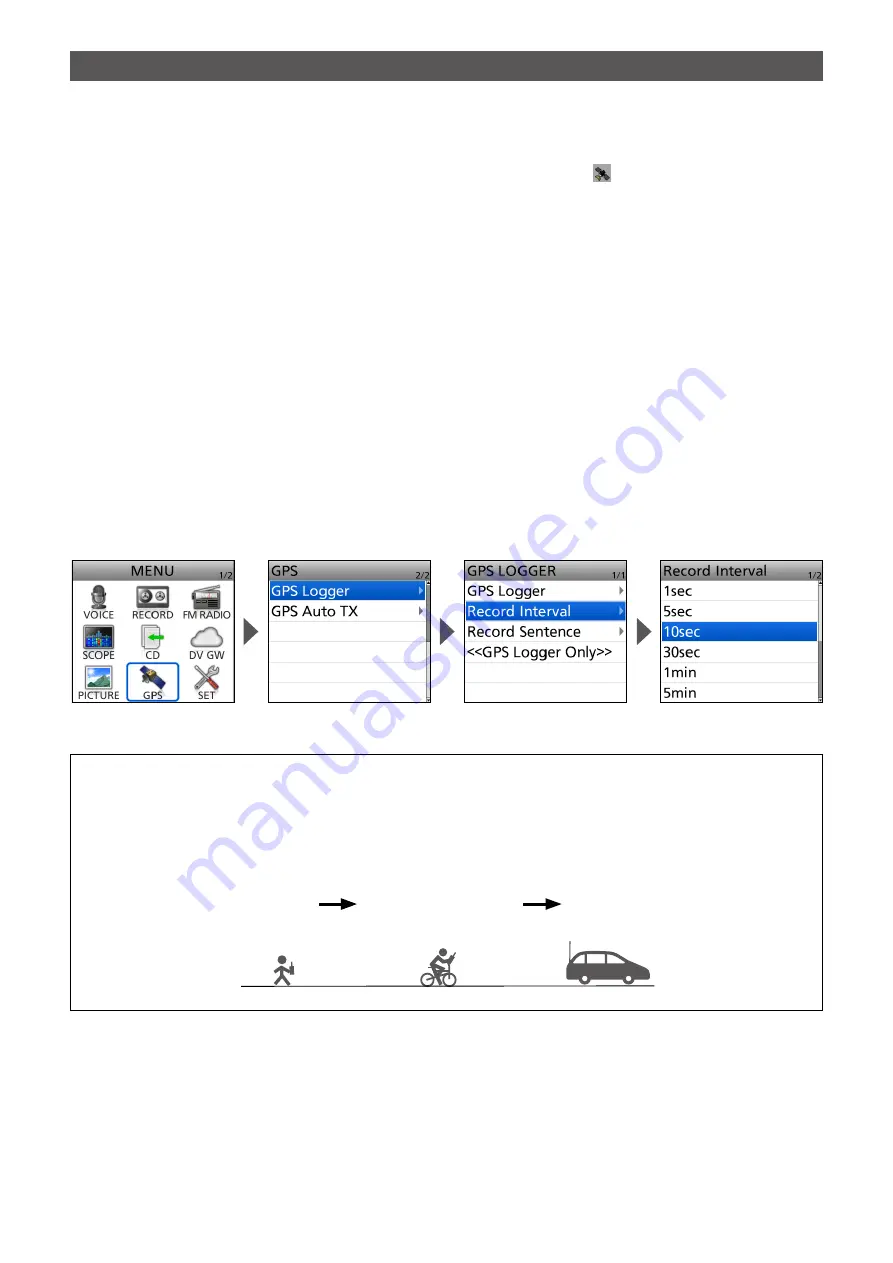
How to set the recording interval
1. Push [MENU] on the transceiver.
2. Select “GPS.”
• The GPS screen is displayed.
3. Select “GPS Logger.”
4. Select “Record Interval.”
5. Select the recording interval you want to set.
6. To exit the MENU screen, push [MENU].
• The standby screen is displayed.
2. Before Using the GPS Logger function
How to select the recording interval
When the recording interval is short, the battery will run down more quickly. In addition, the accuracy of the
trajectory increases because the number of recorded points increases, but the amount of data will increase,
and the acquisition to the map will be slower. On the other hand, when the recording interval is long, the battery
consumption will be reduced, but the accuracy of the log will be lower.
Shorten the interval when traveling on a high-speed vehicle, or set a longer recording interval when walking on
a hill, such as climbing.
10 seconds
60 seconds
30 seconds
Long
short
Record Interval


