

- 2 -
- 3 -
VOR NAVIGATION
D
Pairing with a Low Energy device
Pair a Low Energy (LE) device, as shown below.
1. Push [MENU].
2. Select “LE Device,” and then push [ENT].
( Bluetooth > Pairing/Connect > Search Device
>
LE Device
)
3. Perform pairing from the LE
device within 2 minutes.
L
The remaining time is displayed.
D
Disconnecting a paired device
You can disconnect a paired Bluetooth device if it is not
used.
1. Push [MENU].
2. Select “Pairing/Connect.”
(Bluetooth >
Pairing/Connect
)
• Paired devices are displayed.
L
“(Connect)” is displayed, if a
device is connected.
3. Select a device to disconnect,
and then push [ENT].
• The screen as shown to the right is
displayed.
4. Push [ENT].*
*A confirmation dialog is displayed.
5. Push [MENU] to return to the Main screen.
D
Unpairing a device
Before unpairing a connected headset or device, disconnect it.
1. Push [MENU].
2. Select “Pairing/Connect.”
(Bluetooth >
Pairing/Connect
)
• Paired devices are displayed.
3. Select a device to disconnect,
and then push [ENT].
• The screen as shown to the right is
displayed.
4. Select “Unpair,” and then push [ENT].*
*A confirmation dialog is displayed.
5. Push [MENU] to return to the Main screen.
D
Bluetooth settings
You can customize the Bluetooth
settings on the “Settings” screen.
Refer to The FULL MANUAL for
details.
([MENU] > Bluetooth >
Settings
)
Bluetooth
®
OPERATION (Continued)
D
Bluetooth module specifications
•Frequency range:
2402 ~ 2480 MHz
•Transmission power:
4 dBm (Typical)
•Version: 4.2
•
Support profile:
HFP, HSP, SPP, HRP, GATT
(GATT over Serial)
D
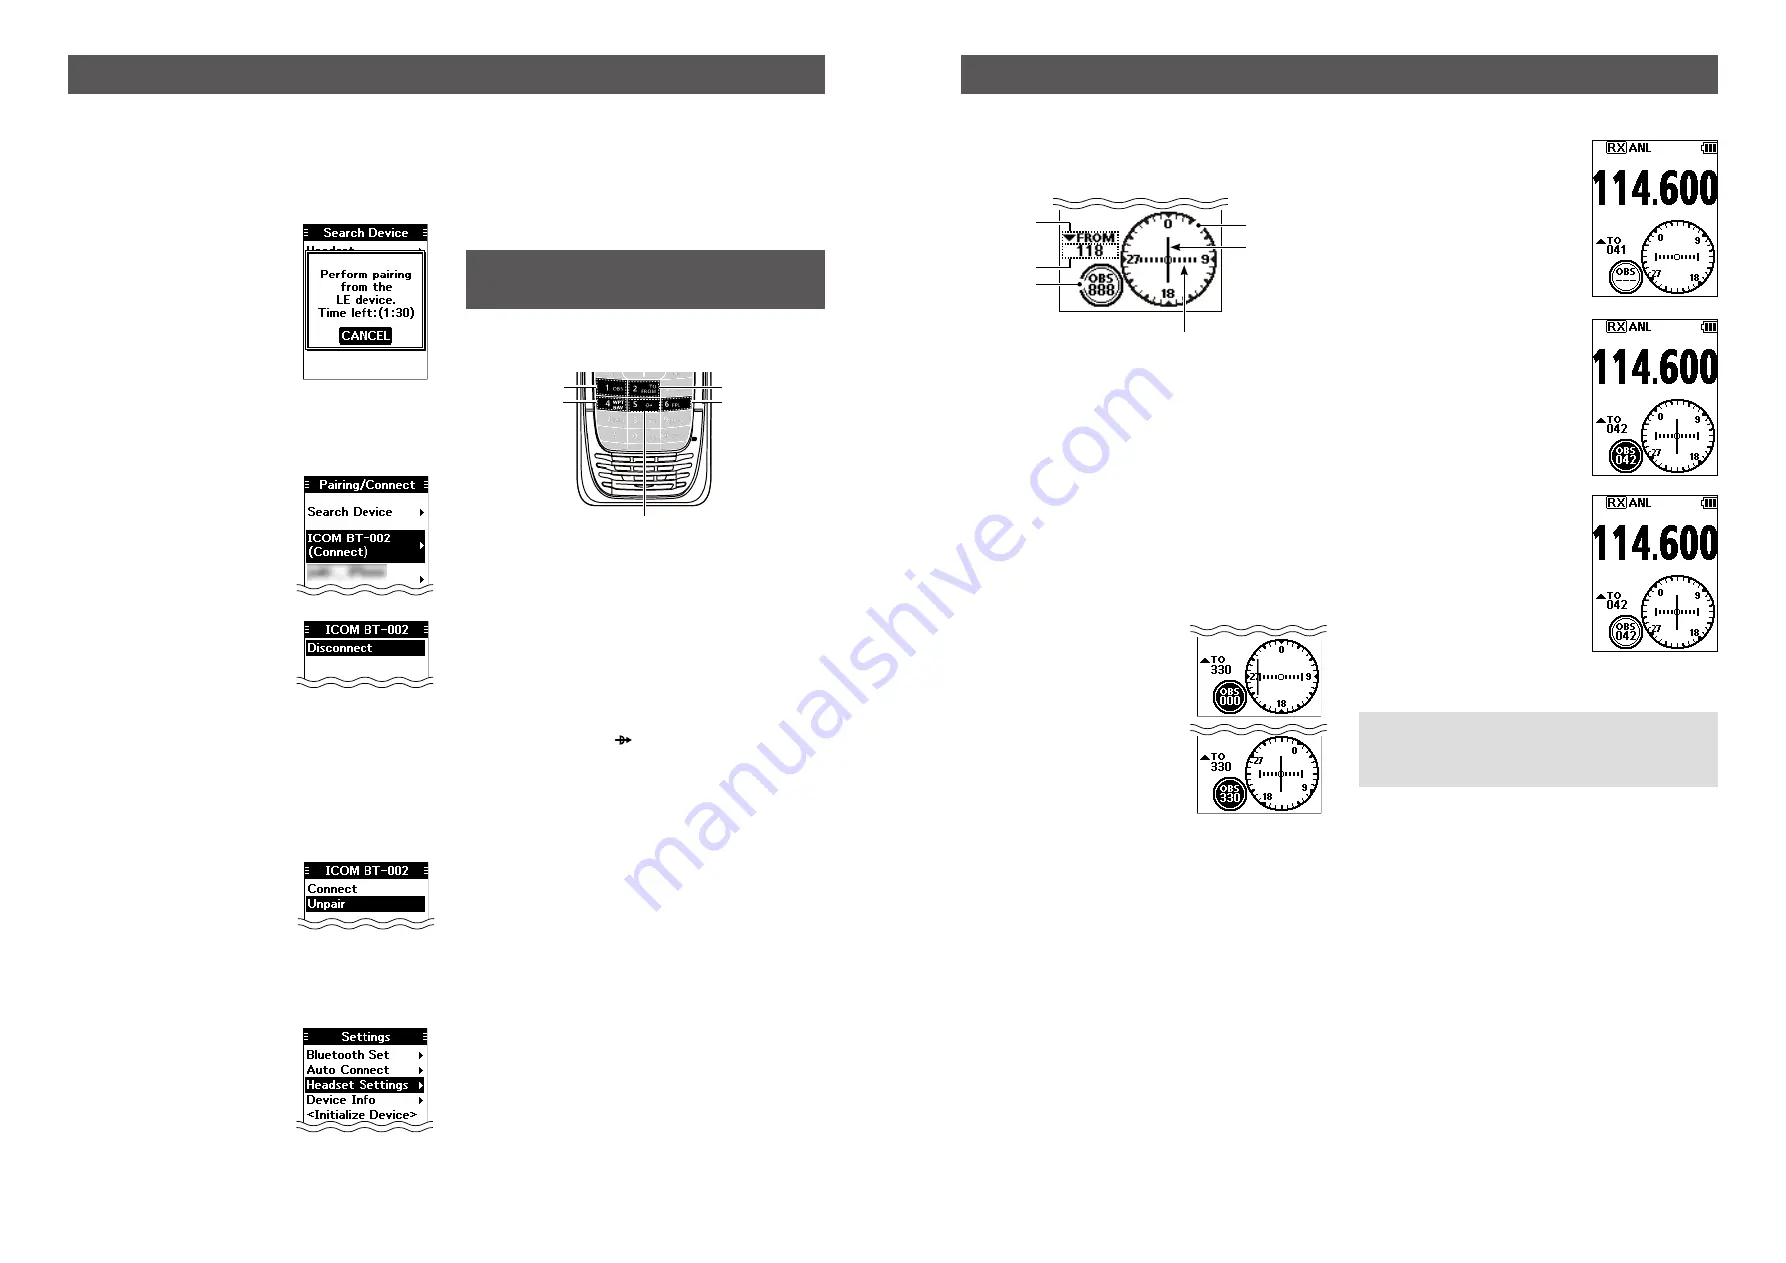
Course Deviation Indicator (CDI) screen
The transceiver displays the CDI screen when the NAV
band frequency is selected.
q
w
e
r
t
y
q
COMPASS ROSE
w
COURSE DEVIATION NEEDLE
Displayed when a VOR signal is received.
e
DEVIATION MARKS
r
OBS VALUE INDICATOR
Displays the course heading.
t
VOR VALUE INDICATOR
Displays the heading to or from a VOR.
y
TO/FROM INDICATOR
D
Using the Omni Bearing Selector (OBS)
Use the Omni Bearing Selector, as shown below, to set the
course heading.
1. Push [F], and then push [OBS] to
enter the OBS mode.
• The OBS value is highlighted.
2. Rotate [DIAL], or push keypad
keys to set the course heading.
3. Push [ENT] to save the adjusted course heading.
KEYS USED FOR
NAVIGATION FUNCTION
Push [F], and then push another key to use the secondary
functions listed below.
q
OMNI BEARING SELECTOR [1]/[OBS]
Push to enter the Omni Bearing Selector (OBS) mode, to
set the course heading.
w
TO/FROM SELECTOR KEY [2]/[TO FROM]
Push to change the “TO/FROM” indicator and invert the
OBS setting on the Course Deviation Indicator (CDI)
screen.
e
WAYPOINT NAVIGATION KEY [4]/[WPT NAV]
Push to display the Waypoint Navigation screen.*
*Only when a waypoint or a flight plan is selected.
r
DIRECT-TO KEY [5]/[ ]
Push to display the “Direct-To WPT” screen, to enter a
waypoint.
t
FLIGHT PLAN KEY [6]/[FPL]
Push to display the current flight plan.*
*Only when a flight plan is selected.
q
e
w
t
r
D
Flying to a VOR station
1. Select a VOR station
’
s frequency.
•The CDI screen is displayed.
2. Push [F], and then push [OBS]
to enter the OBS mode.
• The OBS value is highlighted.
• The Course deviation is displayed,
as shown to the right.
3. Push [ENT].
4. Confirm the TO/FROM indicator
displays “TO.”
L
If “FROM” is displayed, push [F],
and then push [TO FROM] to
display “TO.”
5. Maintain the heading that the Course Deviation Needle
comes to the center of CDI.
NOTE:
The IC-A25N and IC-A25NE’s VOR Navigation
features are supplemental aids to navigation only, and are
not intended to be a substitute for primary VOR navigation
equipment.


