background image

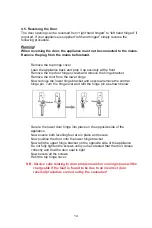
4.5. Reversing the Door

The door opening can be reversed from “right hand hinged” to “left hand hinged” if 
required. If your appliance is supplied “left hand hinged” simply reverse the 
following procedure.

Warning!
When reversing the door, the appliance must not be connected to the mains.
Remove the plug from the mains beforehand.

Remove the top hinge cover
Lean the appliance back and prop it up securely at the front
Remove the top door hinge screws and remove the hinge bracket 
Remove the door from the lower hinge
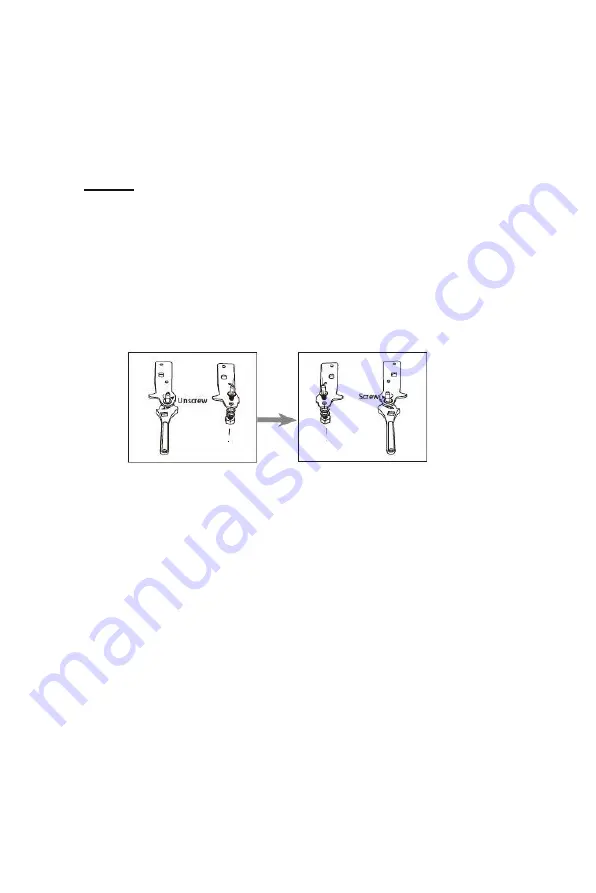
Now remove the lower hinge bracket and unscrew/remove the central 
hinge pin. Turn the hinge over and refit the hinge pin as shown below

Secure the lower door hinge into place on the opposite side of the 
appliance
Now ensure both levelling feet are in place and secure 
Now position the door onto the lower hinge bracket
Now refit the upper hinge bracket on the opposite side of the appliance
Do not fully tighten the screws until you have tested that the door closes 
correctly and that the door seal is tight
Now secure all the screws
Refit the top hinge cover.

N.B. Service calls relating to door problems and/or cooling issues will be 

chargeable if the fault is found to be due to an incorrect door 
reversal procedure carried out by the consumer!

14

Summary of Contents for RZ204W.E

Page 1: ...efully before attempting to install or use this appliance It is advisable to keep these instructions in a safe place for future reference Iceking Henry John House Northway Industrial Estate Northway L...

Page 2: ...eference Included is some important safety information in addition to guidelines and recommendations that will enable you to take full advantage of all the functions available This quality appliance h...

Page 3: ...way and understand the hazards involved y Children aged from 3 to 8 years are allowed to load and unload this appliance y Children should be supervised to ensure that they do not play with the applian...

Page 4: ...damaged avoid open flames and sources of ignition thoroughly ventilate the room in which the appliance is situated y It is dangerous to alter the specifications or modify this product in any way Any d...

Page 5: ...ut 1 y Store pre packed frozen food in accordance with the frozen food manufacture s instructions 1 y Appliance s manufactures storage recommendations should be strictly adhered to Refer to relevant i...

Page 6: ...e lacking this leads to overheating To achieve sufficient ventilation follow the instructions relevant to installation y Wherever possible the spacers of the product should be against a wall to avoid...

Page 7: ...treated as household waste Instead it should be taken to the appropriate collection point for the recycling of electrical and electronic equipment By ensuring this product is disposed of correctly you...

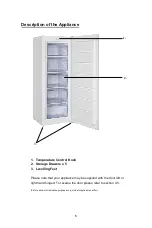
Page 8: ...ol Knob 2 Storage Drawers x 5 3 Levelling Feet Please note that your appliance may be supplied with the door left or right hand hinged To reverse the door please refer to section 4 5 Picture shown for...

Page 9: ...CONTENTS Section 1 Installation Section 2 Safety Advice Section 3 Operating the Appliance Section 4 Maintenance 7...

Page 10: ...at the appliance is positioned on a firm flat floor This appliance must be level Adjust the level by screwing the adjustable feet up or down use your fingers or a suitable spanner Ensure that the appl...

Page 11: ...urces of ignition and ventilate the room in which the appliance is situated Do not damage the refrigerant circuit Do not allow children to play with plastic bags tear the bag s immediately and ensure...

Page 12: ...essor to run continuously in order to maintain a low temperature in the cabinet N B If you site this appliance in a garage out building or a cold room where the ambient temperature may fall below 6 to...

Page 13: ...door open for a long time warm air will enter the cabinet and may cause a build up of ice as well as affecting the energy consumption Ensure there are no obstructions preventing the door from closing...

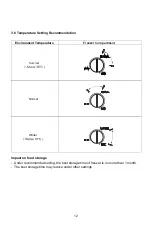
Page 14: ...endation Environment Temperature Freezer Compartment Summer Normal Winter Impact on food storage Under recommended setting the best storage time of freezer is no more than 1 month The best storage tim...

Page 15: ...the performance of the appliance and cause increased energy consumption 4 3 Defrosting It is advisable to carry out de frosting when your frozen food stocks are minimal Any frozen food that you do ha...

Page 16: ...hinge bracket and unscrew remove the central hinge pin Turn the hinge over and refit the hinge pin as shown below Secure the lower door hinge into place on the opposite side of the appliance Now ensu...

Page 17: ...nterior temperature to recover Has the appliance door been opened frequently if yes allow the interior temperature to recover Is the t stat control set to maximum if yes adjust the control to a lower...

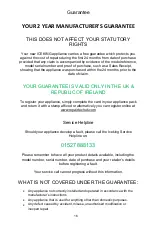
Page 18: ...e the card in your appliance pack and return it with a stamp affixed or alternatively you can register online at www repairtechuk com Service Helpline Should your appliance develop a fault please call...

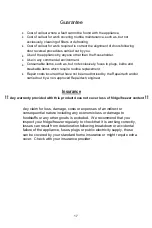
Page 19: ...costs incurred that have not been authorised by the Repairtech and or carried out by a non approved Repairtech engineer Insurance Any warranty provided with this product does not cover loss of fridge...

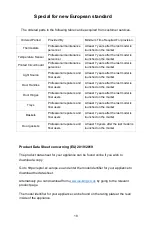
Page 20: ...al users launched on the market Professional repairers and At least 7 years after the last model is Door Hinges final users launched on the market Professional repairers and At least 7 years after the...

Page 21: ...Bin indicates that this appliance may not be treated as household waste Instead it shall be handed over to the applicable collection point for the recycling of electrical and electronic equipment Disp...

Page 22: ...F...

Reviews: