background image

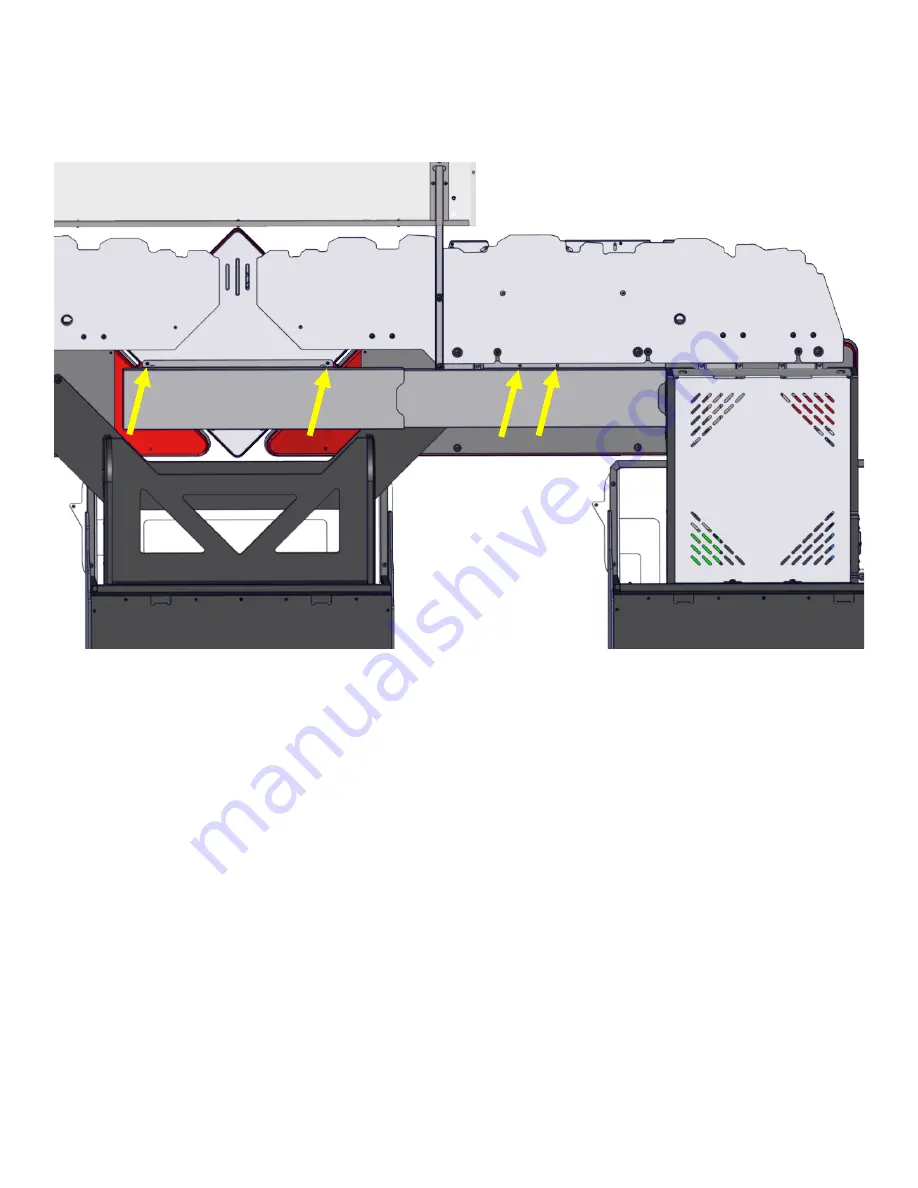
Step 12:


Attach the two wire channel covers.  Carefully wire tie all wires and neatly tuck them inside this 
channel.  Secure the wire channel using two bolts and  washers.


Software settings:


The game that you have the display port plugged into, go into game options and set under 

system 

settings

”, 

machine ID =1, Mega Marquee ON.


 Then the other games should be set   under system 

settings, machine ID=2, then ID=3, both Mega Marquee should be turned OFF.


 Leaving this on will 

cause an error to be displayed at the top left corner (Marquee disconnected).  


We recommend that you set the game as follows.  Standing in front of the game, the game on the 
left should be game ID 1 and this is where you should plug the DVI connection into the PC.


 The 

each game on the right should be one ID higher.  So ID 2 is the middle game, ID 3 is the right most 
game.


All settings then would be on ID1, and the two other games will clone whatever you set game ID1 
to.


Summary of Contents for MONOPOLY ROLL-N-GO

Page 1: ...from the left and right mounts Facing the back of the game the cabinet to the right will have the mount that contains all the electronics The cabinet to the left will have the mount with no electronics Step 1 Position the two games leaving 1 2 between them at the front 1 2 1 2 ...

Page 2: ... cabinet mounts to the top of the cabinets Use four AA6220 bolts and AA6070 washers Make sure the mount with the electronics are on top of the cabinet on the left looking at the front of the game right if from the back ...

Page 3: ...Step 4 Slide the right upper assembly over and onto the mounts as shown Step 5 Secure it to the mounts using three AA6212 bolts and three AA6281 washers Attach harnesses shown ...

Page 4: ... three AA6281 bolts and three AA6212 washers Attach harnesses shown Step 7 At each side of the center display are the mounting inserts They are shown within the circles They insert into slots in each of the top signs One of those slots are shown Insert the center display into the two slots ...

Page 5: ...Step 8 Secure the display using two AA6281 bolts and AA6212 washers Location is shown with the yellow circles with arrows Step 9 Slide the sign onto the poles Attach harnesses shown ...

Page 6: ...ts to the computer in game 1 A network switch is used to connect all the computers together NOTE There is a network connec tion on the marquee THIS IS NOT TO BE INSTALLED INTO THE NETWORK SWITCH Instead a network cable should go from the marquee to the center display at the center of the marquee port B If you plug it into port A the display will not work ...

Page 7: ...system settings machine ID 2 then ID 3 both Mega Marquee should be turned OFF Leaving this on will cause an error to be displayed at the top left corner Marquee disconnected We recommend that you set the game as follows Standing in front of the game the game on the left should be game ID 1 and this is where you should plug the DVI connection into the PC The each game on the right should be one ID ...

Reviews: