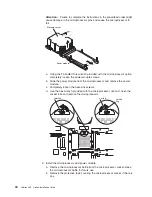


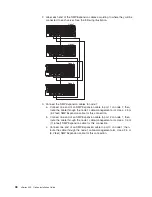

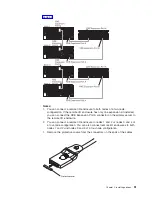


7. Connect the Remote Supervisor Adapter Ethernet connector on each server to
the network. This connection is needed so that the Remote Supervisor
Adapters can communicate and manage scalable partitions.
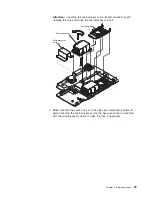
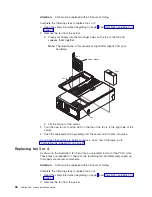
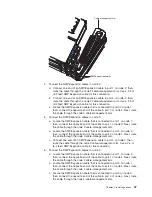
8. Route any remaining cables through the cable-management arms.
9. Secure the cables in the cable-management arms with the hook-and-loop
straps that come with your server.
10. Go to “RXE Expansion cabling” and complete that procedure, if you are
connecting the configuration to one or more remote I/O enclosures.
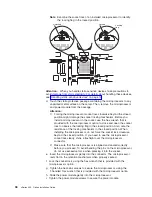
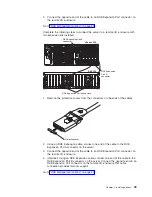
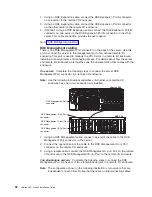
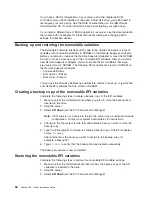
RXE Expansion cabling
There are two RXE Expansion Port connectors on the rear of the server. Use these
ports to connect the server to a remote I/O enclosure and to expand the number of
PCI-X slots that are available for use by the server. For detailed information about
cabling the RXE Expansion Port connectors, see the documentation that comes
with the remote I/O enclosure.
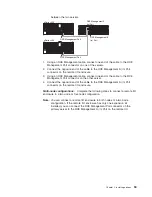
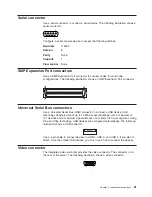
One server:
Complete the following steps to connect the server to a remote I/O
enclosure with one expansion kit installed.
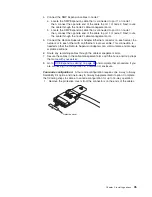
RXE-100
RXE Expansion
Port A
connector
RXE Expansion Port connector
xSeries 455
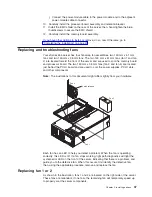
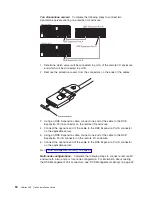
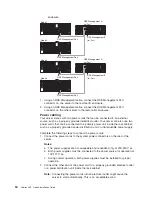
1. Remove the protective covers from the connectors on the ends of the cables.
2. Using an RXE Expansion cable, connect one end of the cable to the RXE
Expansion Port A connector on the server.
Protective cover
48
xSeries 455: Option Installation Guide
Summary of Contents for xSeries 455
Page 1: ...xSeries 455 Option Installation Guide ERserver...
Page 2: ......
Page 3: ...xSeries 455 Option Installation Guide SC88 P919 80 ERserver...
Page 12: ...x xSeries 455 Option Installation Guide...
Page 24: ...12 xSeries 455 Option Installation Guide...
Page 70: ...58 xSeries 455 Option Installation Guide...
Page 74: ...62 xSeries 455 Option Installation Guide...
Page 82: ...70 xSeries 455 Option Installation Guide...
Page 85: ......
Page 86: ...Part Number 88P9198 Printed in U S A SC88 P919 80 1P P N 88P9198...


