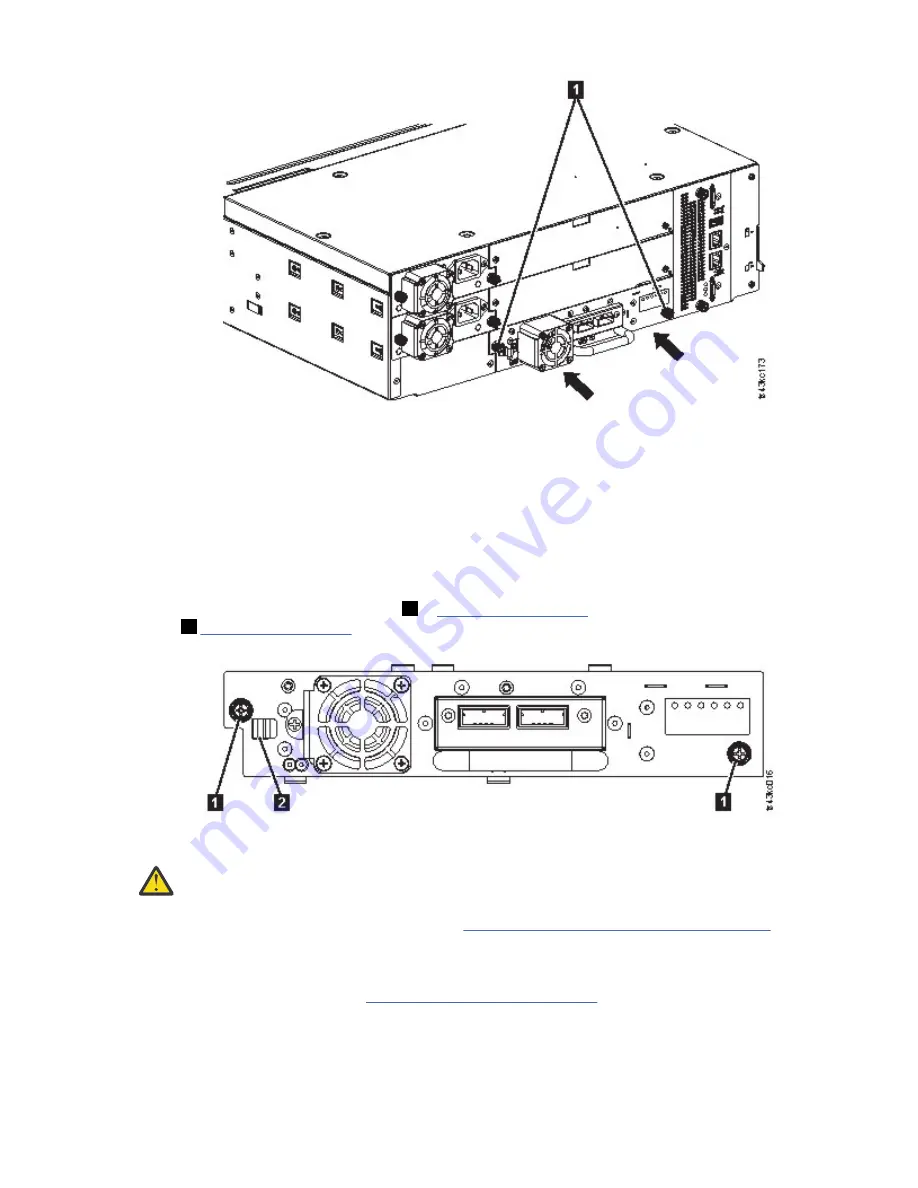
Figure 60. Installing a tape drive
4. Verify the drive operation.
Removing a tape drive
• Ensure that all host activity, including library operations are stopped to the drive being removed.
• Ensure that the tape cartridge is removed from the tape drive. Use the Management GUI to move the
cartridge to a storage slot or I/O station.
• Remove the FC or SAS cables from the tape drive.
• Loosen the blue captive thumbscrews (
1
in Figure 61 on page 121) on the tape drive. Press the lock
lever (
2
Figure 61 on page 121) to the right and pull straight back on the tape drive handle while the
bottom of the drive is supported to remove it from the unit.
Figure 61. Unlocking the drive
Attention: Support the bottom of the tape drive when it is removed to avoid damaging any of the
internal connections.
• Reset the list of known drives and modules. See “Locating Management functions” on page 65.
• Confirm that the drive is logically removed by checking the Operator Panel or Management GUI.
• If there is no replacement drive, install the drive bay cover.
• If you are replacing the drive, see “Adding a tape drive” on page 120.
Verifying Drive installation and operation
Using the Operator Panel or the Management GUI:
1. Confirm that the library recognizes the new tape drive by checking the Operator Panel or Management
GUI. The new drive appears in the module status overview area on the left side of the screen.
Chapter 6. Upgrading and servicing 121
Summary of Contents for TS4300 3555
Page 1: ...IBM TS4300 Tape Library Machine Type 3555 User s Guide IBM SC27 4629 07...
Page 66: ...Chapter 3 Installing 36 IBM TS4300 Tape Library Machine Type 3555 User s Guide...
Page 77: ...Figure 38 Mounting the rails to the connectors Chapter 3 Installing 47...
Page 175: ...Figure 81 Unlocked spooling mechanism enlarged view Chapter 6 Upgrading and servicing 145...
Page 261: ......
Page 262: ...IBM SC27 4629 07...


