

Step 1: Installing & Powering On the Switch
NOTE:
Important safety, electromagnetic compatibility, and
regulatory information is contained in the
Safety Information
document. The installation and use of this product must be
in accordance with the information provided in that
document.
1. Place the switch onto a desktop or into a rack. See the
IBM TotalStorage Storage Switch 2006 Model L10
User’s Guide or optional rack-mounting kit instructions
for information on installing the switch.
2. Power on the switch by inserting the included power
cord.
Step 2: Preparing a Network Interface
Using the serial interface connector on the switch, set the
IP parameters for managing the switch over an Ethernet
network.
1. Attach one end of the included RS-232 null modem
cable to the computer’s DB-9 serial port, and attach the
other end to the switch’s DB-9 serial port.
2. Open a terminal session through your serial terminal
emulation program (such as HyperTerminal
®
) with the
appropriate serial port (for example, COM1) and the
following serial port parameters:
Bits per second: 19200
Data bits: 8
Parity: None
Stop bits: 1
Flowcontrol: None
3. If using HyperTerminal, press E
NTER
to receive a
prompt.
4. If using the
tip
command on a UNIX workstation do the
following:
a. View the
/etc/remote file and create an alias similar
to Hardware but with the serial port parameters above.
(Suggested name: Switch)
b. Use the
tip
command to establish a connection
through the created alias, for example
tip switch
.
(For more information, see the tip command Manual
page.)
5. Type the password at the prompt and press E
NTER
. (The
switch’s default password is
password
.)
The default IP parameters are shown below. If you
need to change these parameters, set the IP
parameters as follows.
6. From the root menu, type
config network ip
and press
E
NTER
.
root>config network ip
Setting
Current
New
IP Address
192.168.1.129 192.168.1.129
Netmask
255.255.255.0 255.255.255.0
Default Gateway
192.168.1.1
192.168.1.1
OK
Enter IP address (192.168.1.129):
_
The switch’s current IP parameters are displayed along
with a prompt for entering the IP address.
7. Change the IP address and press E
NTER
.
8. From the root/config/network menu, type
mask
and press E
NTER
.
9. Change the subnet mask and press E
NTER
.
10. From the root/config/network menu, type
gateway
and press E
NTER
.
11. Change the default gateway and press E
NTER
.
12. Type
save
.
13. Type
root reset
, press E
NTER
, type
y
, and press E
NTER
again to reset the switch.
14. Attach one end of an Ethernet RJ-45 twisted pair cable
into the switch’s 10/100 Ethernet connector and the
other end into an operational Ethernet connector.
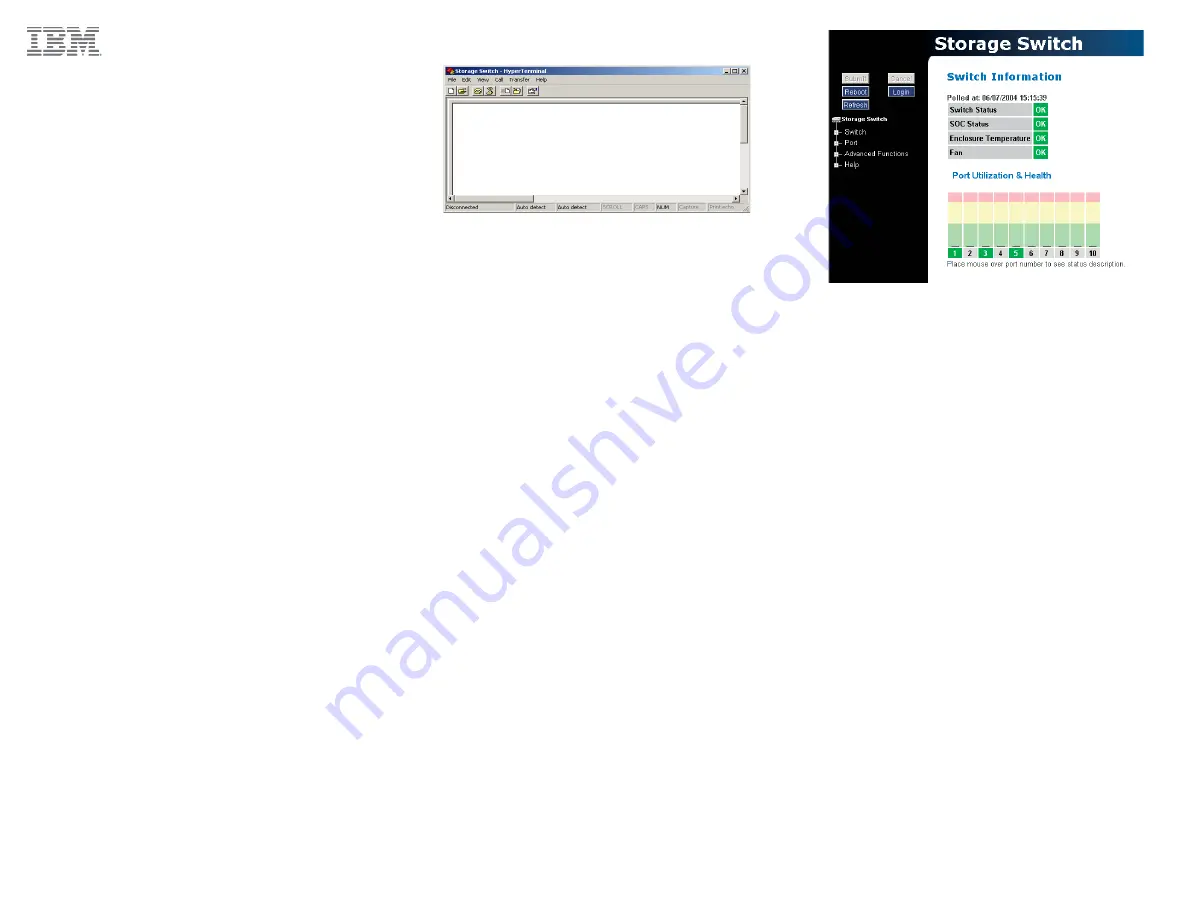
Step 3: Initial Switch Setup
The Web Manager provides easy navigation through a
graphical interface to configure the switch’s settings or view
switch status. The Web Manager supports Microsoft
Internet Explorer for Windows version 5.5 or later and
Internet Explorer for Apple version 5.2 or later.
1. Ensure that your workstation has access to the network
on which the switch is connected.
2. Open the Microsoft Internet Explorer Web browser.
3. In the address bar, type the switch’s DNS name or IP
address and press E
NTER
.
On the left side of the screen, expand and select links
for monitoring and configuring the switch.
4. To change the password, click
Switch > Password
.
Enter the new password in both text boxes and click
Submit
.
NOTE:
You do not have to change the password on the
switch. However, anyone can make changes to the
switch using the default password until the password is
set to a new value.
5. To verify the switch’s current date and time, click
Switch > Date & Time
. The Date & Time page displays
the current time settings. If you wish to change the time
settings, enter a new date and time, or click
Host Time
to set the date and time to the host system’s settings,
and click
Submit
.
NOTE:
The Web Manager does not require a password
unless you want to modify the switch’s configuration.
6. To enter a name for the switch (if desired), click
Switch > Configuration
. On the Switch Configuration
page, enter a name for the switch in the Name text box
and click
Submit
. When you change a setting, the Web
Manager will prompt you to log into the switch. Type the
correct password and click
Log In
. (The default
password is
password
.)
To log out of the Web Manager, click
Logout
, or simply
close the browser window.
NOTE:
The Web Manager will automatically log the user out
after 15 minutes of inactivity, unless the Switch Information
page is displayed. The Switch Information page
automatically updates to display the most current switch
status.
www
.ibm.com


