Connect the appliance
Follow this procedure to connect and power up the SiteProtector System appliance.
Procedure
1.
Connect both power cords to the appliance to prevent warning signals from sounding.
2.
Connect the network to the management interface port 0 using the supplied Ethernet cable. Note that
management port 1 should remain unused
3.
Turn on the appliance. The power button is located on the front of the appliance.
4.
When the LCD display reads "IBM Security SiteProtector SP3001," proceed to Initial Configuration.
Initial configuration
Enter the network information you gathered earlier.
Procedure
1.
Press
Enter
on the LCD panel. "Appliance PIN" appears in the LCD menu.
2.
If you want to specify a personal identification number that users must enter to configure the
appliance, press
Enter
, specify a 4-digit number in the field provided, and then press
Enter
again.
Note:
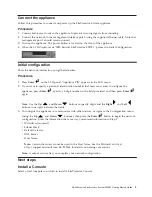
Use the
Up
and
Down
buttons to specify digits and the
Right
and
Left
buttons to navigate between the fields.
3.
To configure the appliance to communicate with other devices, navigate to the Configuration menu
(using the
Up
and
Down
buttons), then press the
Enter
button to begin the network
configuration. Enter the information the same way you entered information in Step 2.
v
IP Address (required)
v
Subnet Mask
v
Default Gateway
v
DNS Server
v
Host Name
Note:
Certain characters cannot be used in the Host Name. See the Microsoft article at
http://support.microsoft.com/kb/909264 for details on naming conventions.
Note:
A reboot occurs after you complete your network configuration.
Next steps
Install a Console
Select a local computer on which to install a SiteProtector Console.
IBM Security SiteProtector System SP3001 Getting Started Guide
3


