2
- Screws, 6-32 x 1/4-in., panhead Phillips
4.
Repeat steps 2-3 to attach the other rear bracket to the left extension.
5.
Adjust the brackets to the rack depth and tighten all the 6-32 x 1/4-in. screws
to a torque of 9 in-lbs (10 cm-kgs).
Attaching the rear brackets to the front rack posts
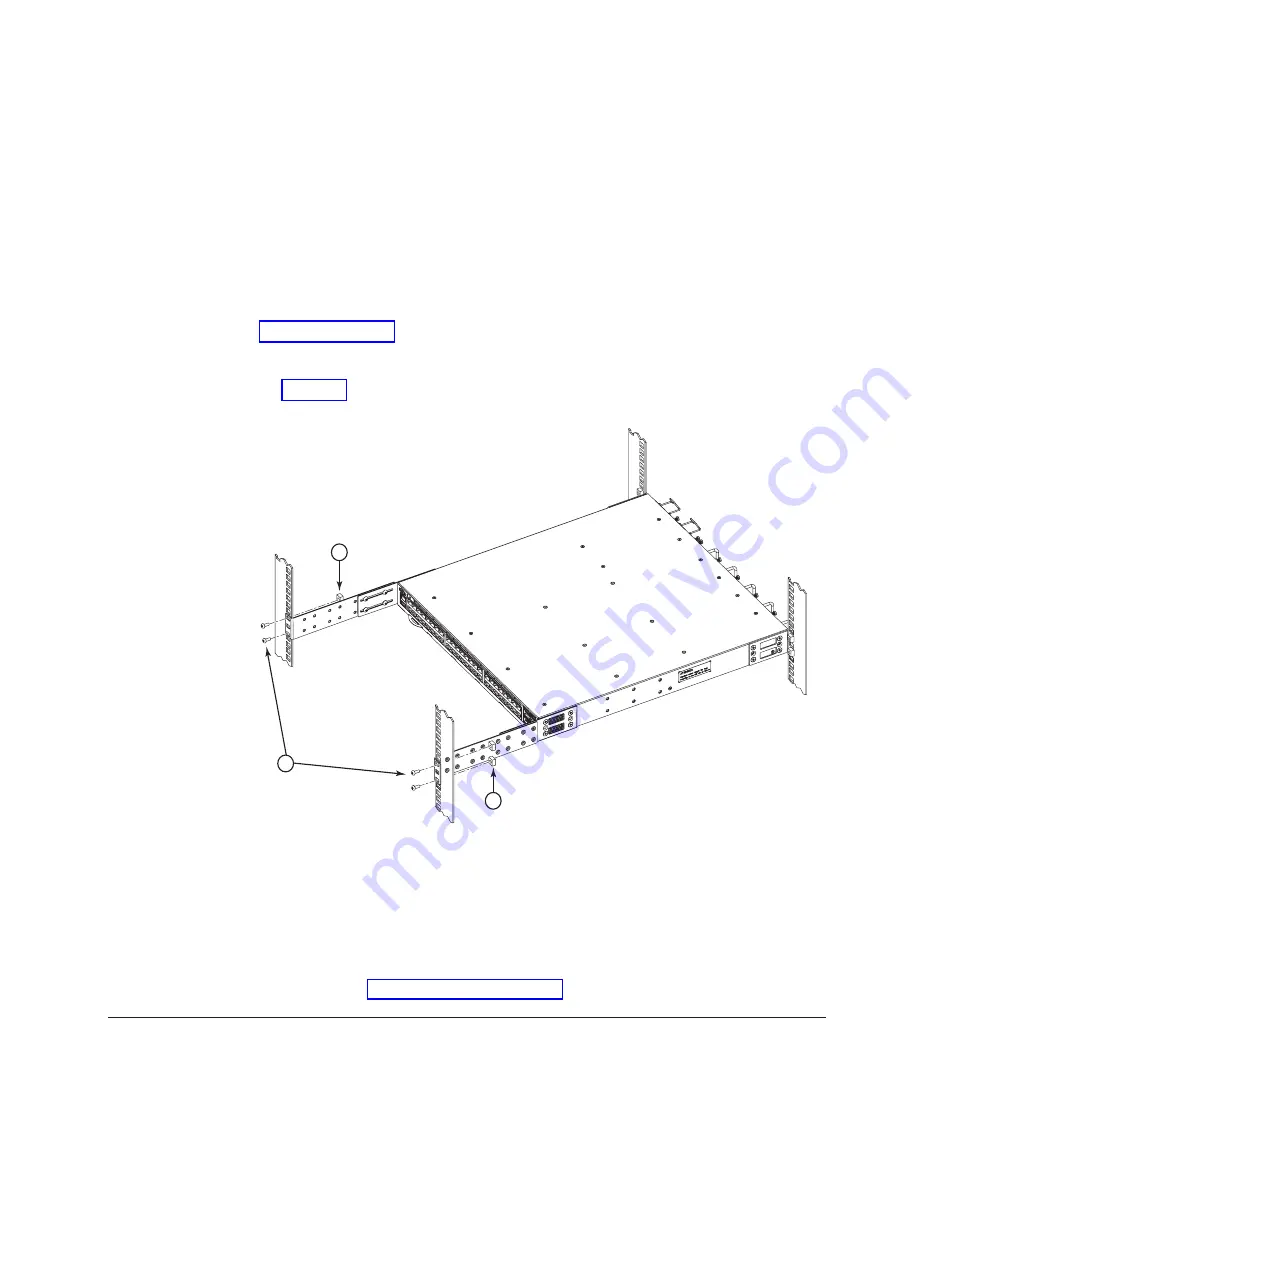
Complete the following steps to attach the rear brackets to the front rack posts. See
Figure 5 on page 11 for detailed illustrations of the parts.
1.
Attach the right rear bracket to the right front rack post using two 10-32 x
5/8-in. panhead screws (
1
) and two retainer nuts (
2
), as shown in
Figure 17. Use the upper and lower holes in the bracket.
1
- Screws, 10-32 x 5/8-in., panhead Phillips
2
- Retainer nuts, 10-32
2.
Repeat step 1 to attach the other rear bracket to the left front rack post.
3.
Tighten all the 10-32 x 5/8-in. screws to a torque of 25 in-lbs (29 cm-kgs).
4.
Remove any clamps or other temporary supports.
5.
Continue to “Initial setup of the switch.”
Initial setup of the switch
The switch must be configured correctly before it can operate within a network
and fabric. For instructions on configuring the switch to operate in a fabric
containing Extension Switches from other vendors, refer to the
Fabric OS
Administrator's Guide
.
2
2
1
b42r023
Figure 17. Attaching the rear brackets to the front rack posts
Chapter 2. Installing and configuring the switch
21
Summary of Contents for SAN42B-R
Page 2: ......
Page 6: ...iv SAN42B R Installation Service and User Guide...
Page 8: ...vi SAN42B R Installation Service and User Guide...
Page 10: ...viii SAN42B R Installation Service and User Guide...
Page 22: ...xx SAN42B R Installation Service and User Guide...
Page 56: ...32 SAN42B R Installation Service and User Guide...
Page 62: ...38 SAN42B R Installation Service and User Guide...
Page 72: ...48 SAN42B R Installation Service and User Guide...
Page 94: ...70 SAN42B R Installation Service and User Guide...
Page 95: ......
Page 96: ...Part Number 00MA667 Printed in USA SC27 6633 00 1P P N 00MA667...


