


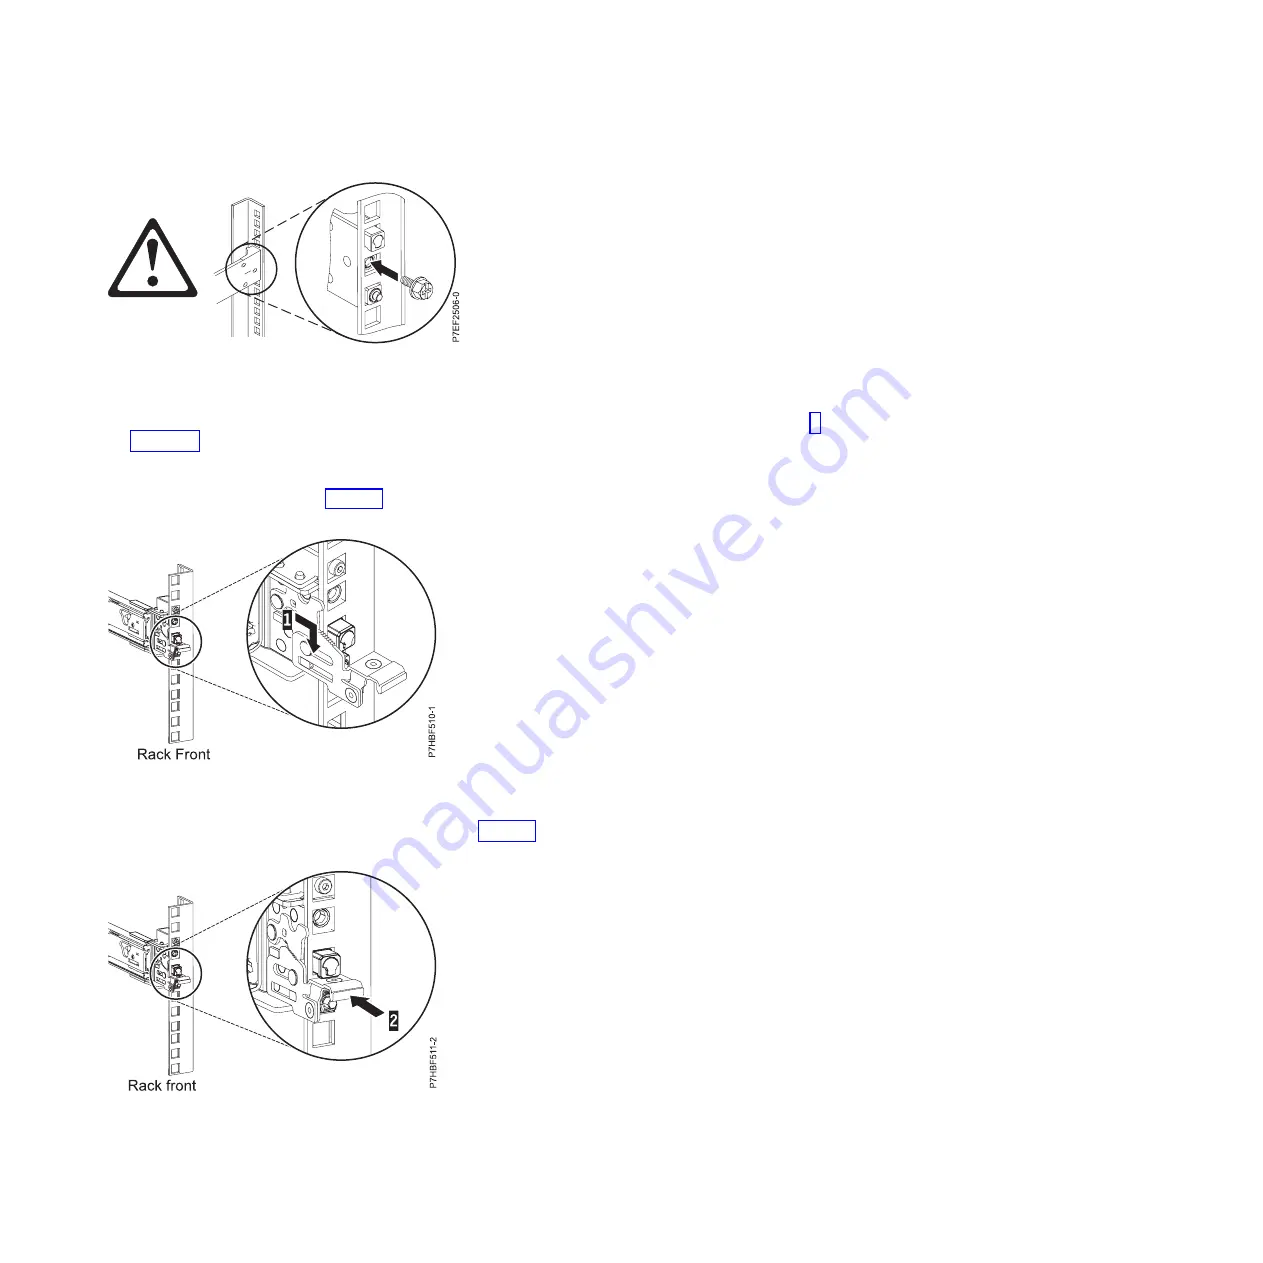
Attention:
You must install the screw to secure the device.
5.
Return to the front of the rack. Ensure the latch is still open on the front of the slide rail. Refer, step 1
on page 5.
6.
Pull the slide rail forward and insert three pins on the front of the rail into the holes within the
selected U that were previously marked. Lower the slide rail down
(1)
to engage the hook feature on
the middle pin, as shown in Figure 6.
7.
While pulling the slide rail forward, ensure that all three pins protrude through the rack holes, then
push the front latch
(2)
all the way in, as shown in Figure 7.
Note:
If you need to reposition the rail, release the front latch
(2)
, and while pressing the blue pin at
the bottom, push the rail toward the rear to release from the rack.
Figure 5. Reinstalling the screw
Figure 6. Rack front rail with pins seated
Figure 7. Rack front rail with latch seated
Installing the server into a rack
7
Summary of Contents for PowerLinux 7R2
Page 1: ...Installing the IBM PowerLinux 7R2 8246 L2D or 8246 L2T GI11 9888 01...
Page 2: ......
Page 3: ...Installing the IBM PowerLinux 7R2 8246 L2D or 8246 L2T GI11 9888 01...
Page 6: ...iv Installing the IBM PowerLinux 7R2 8246 L2D or 8246 L2T...
Page 36: ...24 Installing the IBM PowerLinux 7R2 8246 L2D or 8246 L2T...
Page 57: ......
Page 58: ...Part Number 00L5074 Printed in USA GI11 9888 01 1P P N 00L5074...