6.
If you are installing more than one drive, repeat the steps in this procedure until all drives are
installed.
7.
Proceed to the procedure for preparing the system for operation. For instructions, see “Preparing the
5148-21L, 5148-22L, 8247-21L, 8247-22L, 8284-21A, or 8284-22A system for operation after removing
and replacing a drive with the power turned off” on page 47.
8.
If you are replacing an SSD in an expanded function system, continue with the next step.
9.
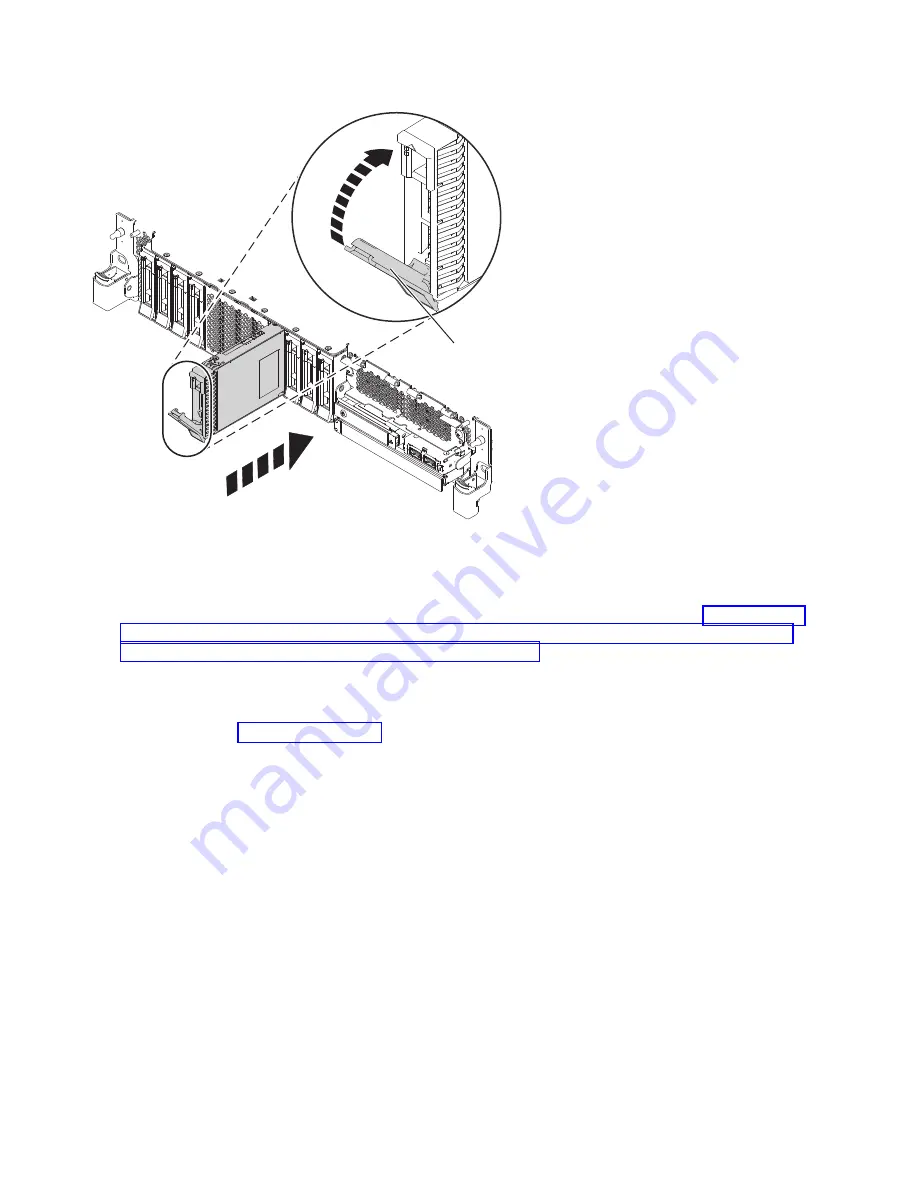
With the SSD drive bay handle (A) in the unlocked position, pull the lever outward to gain access to
the guide rails in the SSD slot. Support the bottom of the SSD as you align it with the guide rails in
the SSD slot. See Figure 46 on page 47.
Note:
Support the drive by holding the drive by its sides.
10.
Slide the SSD into the system until the drive stops, and then lock the SSD by rotating the bay handle
(A)
in the direction shown.
Important:
When you install an SSD, ensure that the SSD is fully seated and is all the way into the
system.
P8HAL505-1
A
Figure 45. Replacing a disk drive in an expanded function system
46
Disk drives or solid-state drives
Summary of Contents for Power System 5148-21L
Page 2: ......
Page 18: ...xvi Disk drives or solid state drives ...
Page 202: ...184 Disk drives or solid state drives ...
Page 203: ......
Page 204: ...IBM ...


