background image

43

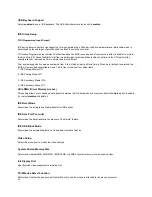
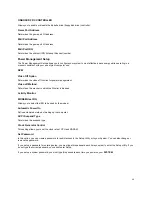
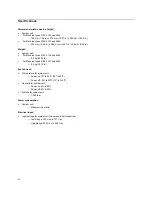
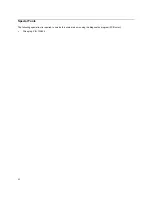
BIOS-contained Model Number and Serial Number

The model number and serial number information is stored in BIOS ROM and displayed in the “Model Information” of BIOS
Setup main menu. If a repair is completed by replacing the system board or installing a new BIOS ROM, then you need to
enter the original system model number and serial number in the new BIOS ROM.

  
To enter the model number and serial number into BIOS:

1.  Prepare a bootable DOS diskette with VPD.EXE files.

2.  Insert the diskette and boot from drive A.

WARNING: 

Do not boot with any memory related driver such as HIMEM.SYS, EMS.SYS

3.  At the DOS prompt, type 

A: >VPD

 then press 

Enter

. You will be asked if you want to update the serial number, type 

Y

to continue. When the screen shows:
Serial Number:

4.  Enter the serial number and press 

Enter

 to continue. You can type a maximum of 7 characters (without spaces).

5.  Follow the instructions on the screen to complete the procedure.

6. Type 

A: >VPD

 and press 

Enter

 to display and verify your input model number and serial number information.

Summary of Contents for PC 300

Page 1: ...1 Hardware Maintenance Service for Service Level A For Micro Tower Models Machine Type 2193 2194 and 6345 For Desktop Models Machine Type 2196 2197 and 6344...

Page 2: ...rein these changes will be made in later editions IBM may make improvements and or changes in the product s and or the program s at any time Address comments about this publication to IBM Corporation...

Page 3: ...tart 55 Index of Symptoms Messages Error Codes or Beeps 57 Troubleshooting 67 Factory Installed Storage Devices 68 Factory Installed Modem Card 70 Audio Not Supported by Diagnostics Program 71 CD ROM...

Page 4: ...Settings of the System Board of Machine Types 2194 and 6345 122 Power Supply Cable Connector Specifications 127 Main Output Pin Assignment 128 Factory Installed Modem Card Layout 130 Factory Installe...

Page 5: ...expressly designated by IBM are the user s responsibility IBM may have patents or pending patent applications covering subject matter in this document The featuring of these patents pending or otherw...

Page 6: ...t signal cables to prevent a possible shock from touching two surfaces with different electrical potentials Electrical current from power telephone and communications cables is hazardous To avoid shoc...

Page 7: ...ult in hazardous radiation exposure Removing the covers of the CD ROM drive could result in exposure to hazardous laser radiation There are no serviceable parts inside the CD ROM drive Do not remove t...

Page 8: ...um poss vel choque ao tocar duas superf cies com potenciais el tricos diferentes A corrente el trica proveniente de cabos de alimenta o de telefone e de comunica o perigosa Para evitar choques el tri...

Page 9: ...rentes daqueles especificados nesta publica o pode resultar em exposi o perigosa radia o A remo o das tampas da unidade de CD ROM pode resultar em exposi o a radia o perigosa de laser N o existem pe a...

Page 10: ...10 telecomunica o redes e modems antes de abrir as tampas a menos que receba outras instru es nos procedimentos de instala o e configura o...

Page 11: ...11...

Page 12: ...12...

Page 13: ...13...

Page 14: ...14...

Page 15: ...15...

Page 16: ...ctrique passant dans les c bles de communication ou les cordons t l phoniques et d alimentation peut tre dangereux Pour viter tout risque de choc lectrique lorsque vous installez ou que vous d placez...

Page 17: ...tion ou utilisation Ne la jetez pas l eau Ne l exposez pas une temp rature sup rieure 100 C Ne cherchez pas la r parer ou la d monter Pour la mise au rebut reportez vous la r glementation en vigueur a...

Page 18: ...duit p se un poids consid rable Faites vous aider pour le soulever Le courant lectrique circulant dans les c bles de communication et les cordons t l phoniques et d alimentation peut tre dangereux Pou...

Page 19: ...n Oberfl chen mit unterschiedlichem elektrischem Potential zu vermeiden Elektrische Spannungen von Netz Telefon und Daten bertragungsleitungen sind gef hrlich Um einen Stromschlag zu vermeiden nur nac...

Page 20: ...in Ber hrung bringen ber 100 C erhitzen reparieren oder zerlegen Die rtlichen Bestimmungen f r die Entsorgung von Sonderm ll beachten achtung Wenn ein CD ROM Laufwerk installiert ist beachten Sie fol...

Page 21: ...achtung Beim Anheben der Maschine die vorgeschriebenen Sicherheitsbestimmungen beachten achtung An Netz Telefon und Datenleitungen k nnen gef hrliche elektrische Spannungen anliegen Um eine Gef hrdun...

Page 22: ...io di scosse derivanti dal contatto con due superfici a diverso potenziale elettrico La corrente elettrica circolante nei cavi di alimentazione del telefono e di segnale pericolosa Per evitare scosse...

Page 23: ...la o immergerla in acqua Riscaldarla ad una temperatura superiore ai 100 C Cercare di ripararla o smaltirla Smaltire secondo la normativa in vigore D Lgs 22 del 5 2 97 e successive disposizioni nazion...

Page 24: ...fascio 32 Kg 55Kg ATTENZIONE Durante il sollevamento della macchina seguire delle norme di di sicurezza ATTENZIONE La corrente circolante nei cavi di alimentazione del telefono e di segnale pericolos...

Page 25: ...25...

Page 26: ...26...

Page 27: ...27...

Page 28: ...ocar dos superficies con distinto potencial el ctrico La corriente el ctrica de los cables de comunicaciones tel fono y alimentaci n puede resultar peligrosa Para evitar una posible descarga siga las...

Page 29: ...xponer el producto a una temperatura superior a 100 C Reparar o desmontar el producto Cuando quiera desechar la bater a siga las disposiciones y reglamentaciones locales caution Cuando instale una uni...

Page 30: ...directa 32 Kg 55Kg caution Alce la m quina con cuidado el sobrepeso podr a causar alguna lesi n caution La corriente el ctrica de los cables de comunicaciones de tel fono y de alimentaci n puede resul...

Page 31: ...and Human Services 21 Code of Federal Regulations DHHS 21 CFR Subchapter J for Class 1 laser products In other countries the drive is certified to conform to the requirements of EN60825 Class 1 laser...

Page 32: ...T Personal System 2 HelpCenter PS 1 IBM PS 2 Intel Pentium MMX EtherExpress and LANDesk are trademarks or registered trademarks of Intel Corporation Microsoft MS DOS Windows and Windows NT are tradema...

Page 33: ...U Diagnostic Aids explain how to use the diagnostics tools for isolating failures Repairing Information contains illustrations and descriptions to disassemble and reassemble the computer Parts Test Po...

Page 34: ...34...

Page 35: ...OS Reset 41 Flash BIOS Update Procedure 42 BIOS contained Model Number and Serial Number 43 BIOS Setup Utility 44 Working with the Setup Menus 44 Start Options 46 Advanced Setup 47 Power Management Se...

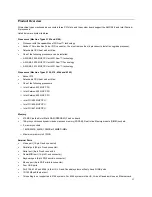
Page 36: ...w of Machine Types 2193 2194 2196 2197 6344 and 6345 describes the standard and optional features and details functional and environmental specifications Machine Types 2196 2197 and 6344 are desktop m...

Page 37: ...an One of the following processors Intel Celeron 533 MHZ CPU Intel Celeron 500 MHZ CPU Intel Celeron 600 MHZ CPU Intel PIII 550 MHZ CPU Intel PIII 600 MHZ CPU Intel PIII 667 MHZ CPU Memory 512 KB Pipe...

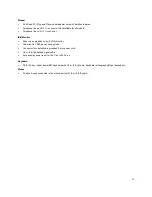
Page 38: ...hutdown by Windows 98 System enters standby mode if any of following conditions are met Execute standby from the Windows 98 Start menu Press system power button if it is set to act as standby function...

Page 39: ...r video graphics array SVGA monitor Compliant to VESA power saving mode Connector for a detachable grounded 3 wire power cord 1 8 m 5 8 ft attached signal cable Auto sensing power input for 100 V ac t...

Page 40: ...25 in high performance forty speed 40X CD ROM IDE AT drive Support Bootable CD ROM Format specification version 1 0 Compliant to Audio CD Video CD CD ROM XA Karaoke CD and Photo CD both single and mu...

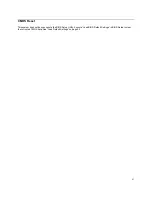
Page 41: ...41 CMOS Reset This system does not deny access to the BIOS Setup Utility Execute Load BIOS Default Settings in BIOS Setup to clear the corrupted CMOS data See Load Default Settings on page 45...

Page 42: ...elated driver such as HIMEM SYS EMS SYS 3 At the DOS prompt type A AWDFLASH VXXYYZZ BIN and then press Enter 4 The screen shows Do You Want To Save Bios Y N Type Y if you want to save old bios data an...

Page 43: ...1 Prepare a bootable DOS diskette with VPD EXE files 2 Insert the diskette and boot from drive A WARNING Do not boot with any memory related driver such as HIMEM SYS EMS SYS 3 At the DOS prompt type A...

Page 44: ...er and its hardware Working with the Setup Menus Starting the Setup Utility Follow these steps to enter Setup when the computer is off 1 Turn on your monitor 2 Turn on the system unit 3 When you see t...

Page 45: ...gs also called factory or default settings are stored in the CMOS Setup includes an option LOAD DEFAULT SETTINGS that allows you to reload the original configuration at any time If you have made chang...

Page 46: ...ome check items during POST Boot Up Floppy Seek Select Enabled to test the floppy drive during POST Boot Up Numlock Status Determines the default state of the numeric keypad By default the system boot...

Page 47: ...ed to RAM However it is optional depending on chipset design Video Shadow will increase the video speed C8000 DFFF Shadowing option determines if the option ROMs will be copied to RAM Devices and I O...

Page 48: ...ct the best available mode This is true for the next four setup items 1 IDE Primary Master PIO 2 IDE Primary Slave PIO 3 IDE Secondary Master PIO 4 IDE Secondary Slave PIO Ultra DMA Direct Memory Acce...

Page 49: ...Determines the manner in which the Monitor is blanked Activity Monitor MODEM Use IRQ Allows you to select the IRQ to be used by the modem Automatic Power On Define automated method of waking up the co...

Page 50: ...es 2193 2194 and 6345 9 2 kg 20 26 lb For Machine types 2196 2197 and 6344 8 5 kg 18 72 lb Environment Temperature for system unit Power on 10 to 35 C 50 to 95 F Power off 20 to 60 C 14 to 140 F Humid...

Page 51: ...one on the system unit and one on the monitor display The system unit comes with a voltage selector switch allowing selection of either 115 V ac or 230 V ac This switch must be in the 230 V ac positio...

Page 52: ...52 Special Tools The following special tool is required to service this system when running the diagnostics program PC Doctor Wrap plug P N 72X854...

Page 53: ...ages Error Codes or Beeps 57 Troubleshooting 67 Factory Installed Storage Devices 68 Factory Installed Modem Card 70 Audio Not Supported by Diagnostics Program 71 CD ROM Drive 73 Memory 74 Keyboard 75...

Page 54: ...es These tables also list the field replaceable units FRUs most likely to cause a particular problem Check Procedures When the Start check procedure or the Index of Symptoms Messages Error Codes or Be...

Page 55: ...he hard drive have a backup copy How to Diagnose Combined FRUs If an adapter or device consists of more than one FRU any of the FRUs might cause an error code Before replacing the device or adapter re...

Page 56: ...The system configuration report shows only those devices supported by the diagnostics diskette If a device is missing from the list and is not factory installed refer to the service manual provided fo...

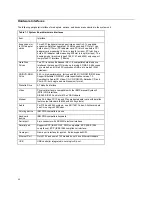
Page 57: ...eir possible causes The most likely cause is listed first Make sure you complete all items in the cause or Action FRU column When servicing a system always begin with Start on page 55 If the problem c...

Page 58: ...lure 40 Floppy Type mismatch 1701 Hard disk s Diagnosis failure Make sure the hard disks are set correctly in BIOS setup Hard disk drive cable connection Hard disk drive System board 1762 Primary mast...

Page 59: ...itialization error Hard Disk s failure 10 Unable to recalibrate fixed disk Non System disk or disk error Replace and strike any key when ready Insert a system disk into Drive A and press Enter If you...

Page 60: ...ed ERROR ENCOUNTERED INITIALIZING HARD DRIVE Hard drive cannot be initialized Be sure the adapter is installed correctly and all cables are correctly and firmly attached Also be sure the correct hard...

Page 61: ...e FRU indicated in the check procedure If no check procedure is indicated the first Action FRU listed in right column is the most likely cause Beeps 2 long 1 short 2 1 1 2 repeatedly This code indicat...

Page 62: ...sor fan System board Processor test failed Processor System board System Board NOTE Ensure that the memory modules are installed properly and the contact lead is clean before diagnosing any system pro...

Page 63: ...ve is correctly formatted Diskette drive connection cable Diskette drive System board Diskette drive does not work Make sure that the diskette drive is not set to None in the Standard CMOS Setup of BI...

Page 64: ...t works normally CD ROM drive CD ROM drive cannot load or eject when the system is turned on and its eject button is pressed and held CD ROM drive power CD ROM Drive on page 73 CD ROM drive CD ROM dri...

Page 65: ...k monitor dark Blank monitor bright Distorted image Unreadable monitor Other monitor problems Monitor signal connection cable Monitor System board Display changing colors Monitor signal connection cab...

Page 66: ...ry module System board Missing diagnostics files s Diagnostics diskette Keyboard Some or all keys on keyboard do not work Keyboard on page 75 Power Supply Pressing power switch cannot turn off system...

Page 67: ...ced units and are not repaired in the field Measuring Voltages Some check procedure steps instruct you to measure voltages on cable plugs and electronic board connectors If you are asked to measure vo...

Page 68: ...GO TO STEP 005 Check the cable installation of all disk drives Diskette drive should be connected to the system board Floppy connector Please refer to Parts Test Point Locations on page 111 for connec...

Page 69: ...ractive Tests from the PC Doctor diagnostics program main menu then select and execute CD ROM DVD Test if you want to test the CD ROM drive If the diagnostics program did not detect a failure but the...

Page 70: ...nostics menu Select All Tests then execute Modem test 003 DOES THE MODEM PASS THE TEST YES READ AHEAD NO GO TO STEP 004 Power off the system unit Remove all adapter cards Connect a hard disk drive wit...

Page 71: ...ERROR CODES DISPLAY AFTER POST COMPLETES BUT BEFORE MICROSOFT WINDOWS 98 STARTS YES READ AHEAD NO GO TO STEP 004 NOTE If POST does not complete answer this question No Make sure that Windows 98 is pr...

Page 72: ...s not turned low Make sure that the speaker and its adapter are not damaged Make sure that the speaker is plugged into speak out jack Refer to Parts Test Point Locations on page 111 If the error canno...

Page 73: ...not damaged and are connected properly Check and make sure that the CD ROM drive driver is loaded correctly Load default settings 003 DO THE TESTS OF OPEN CLOSE TRAY BY DIAGNOSTICS PROGRAM AND BY DEP...

Page 74: ...05 003 Follow the screen instructions to run the Memory test 004 DOES THE MEMORY TEST COMPLETE WITHOUT AN ERROR YES READ AHEAD NO GO TO STEP 005 The system memory is now functioning correctly If you s...

Page 75: ...HEAD NO GO TO STEP 004 Keyboard is functioning normally End 004 ARE THERE ANY STUCK KEYS OR ANY GRIME IN THE GAP OF KEYCAPS YES READ AHEAD NO GO TO STEP 005 Power off the system unit Carefully remove...

Page 76: ...t left button works 004 DOES THE MOUSE BUTTON WORK YES READ AHEAD NO GO TO STEP 007 Test mouse cursor movement 005 DOES THE MOUSE MOVE SMOOTHLY AND KEEP X AND Y COORDINATES CHANGED YES READ AHEAD NO G...

Page 77: ...wer supply connector and take an ohm reading Go to step 007 004 Disconnect the power cord from the back of the system unit Disconnect all power and switch cable connectors from the system board and th...

Page 78: ...hen all connectors are plugged back in go to Undetermined Problems on page 80 If the fan stops running when a drive connector is plugged back in go to Start on page 55 007 DO YOU HAVE AN OHM READING W...

Page 79: ...and monitor and that the line voltage is correct Make sure that the monitor contrast and brightness controls are not turned too low Make sure that the diagnostics diskette is in the diskette drive Pow...

Page 80: ...settings Check all adapter card jumper positions Check all device jumper positions Check all cables and connectors for proper installation If the jumpers switch and voltage settings are correct retur...

Page 81: ...81 Diagnostic Aids Diagnostic Aids 81 Introduction 82 Power On Self Test 83 Diagnostics Tools 84 Using Diagnostics Program from Recovery CD 84 Diagnostics Program Features 84 Copyright IBM Corp 2000...

Page 82: ...82 Introduction This section explains the diagnostic aids power on self test POST and diagnostics program PC Doctor that are available for troubleshooting problems on the system...

Page 83: ...If an error is detected during POST the IBM logo screen will automatically switch to the text based screen and display the error message or code with a beep Depending on the criticality of the POST er...

Page 84: ...nd selected The more devices you have attached to your system and selected in PC Doctor the longer the testing will take Using Diagnostics Program from Recovery CD 1 Insert the recovery CD into the CD...

Page 85: ...Ports Physical Disk Drives Logical Disk Drives VGA Information Software Interrupts SCSI Devices I O Use IDE Drive Info Network Information PCMCIA Information PCI Information SMP Information PNPISA In...

Page 86: ...86...

Page 87: ...ards 91 Diskette Drive 93 CD ROM Drive 94 Hard Disk Drive 95 System Board 95 Power Supply 97 Memory DIMM 98 Removals and Replacements of machine type 2196 2197 and 6344 99 Identifying the Parts of the...

Page 88: ...c sensitive FRUs The Arrows in the removals and replacements procedures show the direction of movement to remove a field replaceable unit FRU to turn a screw or the direction to press a tab to release...

Page 89: ...d diskette advanced technology AT Interface Hard disk and CD ROM drives in this unit use an integrated drive Electronics IDE AT interface This computer supports the American National Standard Institut...

Page 90: ...is machine has a factory installed 3 5 10 or 15 GB hard disk drive 5 Diskette Drive This machine has a factory installed 3 5 1 44MB Floppy drive 6 System board 7 Speaker jack for unpowered speaker onl...

Page 91: ...cover and push it backward about 25 mm Lift the top cover up to remove it completely Touch the bare metal frame of your system unit to dissipate the static electricity from your body Do not touch any...

Page 92: ...oved prior to the installation of the adapter card Removing Adapter Cards Follow these steps to remove an adapter card Position the system unit so that the card is accessible to you If the adapter car...

Page 93: ...t secures the lower drive mounting tray Slide the drive mounting tray toward the rear of the computer and remove it Note If the chassis is not like the figure please refer to the following Press down...

Page 94: ...t the power sound and signal cables from the CD ROM Remove the four screws two on each side that hold the CD ROM drive to the chassis Open the door on the front of the computer Slide the CD ROM drive...

Page 95: ...ive mounting tray Slide the drive mounting tray toward the rear of the computer and remove it Note If the chassis is not like the figure please refer to the following Press down the latch Pivot the tr...

Page 96: ...adapter cards first Disconnect the power cable CD ROM cable Diskette Drive cable Hard Disk Drive cable audio cable power switch cable speaker cable and LED cable from system board Remove the eight sc...

Page 97: ...as a 95 watt switching power supply To remove the power supply you must remove the top cover first Disconnect the power cable from the riser board and all drives Remove the screws in the machine rear...

Page 98: ...s system has 2 system memory module sockets DIMM 0 and DIMM 1 These sockets hold dual in line memory modules DIMM that contains 3 3V single or double sided synchronous DRAM SDRAM The maximum memory si...

Page 99: ...c sensitive FRUs The Arrows in the removals and replacements procedures show the direction of movement to remove a field replaceable unit FRU to turn a screw or the direction to press a tab to release...

Page 100: ...and CD ROM drives in this unit use an integrated drive Electronics IDE AT interface This computer supports the American National Standard Institute ANSI standard for AT attachment disk drives and CD R...

Page 101: ...ill use the Ethernet card 4 Diskette Drive This machine has a factory installed 3 5 1 44MB floppy drive 5 PCMCIA drive This option is only available on selected models 6 CD ROM Drive This machine has...

Page 102: ...cover and push it forward about 25 inches Lift the top cover up to remove it completely Touch the bare metal frame of your system unit to dissipate the static electricity from your body Do not touch a...

Page 103: ...oved prior to the installation of the adapter card Removing Adapter Cards Follow these steps to remove an adapter card Position the system unit so that the card is accessible to you If the adapter car...

Page 104: ...tte drive Pull up the latch that secures the drive mounting tray Slide the drive mounting tray toward the front of the computer and remove it Remove the four screws two on each side that secure the ba...

Page 105: ...p the latch that secures the CD ROM drive mounting tray Slide the drive mounting tray toward the back of the computer and remove it Remove four screws two on each side that secure the bay holder Pull...

Page 106: ...remove the CD ROM Make sure to disconnect the power cord and signal cables from the hard disk drive and the diskette device Remove the screws that secure the bay holder that holds the hard diskette dr...

Page 107: ...remove the system board you must remove the adapter cards first Disconnect the power cable CD ROM cable Diskette Drive cable Hard Disk Drive cable audio cable power switch cable speaker cable and LED...

Page 108: ...has a 95 watt switching power supply To remove the power supply you must remove the top cover first Disconnect the power cable from the riser board and all drives Remove the screws in the machine rear...

Page 109: ...is system has 2 system memory module sockets DIMM 0 and DIMM 1 These sockets hold dual in line memory modules DIMM that contains 3 3V single or double sided synchronous DRAM SDRAM The maximum memory s...

Page 110: ...110...

Page 111: ...ns of System Board of Machine Types 2193 and 2196 120 Layout of System Board of Machine Types 2194 and 6345 121 Jumper and Connector Settings of System Board of Machine Types 2194 and 6345 122 Power S...

Page 112: ...re asked to measure voltages Use this information to help you locate parts such as electronic boards connectors pin numbers and test points This chapter also contains jumper settings for the hard disk...

Page 113: ...113 Layout of System Board of Machine Types 2194 Italy 2197 and 6344 EMEA AP Jumpers and Connectors Locations of System Board of Machine Types 2194 Italy 2197 and 6344 EMEA AP...

Page 114: ...3 2 3 2 3 1 2 Bus Frequency MHz CPUCLK SDRAMCLK 66 100 100 100 100 133 133 133 66 66 CPU Core Clock Multiplier Jumper connected JP1 JP2 JP3 JP4 1 2 1 2 1 2 1 2 1 2 1 2 1 2 1 2 1 2 1 2 1 2 1 2 1 2 1 2...

Page 115: ...and USB connector J5 PCI Slot 1 J6 PCI Slot 2 J7 PCI Slot 3 J 8 Power and HDD LED J10 Digital Flat Panel Connector J9 Power Switch connector J11 Hard Disk connector Primary IDE J12 CD ROM Drive connec...

Page 116: ...of Machine Type 6344 US Canada LA Jumpers and Connectors Locations of System Board of Machine Type 6344 US Canada LA Jumper Settings of the System Board of Machine Type 6344 US Canada LA The Jumper Ra...

Page 117: ...lot 2 PCI Slot 3 PCI Slot 3 JBAT Clear CMOS JFP2 HDD LED Power LED Speaker Power Switch and Reset Swith IDE 1 Primary IDE IDE 2 Secondary IDE JWR1 ATX Power Connector COMA Serial Port Connector COMB S...

Page 118: ...118 Layout of System Board of Machine Types 2193 and 2196 Jumpers and Connectors Locations of System Board of Machine Types 2193 and 2196...

Page 119: ...LK SDRAMCLK 66 100 100 133 95 95 100 100 66 66 97 129 CPU Core Clock Multiplier Jumper connected JP6 JP7 JP8 2 3 1 2 1 2 1 2 1 2 2 3 1 2 2 3 2 3 2 3 2 3 2 3 2 3 1 2 2 3 1 2 1 2 1 2 CPU Clock Frequency...

Page 120: ...ctor Primary IDE J5 CD ROM Drive connector Secondary IDE J6 Digital Flat Panel connector J7 USB and LAN connector J9 DIMM 0 J10 DIMM 1 J11 PCI Slot 1 J12 PCI Slot 2 J13 PCI Slot 3 J14 Floppy Diskette...

Page 121: ...VGA COMA LPT Game Audio JP2 JP19 CPU FAN ATX PWR JP1 POWER FAN DIMM 2 DIMM 1 Floppy IDE 1 IDE 2 BAT TV DFP AMR JP18 J7 JP3 JP20 JP21 JP11 JP14 JP17 JP22 WOL IR SYSTEM FAN J17 J19 J13 J20 JP16 JP13 JP1...

Page 122: ...r Floppy port COMA For Serial port1 COM A Support Modem Ring On LPT For LPT port VGA For VGA Port ATX Power For ATX Power Connector GAME Audio For Game MIC LINE IN LINE OUT TEL Port CD IN AUX IN SPDIF...

Page 123: ...On Pin No Function 1 Signal 2 GND JP2 Keyboard Power On Selection Pin No Function 1 2 close Enabled Keyboard Power On 2 3 close Disabled Keyboard Power On Default JP12 Clear CMOS Pin No Function 1 2 c...

Page 124: ...close Normal Default 2 3 close Safe Mode 1 2 3open Recovery JP16 Top Block Lock Pin No Function Open Top Block Lock Close Top Block Unlock Default JP15 Timeout Reboot Pin No Function Open Timeout Rebo...

Page 125: ...Wake up Default 2 3 close Enable USB Device Wake up JP20 JP21 Quad Speaker Optional Pin No Function 1 2 close LINE_IN 2 3 close QUAD OUT JP24 FWH Write Protection Pin No Function Open Normal Default C...

Page 126: ...D cathode SPKR Speaker Connector PIN 1 VCC PIN 2 NC PIN 3 NC PIN 4 Data HD IDE Hard Disk Active LED PIN 1 LED anode PIN 2 LED cathode GN Green Function Switch Open Normal operation Short Entering Gree...

Page 127: ...ly fan must be running To power on the power supply without using the on off switch use a screwdriver or other tools to short the power supply connector with the switch cable disconnected from the con...

Page 128: ...1 3 3 V Orange 2 3 3 V Orange 3 COMMON BLACK 4 5Vdc RED 5 COMMON BLACK 6 5Vdc RED 7 COMMON BLACK 8 POWER GOOD GRAY 9 5Vs PURPLE 10 12Vdc YELLOW 11 3 3V Orange 12 12Vdc BLUE 13 COMMON BLACK 14 P S on...

Page 129: ...129 Hard Drive or CD ROM Power Cable Connector 3 5 In Diskette Drive Power Cable Connector...

Page 130: ...ct to 1 Telephone line out Some modem adapters may come without this jack Telephone set 2 Telephone line in Telephone line NOTE Care should be taken while connecting the voice in speaker out connector...

Page 131: ...ations 3 5 In Hard Disk Quantum Jumper Settings Locations Back of Drive Quantum AT Interface connector Default Setting Jumper Shown in Parking Position Reserved Position DS with CS for Slaves not supp...

Page 132: ...mber color during data read or seek operation 4 Headphone volume control 5 Emergency eject hole See CD ROM Emergency exit below CD ROM Emergency exit NOTE Make sure to turn off the power before manual...

Page 133: ...INTERFACE 5V 12V G G DC INPUT 5 4 3 2 1 NOT USED 1 2 CD ROM Rear Panel Item Function Connect to 1 Power supply connector Power supply 2 Configuration jumper See Table 5 9 3 NOT USED CD ROM Drive Jumpe...

Page 134: ...134 DIMM Configurations The system board has two DIMM sockets A maximum of 512MB memory may be installed You can install 16MB 32MB 64MB 128MB or 256MB DIMMs in any sockets and with any combinations...

Page 135: ...O 3 Transmit Data O 8 Clear To Send I 4 Data Terminal Ready O 9 Ring Indicator I 5 Signal Ground N A Parallel Port Signals Pin Signal Name I O Pin Signal Name I O 1 Strobe O 14 Auto Feed N A 2 Data Bi...

Page 136: ...136 Keyboard Port Signals Pin Signal Name I O Pin Signal Name I O 1 Keyboard Data I O 4 5 V dc Power 2 Mouse Data N A 5 Keyboard Clock I O 3 Ground Power 6 Mouse Clock N A...

Page 137: ...round N A 5 Ground N A 22 Write Data O 6 No Connection N A 23 Ground N A 7 Ground N A 24 Write GATE O 8 Index I 25 Ground N A 9 Ground N A 26 Track 0 I 10 No Connection N A 27 Ground N A 11 Ground N A...

Page 138: ...7 I O Channel Ready I 8 Host Data 10 I O 28 No Connection N A 9 Host Data 4 I O 29 DMA Acknowledge O 10 Host Data 11 I O 30 Ground Power 11 Host Data 3 I O 31 Host IRQ I 12 Host Data 12 I O 32 No Conn...

Page 139: ...139 Safety Inspection Guide General Guidelines 140...

Page 140: ...udgment should be used to identify possible safety conditions not covered by this Safety Inspection Guide If any unsafe conditions are present you must find out how serious the hazard is and if you ca...

Page 141: ...mbly 2 Diskette Drive Hard Disk Drive 145 Assembly 3 CD ROM Modem Card 146 Assembly 4 Keyboard and Mouse 148 Parts Catalog of machine type 2196 2197 and 6344 152 Assembly 1 System Unit 152 Assembly 2...

Page 142: ...and fan 1 2 19K3286 AMD K6 2 533MHz 100FSB E7 w o heatsink and fan 1 2 19K3412 AMD K6 2 550MHz100FSB E7 w o heatsink and fan 1 2 19K3288 INTEL Celeron 500MHz 66FSB 1 2 19K3289 INTEL Celeron 533MHz 66...

Page 143: ...14F0050 Power Cord Swiss 1 6 13F9996 Power Cord Denmark 1 6 14F0086 Power Cord Israel 1 6 14F0014 Power Cord South Africa 1 6 14F0068 Power Cord Italy 1 6 02K0545 Power Cord China 1 6 13F9939 Power Co...

Page 144: ...14 19K3316 Planar I O Port EMC Shield w USB LAN 1 15 19K3578 HDD PWR LED PWR Switch Cable Assembly for Gigabyte System board 1 16 19K3580 Y Audio Cable for Gigabyte board 1 16 19K3521 Y Audio Cable f...

Page 145: ...mber Description 2 1 19K3298 5 GB Hard Disk Drive 3 5 2 1 10K2059 10 GB Hard Disk Drive 3 5 2 1 19K3299 15 GB Hard Disk Drive 3 5 2 1 19K3355 20 GB Hard Disk Drive 3 5 2 2 36L9130 3 5 Diskette Drive 2...

Page 146: ...3337 CD ROM Audio Cable 2193 3 4 19K3302 40X 8X DVD ROM White 3 4 19K3350 40X 8X DVD ROM Black Bezel 3 5 09N5440 Modem 56K Data Fax GVC NA LA SA TW HK China Japan 3 5 19K3303 Modem 56K Data Fax GVC ME...

Page 147: ...Belgium 3 7 60H6047 Modem Phone Cable Adapter Denmark 3 7 60H6048 Modem Phone Cable Adapter Norway Finland 3 7 60H6049 Modem Phone Cable Adapter FR 3 7 60H6050 Modem Phone Cable Adapter Germany 3 7 60...

Page 148: ...592 105 FR CANADIAN 445 Consumer 4 2 37L2593 105 LA SPANISH 171 4 2 37L2594 105 BRAZILIAN PORTUGUESE 275 4 2 37L2595 105 ARABIC 253 4 2 37L2596 105 BELGIUM UK 120 4 2 37L2597 105 DANISH 159 4 2 37L259...

Page 149: ...onsumer 4 2 37L2516 105 PALM REST LA SPANISH 171 4 2 37L2518 105 PALM REST ARABIC 275 4 2 37L2519 105 PALM REST EURO BELGIUM FR 120 4 2 37L2520 105 PALM REST EURO BELGIUM UK 120 4 2 37L2521 105 PALM R...

Page 150: ...M REST EURO UK ENG 166 4 2 37L2545 105 PALM REST YUGOSL LAT 234 4 2 37L2546 104 PALM REST US ENG EMEA ANZ Singapore 4 2 37L2548 104 PALM REST CHINESE US 467 HK TW 4 2 37L2550 104 PALM RESTTHAILAND 191...

Page 151: ...Thailand 4 3 19K3639 Jazz Speaker Power Adapter TEAC 41 090400V Euro France Germany Sweden Norway Netherlands Finland Belgium Bosnia Croatia Egypt Greece Hungary Poland Portugal Romania Slovenia Spai...

Page 152: ...2 533MHz 100FSB E7 w o heatsink and fan 1 2 19K3412 AMD K6 2 550MHz 100FSB E7 w o heatsink and fan 1 2 19K3288 INTEL Celeron 500MHz 66FSB 1 2 19K3289 INTEL Celeron 533MHz 66FSB 1 2 19K3386 INTEL Celer...

Page 153: ...snia Croatia Egypt Greece Hungary Poland Portugal Romania Slovenia Spain Sweden Turkey LA HI Volt 1 6 13F9939 Power Cord ANZ 1 6 14F0050 Power Cord Swiss 1 6 13F9996 Power Cord Denmark 1 6 14F0068 Pow...

Page 154: ...EMC Shield includes label Used w MSI 6188 810E Planar 1 19 19K3335 Power Switch Cable Assembly 1 20 19K3336 LED Cable Assembly 1 21 19K3339 PCMCIA Cable 1 22 19K3344 Speaker PCI Port Bracket w Cable...

Page 155: ...ber Description 2 1 19K3298 5GB Hard Disk Drive 3 5 2 1 10K2059 10 GB Hard Disk Drive 3 5 2 1 19K3299 15 GB Hard Disk Drive 3 5 2 1 19K3355 20 GB Hard Disk Drive 3 5 2 2 36L9130 3 5 Diskette Drive 2 3...

Page 156: ...k Bezel 3 2 19K3342 CD ROM Cable 3 3 09N5406 CD ROM Audio Cable for MSI board 3 3 19K3337 CD ROM Audio Cable for Pro board 3 4 19K3302 40X 8X DVD ROM White 3 4 19K3350 40X 8X DVD ROM Black Bezel 3 5 1...

Page 157: ...157 3 7 01N1874 Phone Cord Adapter NZ...

Page 158: ...L0912 105 PALM REST FR CANADIAN 058 Commercial 4 2 37L2516 105 PALM REST LA SPANISH 171 4 2 37L2518 105 PALM REST ARABIC 275 4 2 37L2519 105 PALM REST EURO BELGIUM FR 120 4 2 37L2520 105 PALM REST EUR...

Page 159: ...REST SLOVIC 245 4 2 37L2539 105 PALM REST EURO SPANISH 145 4 2 37L2540 105 PALM REST EURO SWED FINN 153 4 2 37L2541 105 PALM REST EURO SWISS 150 4 2 37L2542 105 PALM REST TURKISH 179 4 2 37L2543 105 P...

Page 160: ...you access to the same tools used by IBM PC HelpCenter specialists IBM Online Assistant guides you from symptom to resolution by asking simple questions based on the collective experience of IBM senio...

Page 161: ...F Fan Error Symptoms 62 77 H Hard Disk Drive 38 95 3 5 In Jumper Locations Settings 131 32 bit Access 40 Check Procedure 68 Error Symptoms 63 PIO Mode 48 Hard Disk Drive 40 I IDE Connector Signals 138...

Page 162: ...nts of Machine Types 2196 2197 and 6344 99 Adapter Cards 103 CD ROM Drive 105 Diskette Drive 106 Hard Disk Drive 106 Memory DIMM 109 Power Supply 108 System Board 107 Top Cover 102 S Safety Inspection...

Page 163: ...Printed in U S A International Business MachinesCorporation Old Orchard Road Armonk New York 10504 Part Number 19K2493 Pub Number S19K 2493 00 3 00...

Reviews: