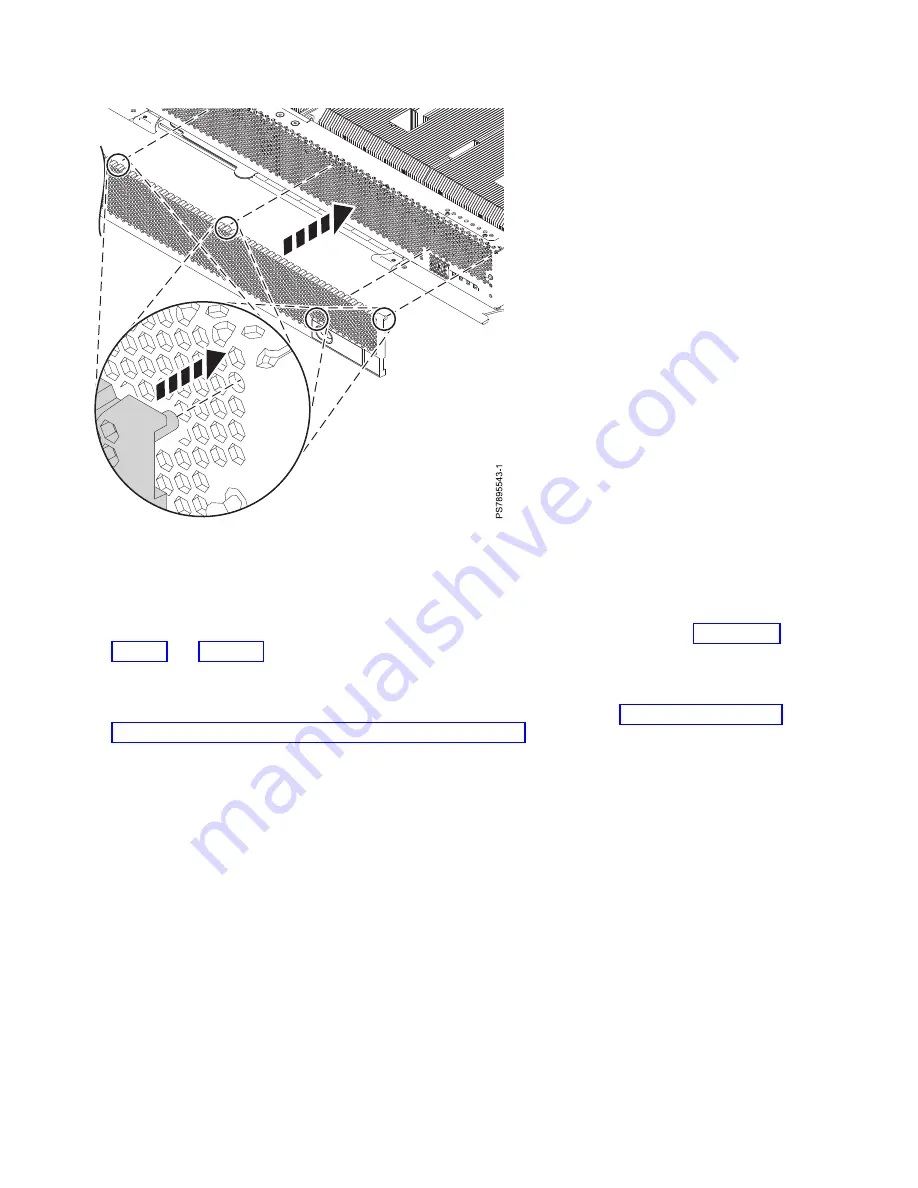
To replace a bezel on the compute node, complete the following steps:
Procedure
1.
Align the bezel with the compute node according to the circled locations indicated in Figure 15 on
page 45 and Figure 16.
2.
Align the bezel assembly with the front of the compute node. Firmly press the bezel at the sides
where the two pins protrude from the face of the compute node until the assembly clicks into place.
3.
Install the compute node into the IBM Flex System Enterprise Chassis. See “Installing the compute
node in an IBM Flex System Enterprise Chassis” on page 93.
Removing a SAS hard disk drive
If the serial-attached SCSI (SAS) hard disk drive is damaged or in need of replacing, you can remove it
from the compute node.
Figure 16. Installing the bezel assembly in an IBM Flex System p460 Compute Node
46
Power Systems: IBM Flex System p260 and p460 Compute Nodes Installation and Service Guide
Summary of Contents for P260
Page 1: ...Power Systems IBM Flex System p260 and p460 Compute Nodes Installation and Service Guide IBM ...
Page 2: ......
Page 3: ...Power Systems IBM Flex System p260 and p460 Compute Nodes Installation and Service Guide IBM ...
Page 32: ...20 Power Systems IBM Flex System p260 and p460 Compute Nodes Installation and Service Guide ...
Page 44: ...32 Power Systems IBM Flex System p260 and p460 Compute Nodes Installation and Service Guide ...
Page 46: ...34 Power Systems IBM Flex System p260 and p460 Compute Nodes Installation and Service Guide ...
Page 108: ...96 Power Systems IBM Flex System p260 and p460 Compute Nodes Installation and Service Guide ...
Page 116: ...104 Power Systems IBM Flex System p260 and p460 Compute Nodes Installation and Service Guide ...
Page 512: ...500 Power Systems IBM Flex System p260 and p460 Compute Nodes Installation and Service Guide ...
Page 523: ...Appendix Notices 511 ...
Page 524: ...IBM Printed in USA ...


