2.
Unplug the power cord and remove the cover. See “Removing the cover” on
page 10.
3.
Locate the battery. See “Identifying parts on the system board” on page 11.
4.
If necessary, remove any adapters that impede access to the battery. See
“Installing adapters” on page 14 for more information.
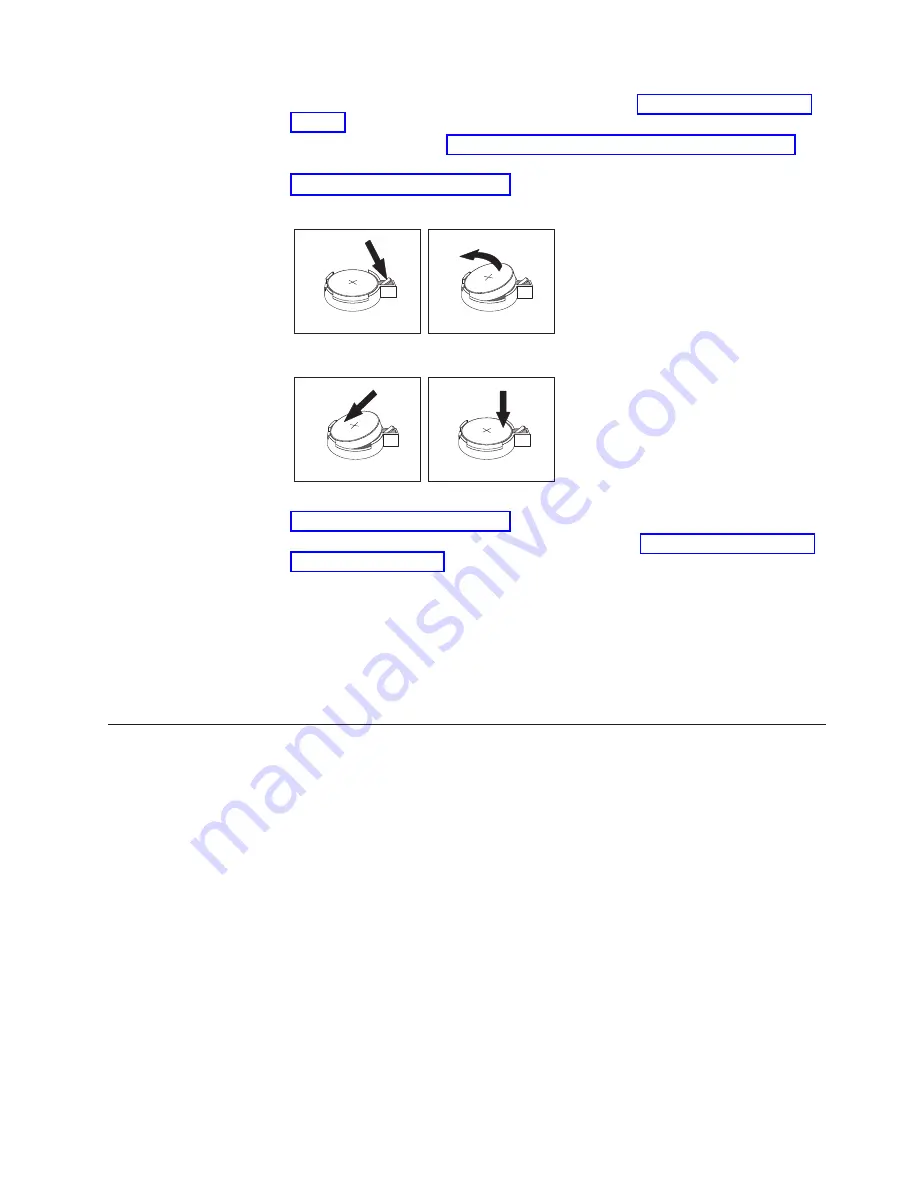
5.
Remove the old battery.
6.
Install the new battery.
7.
Replace any adapters that were removed to gain access to the battery. See
“Installing adapters” on page 14 for instructions for replacing adapters.
8.
Replace the cover, and plug in the power cord. See “Replacing the cover and
connecting the cables”.
Note:
When the computer is turned on for the first time after battery
replacement, an error message might be displayed. This is normal after
replacing the battery.
9.
Turn on the computer and all attached devices.
10.
Use the Configuration/Setup Utility program to set the date and time and any
passwords.
Replacing the cover and connecting the cables
After working with options, you need to install any removed parts, replace the
cover, and reconnect any cables, including telephone lines and power cords. Also,
depending on the option that is installed, you might need to confirm the updated
information in the Configuration/Setup Utility program.
To replace the cover and connect cables to your computer:
1.
Ensure that all components have been reassembled correctly and that no tools
or loose screws are left inside your computer.
2.
Clear any cables that might impede the replacement of the cover.
Chapter 1. Installing options
21
Summary of Contents for NetVista 6029
Page 1: ...NetVista User Guide Type 6029...
Page 2: ......
Page 3: ...NetVista User Guide Type 6029...
Page 6: ...iv User Guide...
Page 12: ...x User Guide...
Page 36: ...24 User Guide...
Page 40: ...28 User Guide...
Page 42: ...30 User Guide...
Page 48: ...36 User Guide...
Page 53: ......
Page 54: ...Part Number 49P1032 Printed in U S A 1P P N 49P1032...


