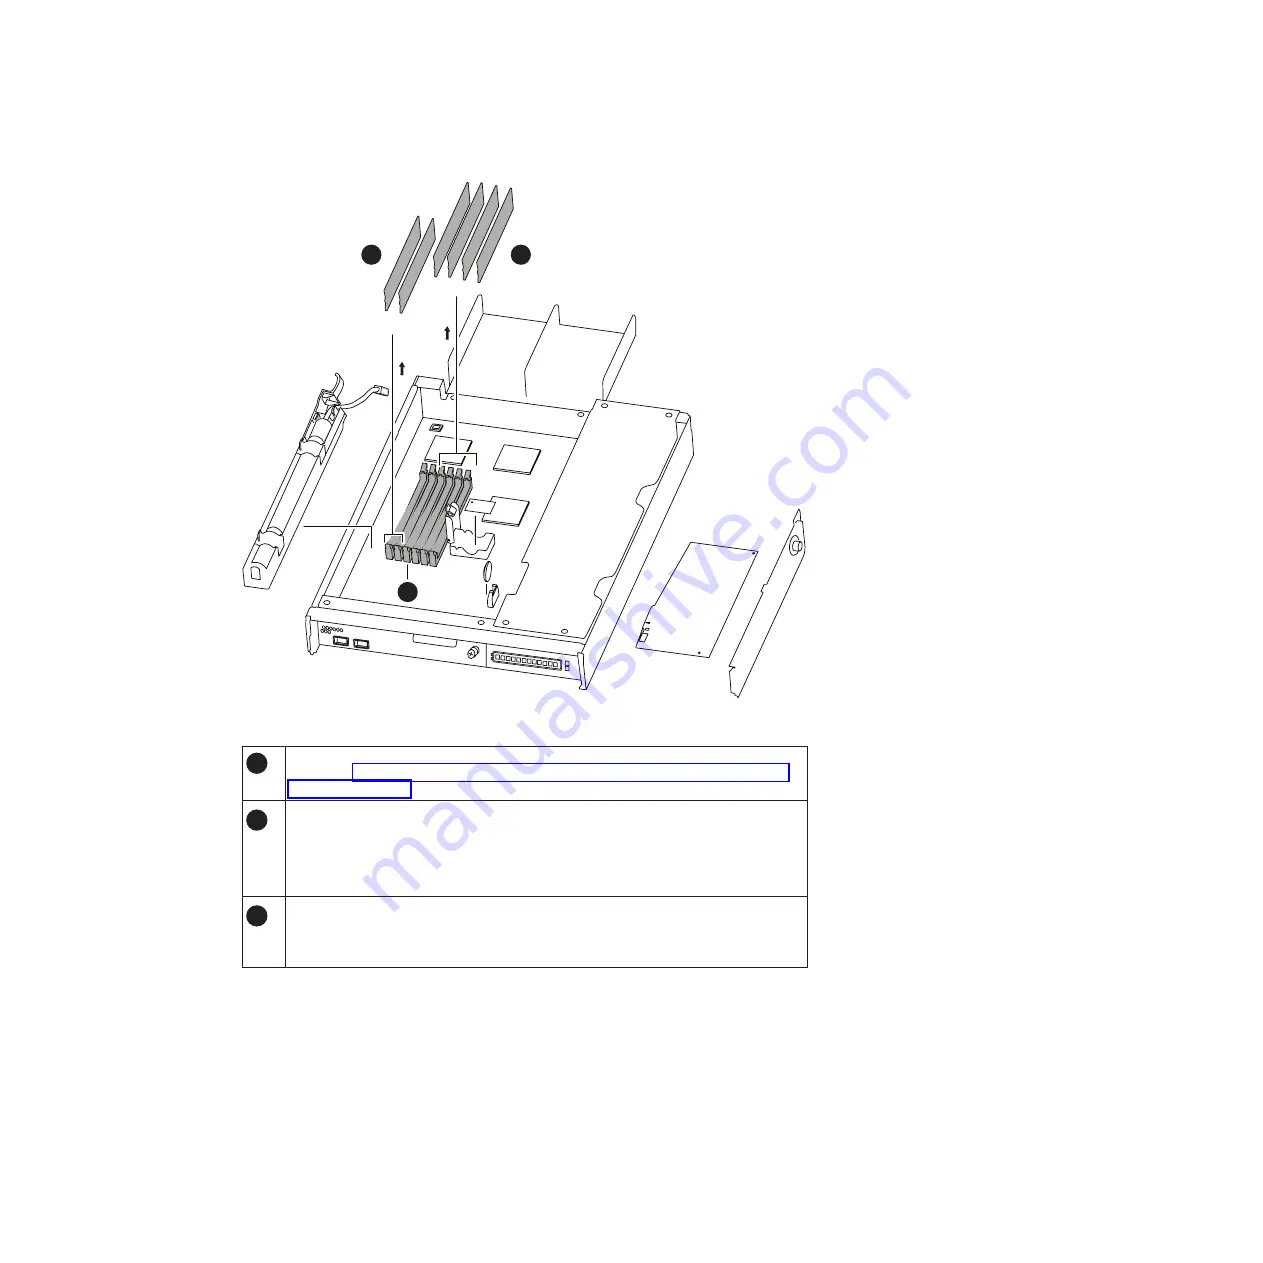
1
NVMEM DIMMs 1 and 2.
Note:
See “Replacing an NVMEM battery or NVMEM DIMMs in an N6200 series
system” on page 30 for information about removing these two DIMMs.
2
System DIMMs 1 through 4.
The number of DIMMs in your system will vary.
v
In N6210 and N6240, only DIMM sockets 1 and 2 are populated.
v
In all other N6200 series models, all DIMM sockets are populated.
3
DIMM sockets.
The NVMEM DIMM sockets have white DIMM locking tabs, while the system
DIMM sockets have black locking tabs.
4.
Note the orientation of the DIMM in the socket so that you can insert the
replacement DIMM in the proper orientation.
5.
Slowly press down simultaneously on the two DIMM ejector tabs to eject the
DIMM from its slot, and then lift it out of the slot.
1 2
1 2 3 4
1
2
3
Figure 24. DIMM locations
46
IBM System Storage: N6200 Series Hardware and Service Guide
Summary of Contents for N6270
Page 12: ...xii IBM System Storage N6200 Series Hardware and Service Guide...
Page 16: ...xvi IBM System Storage N6200 Series Hardware and Service Guide...
Page 18: ...xviii IBM System Storage N6200 Series Hardware and Service Guide...
Page 20: ...xx IBM System Storage N6200 Series Hardware and Service Guide...
Page 46: ...20 IBM System Storage N6200 Series Hardware and Service Guide...
Page 130: ...104 IBM System Storage N6200 Series Hardware and Service Guide...
Page 134: ...108 IBM System Storage N6200 Series Hardware and Service Guide...
Page 146: ...120 IBM System Storage N6200 Series Hardware and Service Guide...
Page 147: ......
Page 148: ...Printed in USA GA32 0838 04...


