Removing
a
DIMM
To
remove
a
DIMM,
complete
the
following
steps:
1.
Read
the
safety
information
that
begins
on
page
and
2.
Turn
off
the
computer
and
all
attached
devices;
then,
disconnect
all
external
cables
and
power
cords.
3.
Remove
the
side
cover
(see
4.
Remove
the
hard
disk
drive
bracket,
if
one
is
installed
(see
5.
For
easier
access
to
the
memory
modules
on
the
system
board,
it
might
be
easier
to
remove
the
drive
cage
from
the
computer
(see
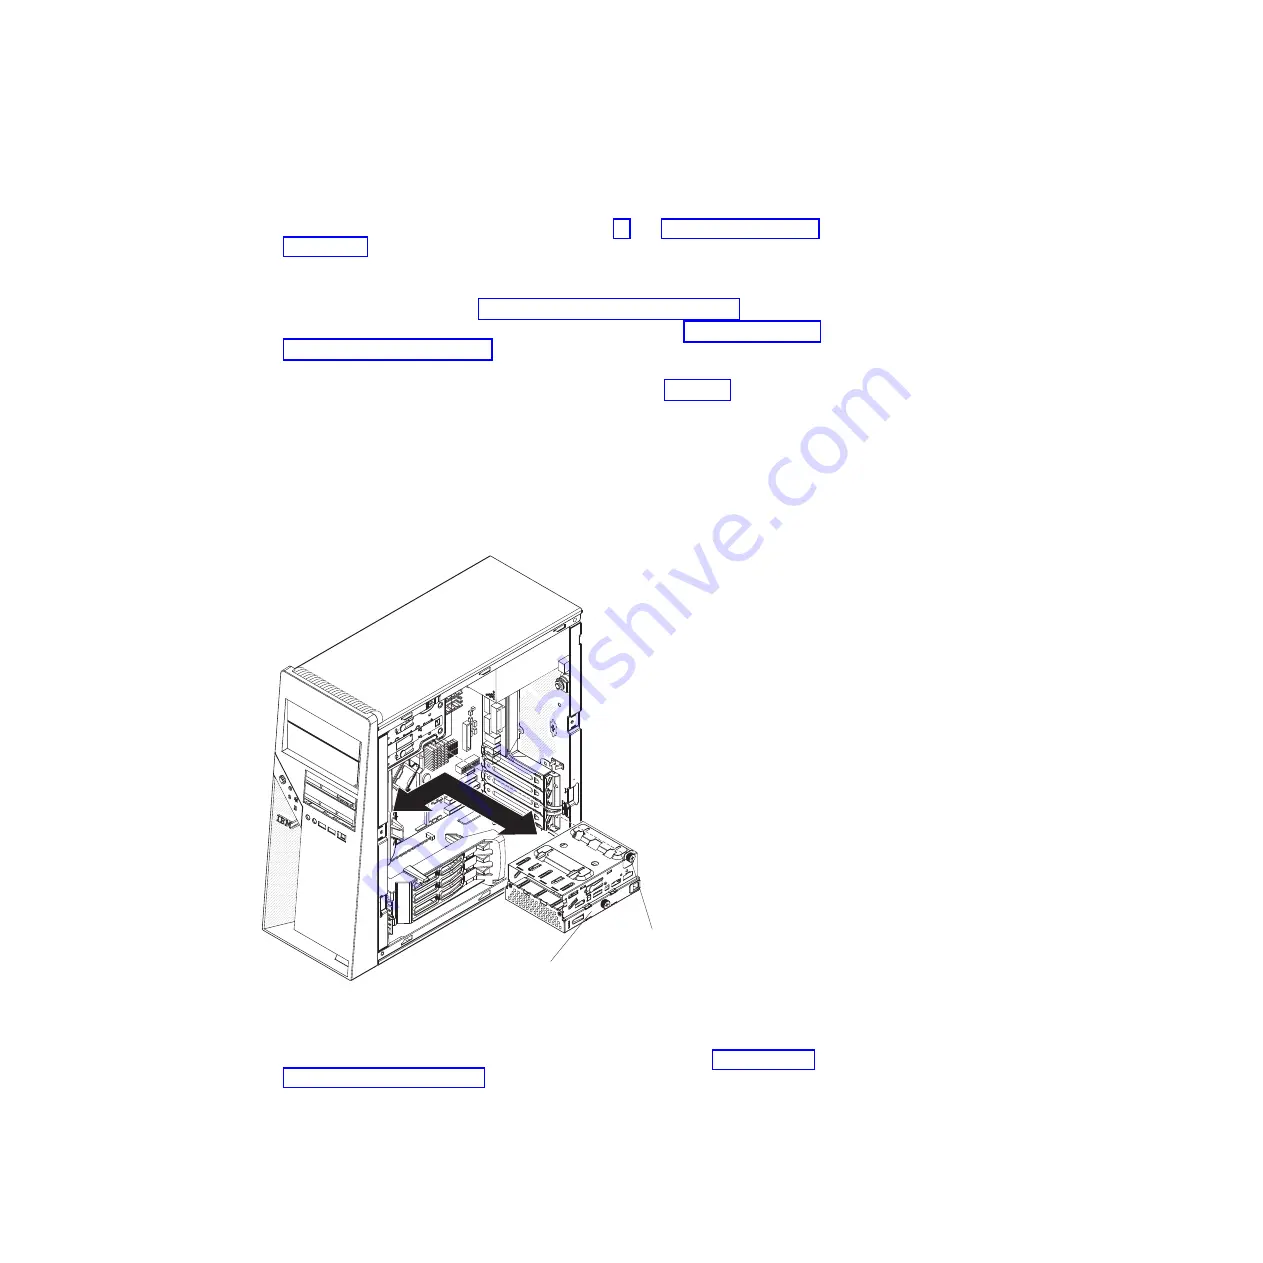
a.
Loosen
the
thumbscrew
at
the
rear
of
the
drive
cage.
b.
Slide
the
drive
cage
to
the
rear
to
disengage
it
from
the
upper
clips
and
lift
the
cage
out
of
the
computer.
Note:
You
might
have
to
disconnect
the
power
cables
from
the
drives
before
you
lift
the
cage
all
the
way
out
of
the
computer.
6.
Disconnect
any
cables
that
impede
access
to
the
DIMMs.
7.
Locate
the
DIMM
connector
with
the
DIMM
to
be
replaced
(see
for
DIMM
slot
locations).
Attention:
To
avoid
breaking
the
retaining
clips
or
damaging
the
DIMM
connectors,
open
and
close
the
clips
gently.
Thumbscrew
Drive cage
Figure
23.
Removing
the
drive
cage
Chapter
4.
Removing
and
replacing
computer
components
89
Summary of Contents for IntelliStation M Pro 6218
Page 1: ...IBM IntelliStation M Pro Type 6218 and 9236 Problem Determination and Service Guide...
Page 2: ......
Page 3: ...IBM IntelliStation M Pro Type 6218 and 9236 Problem Determination and Service Guide...
Page 8: ...vi IBM IntelliStation M Pro Type 6218 and 9236 Problem Determination and Service Guide...
Page 16: ...xiv IBM IntelliStation M Pro Type 6218 and 9236 Problem Determination and Service Guide...
Page 26: ...10 IBM IntelliStation M Pro Type 6218 and 9236 Problem Determination and Service Guide...
Page 140: ...124 IBM IntelliStation M Pro Type 6218 and 9236 Problem Determination and Service Guide...
Page 162: ...146 IBM IntelliStation M Pro Type 6218 and 9236 Problem Determination and Service Guide...
Page 167: ......
Page 168: ...Part Number 31R1998 Printed in USA 1P P N 31R1998...


