14. Slide the disk enclosure back into the rack, as described in “Installing or replacing a 5U92 disk
enclosure in a rack ” on page 29.
Installing or replacing the top cover
You can replace the top cover on a 5U92 disk enclosure during the installation process or after you
complete a service task.
Before you begin
Important: You can install the cover while the disk enclosure is powered on. To maintain operating
temperature, replace the cover within 15 minutes of completing other service tasks. When the cover is
removed, the reduction in airflow through the enclosure might cause the enclosure or its components to
shut down to protect from overheating.
About this task
To install or replace the top cover on the 5U92 disk enclosure, complete the following steps.
Procedure
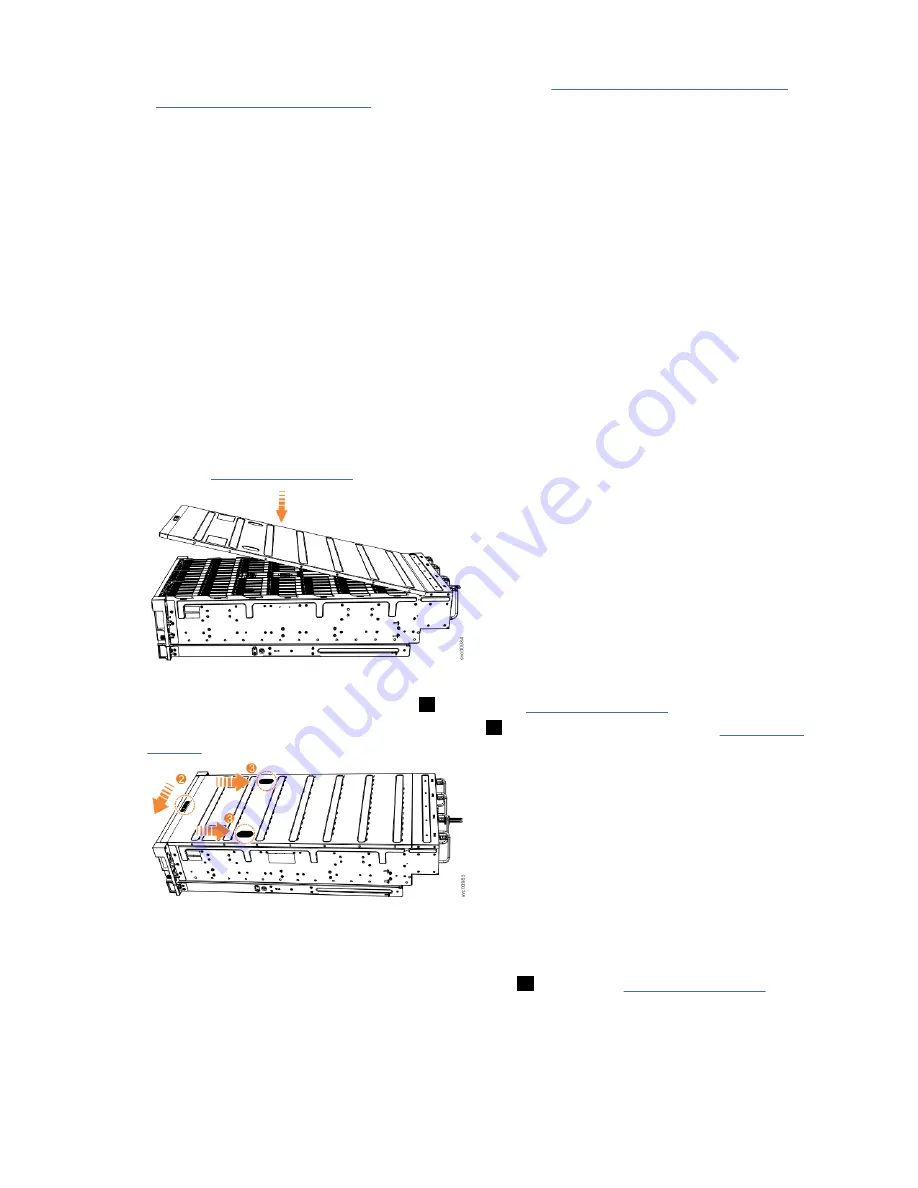
1. Carefully lower the cover and ensure that it is aligned correctly with the back of the enclosure, as
shown in Figure 24 on page 28.
Figure 24. Aligning the top cover
2. Push the cover release lever to the side (
2
) as shown in Figure 25 on page 28.
3. Slide the cover towards the back of the enclosure (
3
) back until it stops, as shown in Figure 25 on
Figure 25. Replacing the top cover
4. Verify that the cover correctly engages the cover release latch and all of the inset tabs on the disk
enclosure.
5. Lock the cover into position by sliding the release lever
4
, as shown in Figure 26 on page 29
28 IBM Cloud Object Storage System
™
Version 3.15.6: J15 Appliance Manual
Summary of Contents for 5U92
Page 1: ...IBM Cloud Object Storage System Version 3 15 6 J15 Appliance Manual IBM...
Page 10: ...x...
Page 12: ...xii...
Page 24: ...xxiv IBM Cloud Object Storage System Version 3 15 6 J15 Appliance Manual...
Page 32: ...4 IBM Cloud Object Storage System Version 3 15 6 J15 Appliance Manual...
Page 140: ...112 IBM Cloud Object Storage System Version 3 15 6 J15 Appliance Manual...
Page 141: ......


