background image

12

Support automatic identification for signal output.

Supports standard definition (NTSC / PAL) and high definition format like

AHD, TVI and CVI; Supports resolution up to 1080P30Hz.

Multiple HDMI input resolutions: 640x480,720x480,720x576,800x600,1024x768,

1280x720,1280x1024,1366x768,1440x900,1600x900,1920x1080.
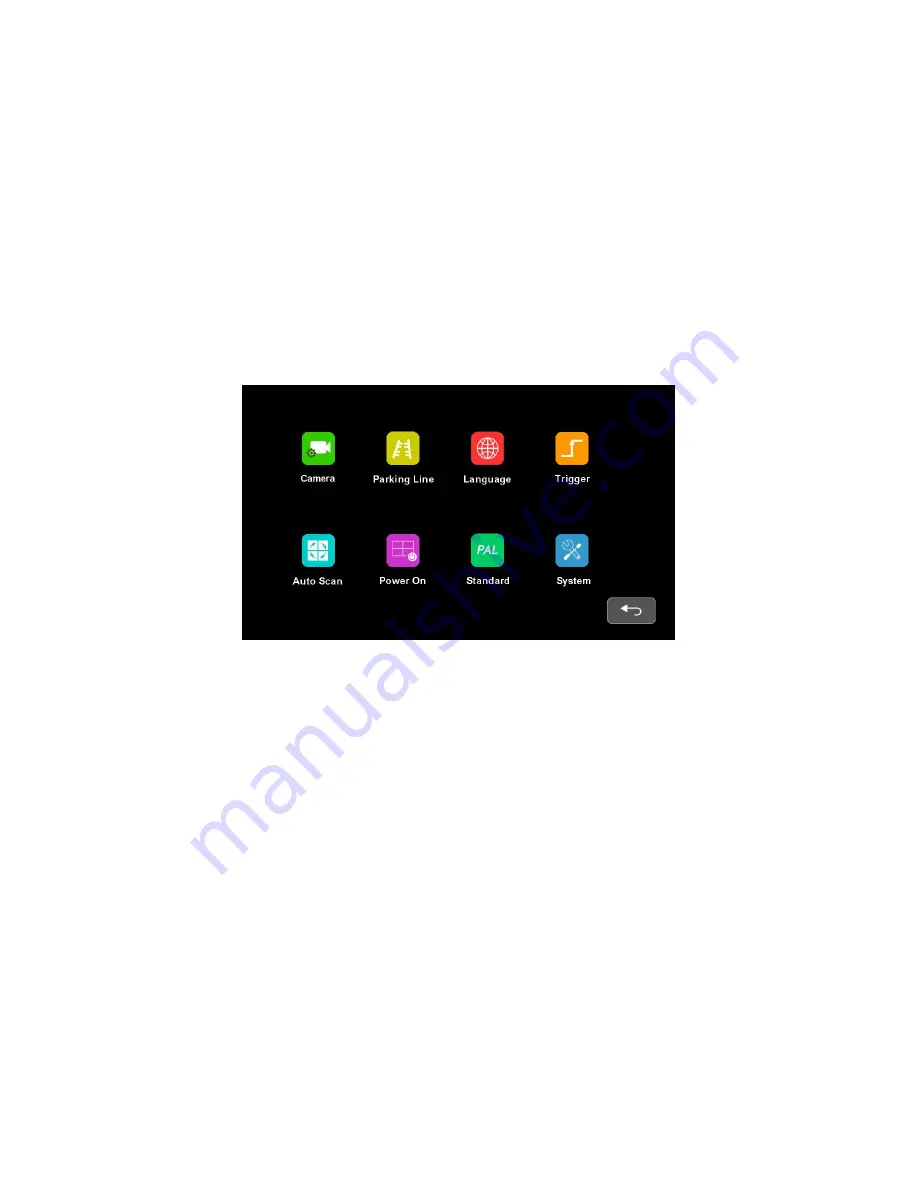
4.2.6 Setting

Pic.4.2.6

Setting menu interface (for other functions) is shown in pic 4.2.6.

Summary of Contents for TE-4HCM-S

Page 1: ...TE 4HCM S User Manual iBeamUSA com MetraDealer com techsupport metra autosound com TECH SUPPORT l J 800 253 8324 ...

Page 2: ...s 3 2 Accessories 5 3 Connections 6 4 Menu operation and functional specification 8 4 1IR remote control 8 4 2Menu operation 9 4 2 1 Desktop 9 4 2 2 Home Menu 10 4 2 3 Volume 10 4 2 4 Mode 11 4 2 5 Source 11 4 2 6 Setting 12 ...

Page 3: ...h or use abrasive cleaning materials on this device 7 Do not place cables where they may be pinched or stepped on 8 Leave at least a 2 space between the monitor and walls cabinets or other objects to allow adequate air circulation around the device 9 The monitor is not designed to be waterproof Operating Precautions 1 The device may be powered by a 12 or 24 volt automotive battery or vehicle elect...

Page 4: ...d dangerous voltage within the product s enclosure that may be of sufficient magnitude to constitute risk of electric shock to persons This symbol is intended to alert the user to the presence of important operating and maintenance servicing instructions in the literature accompanying the appliance This symbol is intended to alert the user not to waste electrical and electronic equipment CAUTION Y...

Page 5: ...5 2 Accessories ...

Page 6: ... male for Channle Back Single red wire to positive power supply for DC 10 32V Single black wire to GND Single white wire to positive power wire of Channel Left Single blue wire to positive power wire of Channel Right Single green wire to positive power wire of Channel Front Single brown wire to positive power wire of Channel Back ...

Page 7: ...Support 1 x HDMI video input easy connection to PC or smart electronic devices etc Capacitive touch screen Support 4 x triggers trigger priority trigger delay selectable Support auto scan scan channel and time selectable Support Automatic Backlight Control and manual selection in 3 levels Parking line display With 1 5W speaker Menu operation by buttons control remote control or touch screen contro...

Page 8: ...p the menu cursor or decrease volume MENU Call home menu or return to previous menu UP Move up the menu cursor or switch screen display mode when ther e is no pop up menu and signal source is selected as camera DOWN Move down the menu cursor or switch screen display mode wh en there is no pop up menu and signal source is selected as camera MODE Switch input source between CAMERA and HDMI SEL Confi...

Page 9: ...s shown in Pic 4 2 1 When Home Menu is not displayed Touch the area of the Red border shown to pop up home menu Pic 4 2 1 When signal source is selected to be cameras cameras can be switched by sl iding to left right on screen sequentially Left Right Front Back Left ...

Page 10: ... to Desktop 4 2 3 Volume Pic 4 2 3 Volume volume setting is shown in pic 4 2 3 Its operations are as follows Press VOL VOL and MUTE button on remote control to adjust volume or set up to mute The value displaying on the bar represents current volume Directly drag the slider on the screen to adjust volume Click speaker icon to trun on off Mute as shown in pic 4 2 3 ...

Page 11: ... remote control to move the cursor up down left right then press Sel to switch to the corresponding display mode The corresponding screen display modes can be switched by touching the icons on OSD 4 2 5 Source Pic 4 2 5 Source interface signal source selecting is shown in pic 4 2 5 Switch source by pressing Mode button then selecting desired source ...

Page 12: ...high definition format like AHD TVI and CVI Supports resolution up to 1080P30Hz Multiple HDMI input resolutions 640x480 720x480 720x576 800x600 1024x768 1280x720 1280x1024 1366x768 1440x900 1600x900 1920x1080 4 2 6 Setting Pic 4 2 6 Setting menu interface for other functions is shown in pic 4 2 6 ...

Page 13: ...nd move the cursor to the channel selection area shown as red border in pic 4 2 6 1 Press Up Down Vol and Vol to select the channel and press Sel to switch to the corresponding channel for attribute settings Pic 4 2 6 1 2 Camera Name setting interface setting for each channel s name as shown in the pic 4 2 6 1 2 Camera name digits can be a maximum of 8 characters ...

Page 14: ... as shown in the pic 4 2 6 2 Touch CALIBRATE icon to set reverse cursor Press SEL or touch TYPE1 TYPE2 on screen to switch reverse cursor mode and drag the cursor directly to adjust 4 2 6 3 Language Pic 4 2 6 3 Language setting interface setting for system language as shown in the pic 4 2 6 3 ...

Page 15: ...the pic 4 2 6 2 2 Trigger delay range 1 60s Trigger priority 1 4 Trigger function takes priority over Auto Scan function When there is trigger signal source will be automatically switched to the working Camera It will return to the previous signal source after the trigger ends Support standby trigger ...

Page 16: ... setting interface as shown in the pic 4 2 6 5 Delay range 1 60s 4 2 6 6 Power On Pic 4 2 6 6 Power On setting interface power on screen display mode setting as shown in the pic 4 2 6 6 6 Set initial camera to display when monitor is powered on ...

Page 17: ...ff User can set the TV mode in menu according to the camera used then will show the normal picture in the monitor Manual setting TV mode is recommended for faster response when switching 4 2 6 8 System Pic 4 2 6 8 System setting interface as shown in the pic 4 2 6 8 When Menu Lock is ON screen touching control will be disabled Menu Lock can be canceled by pressing the physical button on the monito...

Page 18: ..._______________________________________________________________ _______________________________________________________________________________ _______________________________________________________________________________ _______________________________________________________________________________ _______________________________________________________________________________ ________________...

Page 19: ...____________________________________________________________ _______________________________________________________________________________ _______________________________________________________________________________ _______________________________________________________________________________ _______________________________________________________________________________ ___________________...

Page 20: ...and negative pole otherwise the fuse will blow immediately for security protection If it happens please replace the blown fuse with a new one with same specification after connecting properly to the right pole Don t randomly increase the current rating of the fuse and NEVER use metal wire as a substitute KNOWLEDGE IS POWER Enhance your installation and fabrication skills by enrolling in the most r...

Reviews: