background image

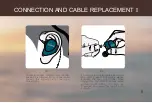
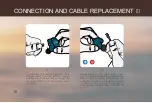
耳机线更换说明 Ⅲ

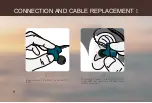
完整去除耳机线:将耳机线完全拔离

MMCX接口。

更换耳机线:首先需要检查你的耳机

是左侧的还是右侧的。连接时插入并

推进,但不要太用力,直到你感觉

MMCX插口有轻微的点击声。

20

Summary of Contents for IT07

Page 1: ...Seven Driver Hybrid In Ear Monitor IT07...

Page 2: ...IT07 Thank you for selecting the IT07 Audiophile in ear monitors Plesae take a few minutes to read these instructions carefully before using the product...

Page 3: ...monitors for extended periods of time at high volume The ability to hear your own voice while listening and speaking normally with in ear monitors can serve as a measure of correct volume adjustment...

Page 4: ...11...

Page 5: ...nitor 2 5mm MMCX balanced cable 2 5mm balanced to 3 5mm single ended cable adapter Three pairs of screen lters Twelve pairs of silicone eartips Two pairs of foam eartips Storage case Warranty card Thi...

Page 6: ...IT07 2 5mmMMCX 2 5 3 5 12...

Page 7: ...artip ts the best by trying on each of the di erent tips supplied by placing the di erent eartips carefully inside your ear after they are placed on the IEM nozzle The correct size of eartips should n...

Page 8: ...13...

Page 9: ...der 2 Pull the front part of your ear slightly upward with one hand and insert the rolled eartip deep into the ear canal with the other 3 Use a nger to hold the in ear monitor in place until the earti...

Page 10: ...1 2 3 14...

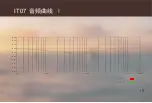
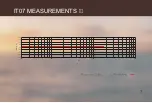
Page 11: ...IT07 MEASUREMENTS 5 FR L FR R 20 0 60 00 70 00 80 00 90 00 100 00 110 00 120 00 130 00 140 00 150 00 100 0 1000 0 10000 0 20000 0...

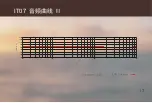
Page 12: ...IT07 15 FR L FR R 20 0 60 00 70 00 80 00 90 00 100 00 110 00 120 00 130 00 140 00 150 00 100 0 1000 0 10000 0 20000 0...

Page 13: ...IT07 MEASUREMENTS 6 THD L THD R...

Page 14: ...IT07 16 THD L THD R...

Page 15: ...7 IT07 MEASUREMENTS 20 20 0 15 0 10 0 5 0 0 0 5 0 10 0 15 0 20 0 100 1k Hz 10k dB re 1...

Page 16: ...17 IT07 20 20 0 15 0 10 0 5 0 0 0 5 0 10 0 15 0 20 0 100 1k Hz 10k dB re 1...

Page 17: ...CONNECTION AND CABLE REPLACEMENT Please identify the right R and left L IEM To correctly place the IEM Notice that on the IEM the cable faces forward and slightly downward 8...

Page 18: ...L R 18...

Page 19: ...serted into your ear canal Reverse this sequence when removing your monitor To remove the cable Please do not pull the MMCX apart but gently wedge between the two connections When doing this the MMCX...

Page 20: ...MMCX MMCX 19...

Page 21: ...that you are grasping the connector MMCX at the end and never the cable Replacement of the cable First check to make sure you have the cable for the left or right monitor Notice how the connection in...

Page 22: ...MMCX MMCX 20...

Page 23: ...year from date of purchase excluding the accessories Buyer must retain the warranty card which will be requested at the time of warranty repair This warranty does not apply when failure is due to acci...

Page 24: ......

Reviews: