

IAD_DGS_X7S_
4
0EP
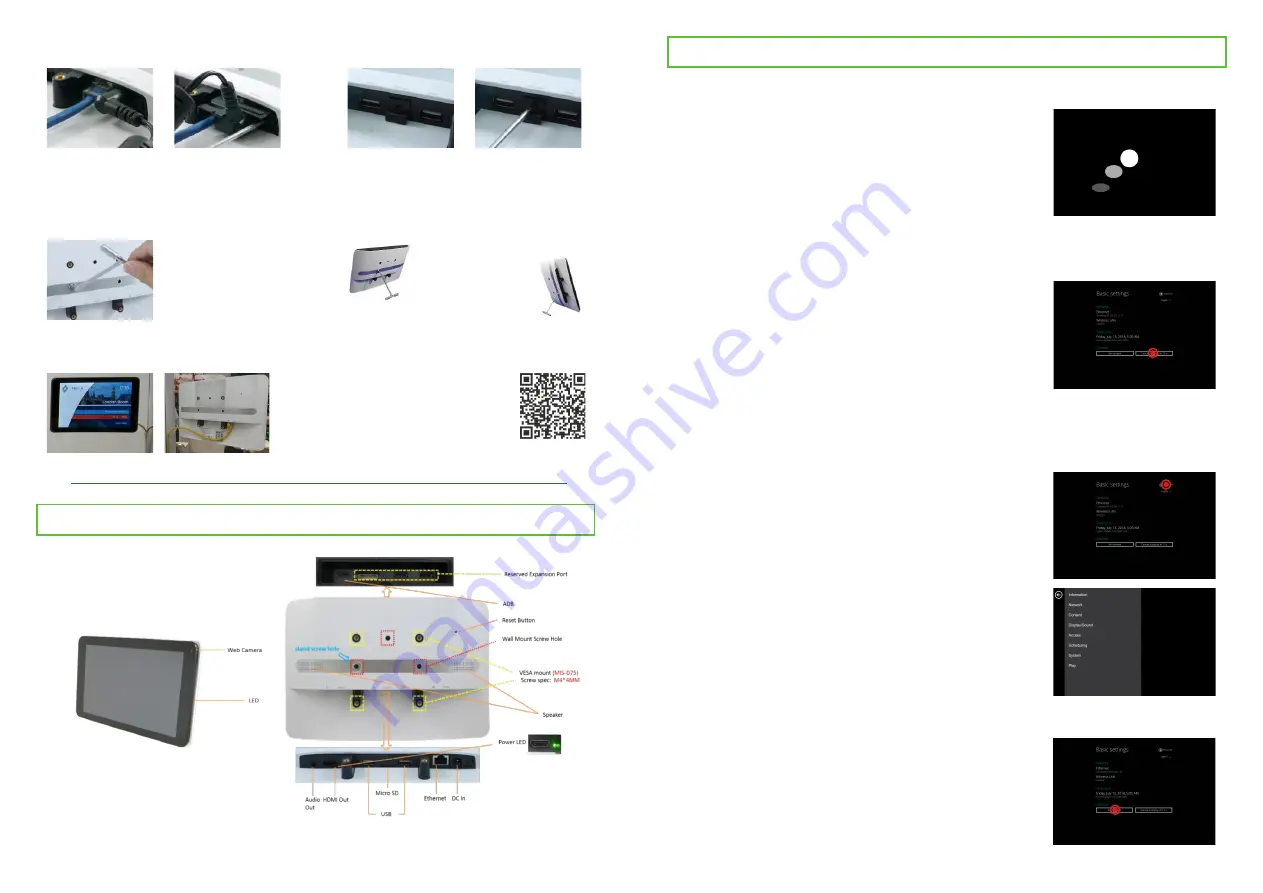
Securing power and network cable
Securing SD card
1) Insert both
cables
2) Fasten bracket
onto the socket
1) Insert SD
card bracket
2) Fasten SD
card bracket
Securing table stand
Screw the table stand
into stand screw hole.
Supports landscape
and portrait setup.
Glass mount
Landscape
Portrait
1) Order your glass mount kit
2) Scan QR code for user manual
3) Mount your signboard
4) Impress your visitors
Port Connections
QR:
http://www.iadea.com/wp-content/uploads/2018/10/PGM-001_User-Manual_2018OCT_web.pdf
Boot up
1
Plug in the AC adapter and Ethernet cable (if that
is the preferred method of connecting to network)
located at the back of the smart signboard and
it will power on automatically. Once the user has
exited the boot up screen, users can go through
system configurations in both landscape and por
-
trait orientations.
System Setup
Set content
4
Make configurations
3
Basic settings
When boot up is complete, the user will see the
“
Basic settings
” which allows the user to make
configurations or autoplay preloaded content.
Please note, the smart signboard is set to autoplay
preloaded content 15 seconds after boot up. This
can be canceled if “
Cancel autoplay in 15s
” is
selected which lets the user remain on the “
Basic
settings
” and initiate playback manually.
Users can set content by clicking "
Set Content
" to
enter the URL or use the desired content manage-
ment system to upload the contents onto the smart
signboard.
To change smart signboard system language, se-
lect “
(Current Language) ....
” For system configu
-
rations, select “
Advanced.
”
Important recommended configurations:
2
Set correct time, date, and time zone for
properly scheduled playback.
1
Set password to prevent unauthorized
access during setup menu.
2
Set network for establishing network
connection.
3


