background image


10

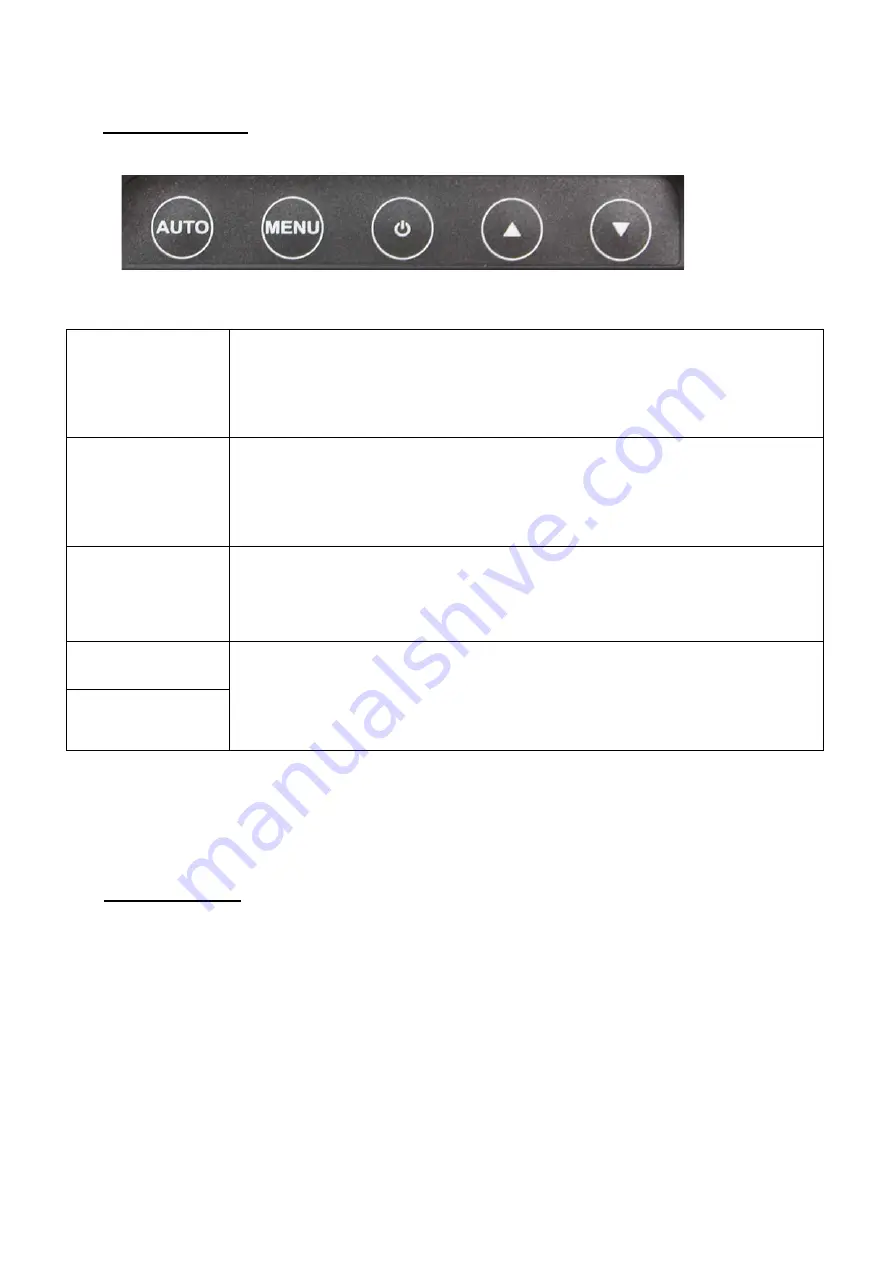
Control Buttons 


Auto Adjusting 

a.) Pressing to execute AUTO-Adjusting function. This function will set the 

monitor display area to the optimal position.                                     

b.) Sometimes this function can't achieve the optimal effects. Please follow the 

manual adjusting procedure. 

Menu 

When the light bar move other item, the key are used to select it, and read to 

adjust.    Press the MENU key to activate the On Screen Display (OSD). Press 

twice to turn off the OSD. After 30 sec idle time, the OSD screen will 

automatically turn off. 

Power 

Use the power switch to turn the power ON or OFF. We recommend to turn your 

system power on first, then the LCD monitor. 

Up 

Down 

a.) When OSD mode is activated (When “MENU” key is pressed). The two keys 

are used to select the adjustment items.                                                                     

b.) When adjustment item is selected, the two keys are defined to decrease or 

increase the value of each selected item. 


IV.


For your safety 


1.


When move the monitor, always switch off power and disconnect all cables to avoid any danger. 

2.


Please use the power and signal cables correctly when install or bend it. 

3.


In case of notice any abnormal smell or noise, please stop operation and call the nearest dealer or 

service center. 


Summary of Contents for KKF1040V-TR

Page 1: ...Touch Display LCD Monitor User Manual Installation Guide 10 4 True FLAT Touch LCD Monitor VGA Interface MODEL KKF1040V TR i Tech Company LLC TOLL FREE 888 483 2418 EMAIL info itechlcd com WEB www iTe...

Page 2: ...ply unit or incorrect power voltage Do not exposure this unit in the rain or moisture environment to reduce the risk of fire or electric shock Contents I FCC Warning Statement 2 II Introduction 3 Feat...

Page 3: ...e determined by turning the equipment off and on the user is encouraged to try to correct the interference by one or more of the following measures Reorient or relocate the receiving antenna Increase...

Page 4: ...ht weight only 800g physically for 10 4 True Flat Monitor VESA 75 75 mm wall mount standard Integrate with resistive touch Unpacking the monitor Put the monitor on a clean surface make sure the box in...

Page 5: ...b c d True Flat Touch Monitor a b c d e a LCD Monitor b Power adaptor c VGA cable 8 PIN Mini DIN cable d User Manual CD a LCD Monitor b Power adaptor c VGA cable 8 PIN Mini DIN cable d Touch driver U...

Page 6: ...I O placement 1 VGA DIN Type 2 DC Input 3 USB Input for Touch model only To PC 1 Connect VGA cable from monitor to PC 2 Connect USB touch cable to PC 3 Connect DC plug to monitor and the other side to...

Page 7: ...only 1 Double click setup exe from driver menu 2 Click next from welcome window 3 Click next from choose destination location window 4 Click next from ready to install the program 5 Click next from se...

Page 8: ...tion procedures 1 Double click POS Touch icon to run calibration function 2 Follow 9 points linearity calibration procedures and save the data 3 Follow free draw calibration 4 Exit calibration menu 5...

Page 9: ...ture downward Clock Adjust sampling clock of analog to digital converter until clock is equal to pixel frequency of video input Phase By varying this UP DOWN control the exact sampling time within the...

Page 10: ...choose any one of the following languages English French Germany Italian Spanish Russian Traditional Chinese and Simplified Chinese Color Recall Recall All Recall the default value Recall Exit Sharpne...

Page 11: ...tomatically turn off Power Use the power switch to turn the power ON or OFF We recommend to turn your system power on first then the LCD monitor Up Down a When OSD mode is activated When MENU key is p...

Page 12: ...eference Standard Resolution Pixel MHz FH KHz FV Hz Interlace H Polarity V Polarity Mode 1 VESA 800 600 36 000 35 156 56 250 NO Mode 2 VESA 800 600 40 000 37 879 60 317 NO Mode 3 VESA 800 600 50 000 4...

Page 13: ...atio 500 1 Response Time 30 ms typ 150 degrees H Viewing Angle 110 degrees V Input Video Format VGA Touch Panel NA 5 Wires TWN Resistive Input Video signal connector Mini DIN 8 pins Power consumption...

Reviews: