8
Quick Start / USB 3.0 SATA HDD Docking Station
EN
HDD CLONING
1.
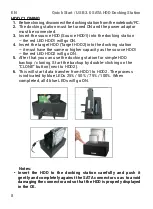
Before cloning, disconnect the docking station from the notebook/PC.
2.
The docking station must be turned ON and the power adaptor
must be connected.
3.
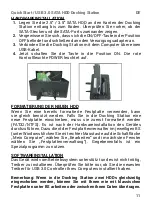
Insert the source HDD (Source HDD1) into the docking station
– the red LED HDD1 will go ON.
4.
Insert the target HDD (Target HDD2) into the docking station
– it must have the same or higher capacity as the source HDD1
– the red LED HDD2 will go ON.
5.
After that you can use the docking station for simple HDD
backup / cloning. Start the backup by double-clicking on the
“CLONE” button (next to HDD2).
6.
This will start data transfer from HDD1 to HDD2. The process
is indicated by blue LEDs 25% / 50% / 75% / 100%. When
completed, all 4 blue LEDs will go ON.
Notes:
• Insert the HDD to the docking station carefully and push it
gently and completely against the SATA connector so as to avoid
damaging the connector and so that the HDD is properly displayed
in the OS.


