background image


95 

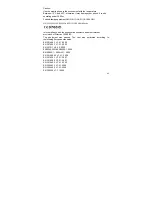
Caution: 
Use the mobile phone in the environment with the temperature 
Between-10 °C and 45°C; otherwise, it may damage your phone. It can be 
operating under 2000m


Forthefollowingequipment:

HSDPA/WCDMA/EDGE/GPRS/GSM 

850/900/1800/1900/2100MHz BT/WiFi/GPS Mobile Phone 


is in compliance with the essential requirements and other relevant 
provisions of Directive 1999/5/EC. 
The equipment was passed. The test was performed according to 
thefollowing European standards: 
EN 301 489-1 V1.8.1 :2008 
EN 301 489-7 V1.3.1: 2005   
EN 301 511 V9.0.2 :2003 
EN50360:2001&EN62209-1:2006 
EN 60950-1

2006+A11

2009 

EN 301 489-24 V1.4.1: 2008 
EN 301 908-1 V3.2.1: 2007 
EN 301 908-2 V3.2.1: 2007   
EN 301 489-3 V1.4.1 :2002 
EN 300 440-1 V1.4.1:2008 
EN 300 440-2 V1.2.1:2008 
EN 300 328 V1.7.1:2006   

Summary of Contents for i651

Page 1: ...i mobile i651 HSDPA WCDMA EDGE GPRS GSM 850 900 1800 1900 2100MHz Mobile Phone User Manual...

Page 2: ...le for any loss of data income or any special incidental consequential or indirect damages howsoever caused The content of this manual is provided as is To the fullest extent permissible by law we mak...

Page 3: ...roduction 11 Your phone s label 11 Phone image 11 Key definition 13 Touch screen 14 Silent mode 15 Screen sleep 15 Screen lock 15 Wireless off 16 Making phone calls 17 Power on off 17 Home screen 19 H...

Page 4: ...the Home screen 20 Create and delete folders on the Home screen 20 Customize Home screen wallpaper 21 Notification and connection status icons 21 Getting Started 25 Installing the battery 25 Installi...

Page 5: ...play 34 Location secutiry 35 Applications 36 Accounts sync 37 Privacy 38 SD card phone storage 38 Search 39 Language keyboard 39 Date time 40 About phone 40 Bluetooth 41 Turn on Bluetooth services 41...

Page 6: ...Contacts 44 Your contact list 44 Search for a contact 45 Add a contact 45 Assign favorites 45 Edit contact details 46 Delete contact 46 Display contact 46 Communicate with a contact 46 Contacts settin...

Page 7: ...arate windows 59 Manage bookmarks 60 Set your home page 62 Browser history 62 View the most visited webs 62 Download Web files and applications 62 View your downloads 63 Browser settings 63 Dialer Voi...

Page 8: ...ate 72 Create an event 72 Go to today 72 View an event 73 Camera Camcorder Gallery 74 Before you begin 74 Camera 74 Video Recorder 75 Settings of Camera Camcorder and Gallery 75 Music Video player 82...

Page 9: ...8 Icon definition 88 Wireless Tether 88 Tools 89 Alarm Clock 89 Calculator 90 File Manager 90 FM radio 91 Battery Information 93 Accessories 94 Safety of the battery 94 Data cable 94...

Page 10: ...h off the phone during the flight as wireless devices can cause interference in aircraft ROAD SAFETY Obey all local laws Please use the hands free kit while driving ACCESSORIES AND BATTERIES Use only...

Page 11: ...ct WATER RESISTANCE Your phone is not water resistant Keep it dry INTERFERENCE All wireless devices may be susceptible to interference which could affect its performance Damage to the security seal wi...

Page 12: ...rcode label includes important information about services and customer support Please keep it properly Phone image Note All the illustrations simulated screen and related images in the manual are for...

Page 13: ...port 4 _ Earphone jack 5 _ Front camera 6 _ Receiver 7 _ Touch lens 8 _ LCD screen 9 _ Search key 10 _ Menu key 11 _ Call log key 12 _ Optical mouse 13 _ Microphone 14 _ Power End key 15 _ Back key 1...

Page 14: ...or menu Menu key Press to open a list of actions you can take on the current screen Volume keys Press to adjust the volume Search key Press to search the resource in the device or through the internet...

Page 15: ...de your finger up down on the screen Crop pictures When creating wallpaper or an icon from a picture you can control how the picture is cropped Touch hold an edge of the cropper to reveal the sizing a...

Page 16: ...Menu key to select Settings Sound display 2 Select Screen timeout then select a time or from the menu Prevent sleep while charging 1 Return to the Home screen then press the Menu key to select Settin...

Page 17: ...tern check box 4 Set or change your unlock pattern by selecting either Set unlock pattern or Change unlock pattern as applicable 5 Follow the prompts to define your pattern Note You must slide your fi...

Page 18: ...o open the Dialerpad and touch the Dialerpad or To answer an incoming call press the Call log key To end a call press the Power End key or Back key While in a call press the Menu key to reveal the in...

Page 19: ...18...

Page 20: ...s you more room to customize Home with applications shortcuts and widgets Create Home screen shortcuts and widgets 1 Start from the Home screen then touch hold the screen with your fingertip The Add t...

Page 21: ...Home screen not in view move it to the edge of the screen and hold it there for a moment The screen view will shift position the object and release Create and delete folders on the Home screen You ca...

Page 22: ...aper 4 If you select Pictures your picture album opens Note that if this is the first time you have viewed the pictures stored on your memory card from your phone it may take a while for the pictures...

Page 23: ...ying Data is syncing Preparing sd card SD card removed More undisplayed notifications Call in progress Missed call Speakerphone is on Ringer is off Silent mode Ringer on vibrate only Phone on mute Sig...

Page 24: ...t the arrival of new messages calendar events and alarms You can clear notifications list by selecting Clear notifications at the top of the notifications window Touch the item to open the message rem...

Page 25: ...24 1 Open the notifications window to reveal the New voicemail notification 2 Select the notification 3 Your voicemail number is dialed...

Page 26: ...25 Getting Started Installing the battery 1 Take off the battery cover 2 Put in the battery...

Page 27: ...26 3 Install the cover...

Page 28: ...Sim card Note The sim card slot is at the topside of the battery Release the sim card lock Then put in the sim card and lock it up Insert the memory card into the card slot which is at the right side...

Page 29: ...lectrical outlet 3 The device is a 3G product So it consumes more power than in 2G network Tips If your phone is off there will be a yellow light at the upper right corner of the phone s front side wh...

Page 30: ...out Please replace the battery when the battery capacity falls to approximately 50 of its original storage capacity Use and maintenance The following suggestions will help you use and maintain your mo...

Page 31: ...move the battery Leave it to dry thoroughly before using it again To get the maximum talk and standby times from your battery please turn down the volume and reduce the backlight and contrast Please k...

Page 32: ...perator 4 Use only 2G networks to save battery 5 Select a wireless operator network Scan for all available networks or select a network automatically Airplane mode on off When airplane mode is selecte...

Page 33: ...rver 6 Select BT Path to remember the BT transfering path Send Receive files 1 Scan for devices 2 Select the device you want to pair with 3 Type PIN to pair 4 After the pair succeeds you can send rece...

Page 34: ...uninet 8 Double click the connection you just created and you can enjoy internet surfing now with the handset as a modem you can turn on WiFi in your handset after it serves as a modem successfully C...

Page 35: ...music videos FM or voice recordings Phone ringtone Select to set your default incoming call ringtone Phone vibrate Select to have your phone vibrate for incoming calls Notification ringtone Select to...

Page 36: ...reen turns off Location secutiry My location Use wireless networks Select to use wireless networks Use GPS satellites Enable your handset to receive GPS data Screen unlock pattern Create a pattern you...

Page 37: ...download applications from the Web With this check box not selected you will only be able to download applications from Android Market To ensure your personal data and phone remain secure it is recomm...

Page 38: ...y selecting Uninstall Running services You can check and control the running application in this menu Development If you are an application developer you may be interested in these settings USB debugg...

Page 39: ...will erase all your data and downloaded applications SD card phone storage View and manage the data storage on your phone SD card Monitor and manage the use of your memory card from this screen 1 View...

Page 40: ...he search box Browser When selected relevant information in the network shows as you type the word in the Language keyboard Locale setting Select language and region Text settings Thai Keyboard settin...

Page 41: ...ving in the user dictionary Date time Automatic Select to use network provided values Set time time zone and date Use Automatic unless you need to override the network values Time format Select from 1...

Page 42: ...hone in their scans for Bluetooth devices If you make your phone discoverable it will be visible to other Bluetooth devices To make your phone discoverable 1 Make sure you have turned Bluetooth on as...

Page 43: ...one starts scanning for Bluetooth devices within range As they are found the devices appear in the list of Bluetooth devices 4 To pair with a device in the list select it 5 Type the device s password...

Page 44: ...receive an unable to connect message If you pair with a second headset while connected to the first the first headset will remain connected To switch connection to the second headset you must manually...

Page 45: ...can select to View contact call Mobile Text contact Add to favorites Edit contact or Delete Contact 2 Press beside one contact and there will appear the following option Dail this number Enter the op...

Page 46: ...a contact To add more fields select 3 Assuming you have a memory card inserted with pictures in it you can assign a Caller ID icon to your contact by selecting the caller ID icon beside the name text...

Page 47: ...open context menu Select Delete contact to delete the selected contact 2 Or in contact detail menu press the Menu key to select Delete contact Display contact 1 From contacts press Menu key to select...

Page 48: ...the Text mobile section select a phone number 2 A Compose screen opens for your new message Send email to a contact To send an email message to a contact you must have an email address stored for the...

Page 49: ...option Import Export Once the list of names and numbers appears you can 1 Import all names numbers in the list Press the Menu key and select Import Export then select import from SIM card 2 Import on...

Page 50: ...the application will set everything up for you Before you go to your Inbox you can name the account if you don t your email address will be used You are also asked to type your name You must complete...

Page 51: ...or continue typing the address Add as many as you wish 3 Type a subject and message 4 Select Send Save as draft or Discard Pressing the Back key will also save as draft unless you have not typed anyth...

Page 52: ...checked for new messages Note that whenever you open a folder email is refreshed regardless of this setting Default account If you have more than one POP3 or IMAP email account set up on your phone an...

Page 53: ...automatically convert a text message into a multimedia message as soon as you add a subject or an attachment or if you address the message using an email address rather than a phone number The message...

Page 54: ...nt to convert it to a multimedia message Links in messages If a message contains a link to a Web page it will be selectable To view the Web page in the Browser simply select it Forward messages In the...

Page 55: ...typing a name phone number or email address in the To field Matching contacts will appear Select the recipient or continue typing Add as many recipients as you wish If you send the message to an email...

Page 56: ...essage list press the Menu key and select Settings You can set the following from this screen Storage settings Delete old messages When the box limits are reached old messages are removed Text message...

Page 57: ...box If you clear this check box then only the message headers will be retrieved and display in your message list You can retrieve the full message by selecting the Download button that displays in th...

Page 58: ...57...

Page 59: ...following zoom and navigation techniques Zoom in 1 Touch the screen to open the zoom in and zoom out controls 2 Touch the control to zoom in With each touch you zoom in closer 3 Or put your two finger...

Page 60: ...ress the Menu key and select Bookmarks Refresh a Web page To refresh the contents of the current page press the Menu key and select Refresh Open pages in separate windows You can keep more than one We...

Page 61: ...Bookmarks screen From the Current windows screen press the Menu key and select Bookmarks to go to your list of bookmarks View Browser history From the Current windows screen press the Menu key to ente...

Page 62: ...en The context menu opens 3 Select Open or Open in new window Edit bookmark 1 Press the Menu key and select Bookmarks The Bookmarks screen opens 2 Touch hold the bookmark you want to edit The context...

Page 63: ...the Recently visited pages list to go to the site View the most visited webs From the Browser screen press the Menu key to select Bookmarks then select the Most visited tab to view the view the webs y...

Page 64: ...e Downloads 2 The Download history screen appears with the list of downloads If you have no downloads nothing will be shown on this screen Browser settings From the Browser screen press the Menu key a...

Page 65: ...r landscape screen orientation Enable JavaScript Select to enable JavaScript on pages Disabling JavaScript may cause some Web pages to not work properly Enable plug ins Select to turn on this function...

Page 66: ...er rather than retyping it Security settings Remember passwords Select this check box to save usernames and passwords to various Web sites Clear passwords Select Clear passwords to clear all your save...

Page 67: ...66...

Page 68: ...headset or hands free car kit Before you can use your Bluetooth device follow these steps 1 Turn Bluetooth on 2 Get your headset or hands free car device ready for pairing by following the manufacture...

Page 69: ...il number Redial to dial the last outgoing call 4 Regardless of what you tell the Voice Dialer you will be asked to confirm your choice from a menu If you spoke a name with more than one match in Cont...

Page 70: ...ur side of the conversation press the Menu key and select Mute so it shows a green bar To turn it off select it again so the bar is unfilled The status bar will display this icon when Mute is on Hold...

Page 71: ...d select Hold To switch calls at any time press the Menu key and select Swap calls Reject incoming If you don t want to interrupt your call in progress then press the Back key Answer incoming end call...

Page 72: ...and take these actions Display list Press Menu to select Display by group or Display by date The call list will display by group or date Call number Select to dial this number View contact if stored...

Page 73: ...it event etc View date Slide up or down the screen to alter the month After you enter the month select one day to view or edit event or slide left or right the screen to view the day Create an event 1...

Page 74: ...73 View an event With any event edited there appears a colored bar in the date box Press the date box to view the event...

Page 75: ...ng the following Remove the memory card and insert it into a card reader attached to your computer 2 On your computer find the mounted USB drive and open it 3 Copy image or video files into this folde...

Page 76: ...you ve captured go to the Gallery application or in record mode press the Menu key to select Gallery The newest video you recorded will display as a small window on the screen touch the small window a...

Page 77: ...warm fluorescent Select color effect Select color effect from none mono negative sepia Select exposure Select exposure compensation from assorted figures Select pan shot direction Select pan shot dire...

Page 78: ...allery in the Home screen 2 Depending on how many pictures and videos you ve stored they may take a few minutes to load 3 If you ve stored your pictures and videos in folders on your memory card then...

Page 79: ...rrows then touch an arrow to go to the previous or next picture Picture options You can do the following while in Gallery Note In all the instructions below you can touch hold a picture to open the co...

Page 80: ...p 2 Touch hold an edge of the cropper to reveal the sizing arrows then drag the edge in or out to size Touch drag the center of the cropper to move it within the picture 3 When you are happy with the...

Page 81: ...format You can select the picture or video display sizes from Large or Small Sort order You can select to sort pictures and videos with the newest one first or newest one last Confirm deletions Select...

Page 82: ...81 Shuffle slides Select this check box to shuffle your pictures in the slideshow...

Page 83: ...Supported music formats Your phone will play the following music file formats MP3 MIDI AAC AAC AMR Load music onto your memory card All the music you can listen to on your phone is stored on a memory...

Page 84: ...ng a song artist album or playlist to open the context menu Select Play to begin play and go to the Playback screen You can do the following using the Playback screen Shuffle songs Shuffle plays songs...

Page 85: ...ry screen you can switch to the Playback screen quickly by selecting the lower song bar Playlists You can create as many playlists as you wish Note that the Recently added playlist is a system playlis...

Page 86: ...playlist to open the context menu Select Rename Open the keyboard if not already open and type the new name Select Save Create ringtones from songs You can set any of your songs as a phone ringtone 1...

Page 87: ...em from your memory card Video player Select Video player in the Application screen to open the Video player application The video list appears Watch videos To play a video touch it with your fingerti...

Page 88: ...o search Settings Screen pixel Set the size of video playing Refresh media store Update the media store manually Play circularly Set to play the videos circularly Select play settings Set to play all...

Page 89: ...can make your device become a wireless network launcher 1 Turn on Wireless Tether in the application screen 2 Press the icon in the middle of screen to start Once you start this feature your device w...

Page 90: ...quickly Ringtone The current ringtone selection is shown Select Ringtone to pick another ringtone that will play when the alarm rings When you select a ringtone it plays briefly Vibrate Select this ch...

Page 91: ...Calculator panels Two calculator panels are available basic and advanced Use the Basic panel to enter numbers and perform basic addition subtraction multiplication and division Use the Advanced panel...

Page 92: ...e file name you want to search in this folder then press the magnifier to start searching Back to pre directory Touch the icon of the pre directory on the upper side of the screen to go back to pre di...

Page 93: ...Search channel In FM radio press the Menu key to select Seek enter the frequency of the radio channel and select OK to search Adjust the volume In FM radio press the Volume keys to adjust the volume...

Page 94: ...s turning on the backlight and multimedia player will consume more battery power The standby time is shorter when the network is not available than in the standard status For power saving the backligh...

Page 95: ...al things e g Keys in your pocket away from the contact point of your battery to avoid short circuits 3 Do not bend or open the battery by force 4 Please keep the battery away from water or fire 5 The...

Page 96: ...with the essential requirements and other relevant provisions of Directive 1999 5 EC The equipment was passed The test was performed according to thefollowing European standards EN 301 489 1 V1 8 1 2...

Page 97: ......

Page 98: ...e equipment off and on the user is encouraged to try to correct the interference by one of the following measures Reorient or relocate the receiving antenna Increase the separation between the equipme...

Page 99: ...rdance with the measurement methods and procedures specified in OET Bulletin 65 Supplement C This EUT is compliance with SAR for general population uncontrolled exposure limits in ANSI IEEE C95 1 1999...

Reviews: