background image

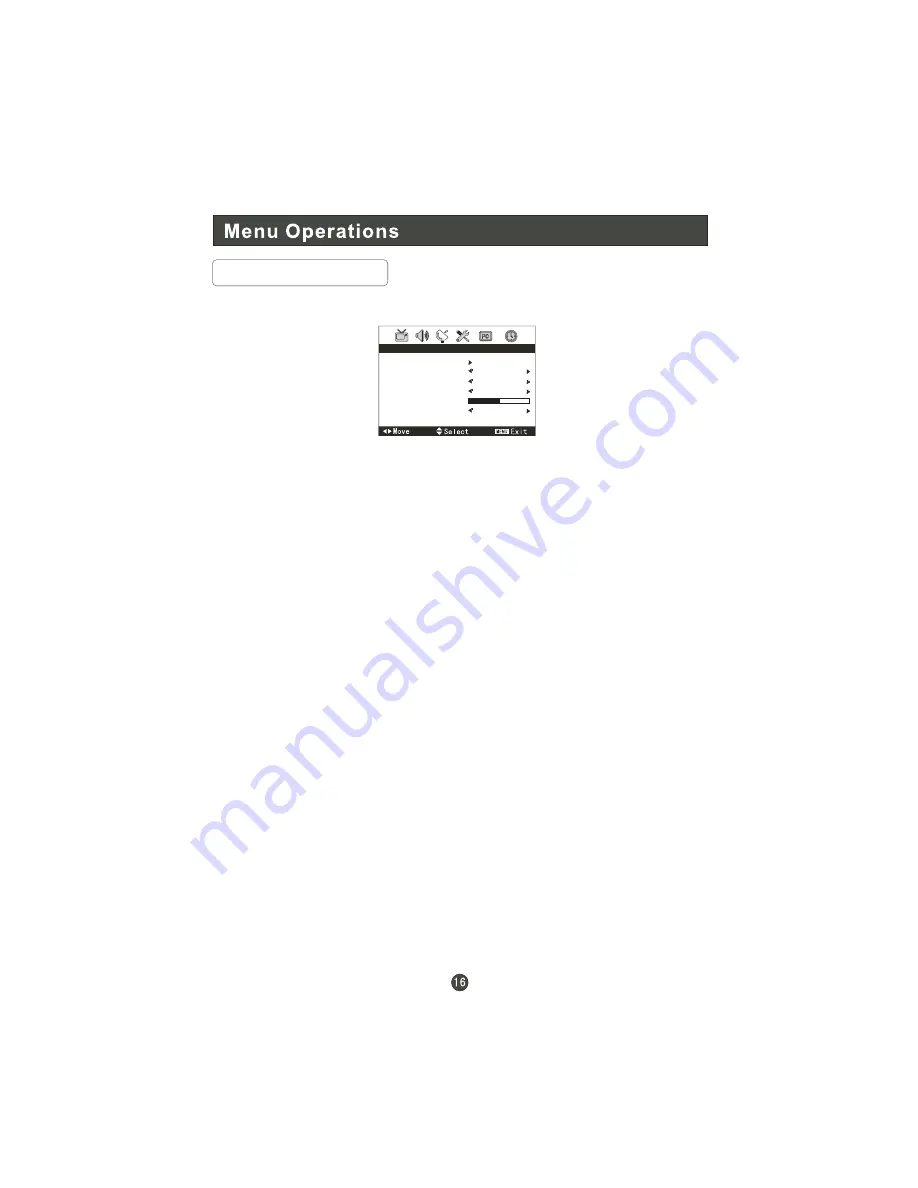
1. Press MENU and VOL+/- button until the following menu appears on the
    screen.

2. Press CH+/- button to enter the turning menu and to go up and down to select 
    the desired option .

3.Press VOL+/- button to adjust the selected option to your preference .

Functions:

Auto Search

: Auto search and save the channel .Press the VOL+ button to start

automatic search function operation. All channels now available will be 
automatically preset in order .After the search has finished, the first program 
number will display on the screen. This search automatically adds only the active 
channels in your area to the TV's memory. It deletes any channels on which there
is no broadcast or a poor signal.

Channel

: Show the channel number.

Color System

: Press VOL+/- to select Auto, PAL, NTSC,  SECAM.

Sound System

: Press VOL+/- to select D/K, M, B/G, I.

Manual Search

:  Manual search and save the channel.

Fine Tune

 : If the image and / or sound received is not very good , you can press 

CH+/- to select Fine Tune in the menu . Then , press VOL+/- button to adjust and 
improve the image quality. Do not use this feature unless reception is poor.

Skip

 : If you want skip a channel , press VOL+/- to select On , and this channel

will be skipped next time when you press CH+/- . You can press the digit buttons 
to select the channel . If you want to restore the channel , select Off.

Tuner Menu Options

AUTO SEARCH
CHANNEL                            2
COLOR SYSTEM

AUTO

SOUND SYSTEM             D/K
MANUAL SEARCH
FINE TUNE

42.12MHZ

TUNING

Note: This menu appears only in TV mode

Summary of Contents for 90509536

Page 1: ...L22R1W...

Page 2: ......

Page 3: ......

Page 4: ......

Page 5: ......

Page 6: ...HDMI...

Page 7: ......

Page 8: ...able 4 Input selection 5 MENU 6 Volume Channel Selection 7 Exit On Screen Display 8 Adjust Picture Mode 9 Select the aspect ratio 10 Not available 11 Not available 12 Not available 13 Not available 14...

Page 9: ......

Page 10: ......

Page 11: ......

Page 12: ......

Page 13: ......

Page 14: ...SCAN MENU VOL EXIT P MODE ARC CCD MTS SAP PIP SWAP MOVE 1 2 3 4 5 6 7 8 9 CH CH VOL OK SLEEP H LOCK 0 HDMI S MODE FREEZE FAVORITE MUTE RECALL INPUT DISPLAY...

Page 15: ...ed Tuner Lock The tuner can be locked Press CH to select Preset Source Preset the source Preset CH Preset the channel Source Lock The source can be locked Press CH to select Child Lock Press CH to sel...

Page 16: ...d the menu for each source is different 1 Press MENU button to display the main menu and VOL to select the main menu 2 Press CH to scroll through the parameters 3 Press VOL buttons to make changes to...

Page 17: ...igher as the number increase Brightness Adjust the brightness of the picture By increasing the level it will add more light to dark parts of the picture and by decreasing the level it will add more da...

Page 18: ...d Function Sound Mode Press VOL to select Standard Theater Music User Balance Adjust the balance of the audio output from left to right When indication value of balance increases toward 50 sound of th...

Page 19: ...On or Off To set On screen will be in blue screen after 3 seconds if there is no signal PIC OPTIMIZE To select the picture optimize You can select LTI CTI BLE DNR LTI Luminance Transient Improvement P...

Page 20: ...n which there is no broadcast or a poor signal Channel Show the channel number Color System Press VOL to select Auto PAL NTSC SECAM Sound System Press VOL to select D K M B G I Manual Search Manual se...

Page 21: ...Time Set the time that the TV goes off automatically On Time Set the time that the TV comes on automatically On Channel Set the channel that the TV comes on automatically Remind Time Set the time that...

Page 22: ...e selected option to your preference Functions H Position Picture horizontal position adjust V Position Picture vertical position adjust Clock Adjust the TFT LCD to match the PC input source Phase Rem...

Page 23: ......

Page 24: ...22 PAL NTSC 2 5W 2 5W COMPONENT input PC input S VIDEO input Audio input Video input Antenna input HDMI input A V output PC Audio in Headphone 110 240V AC 50 60 Hz 70W External jacks...

Page 25: ......

Page 26: ......

Page 27: ......

Page 28: ...V0 1 0090509536...

Reviews: