background image

Drive Axle Removal

  WARNING 

When  putting  the  lift  truck  on  blocks,  make  sure
the  surface  is  solid,  even,  and  level.  Any  blocks
used  to  support  the  lift  truck  must  be  solid,  one-
piece units.

1. 

Put blocks on each side (front and back) of the
steering  tires  to  prevent  movement  of  the  lift
truck.

2. 

Raise  the  lift  truck  and  put  blocks  under  the
frame so that the drive wheels do not touch the
floor.  Put  blocks  under  the  counterweight  for
stability.

3. 

Remove the mast assembly as described in the
section

Mast  Repairs,  2-  and  3-Stage  Masts  (S/N
A513,  A514,  A613,  A614,  A702,  A703,  A704,
A705,  A706,  A707,  A751,  A752,  B513,  B514,
B586,  B587,  B588,  B589,  B590,  B591,  B749,
B750,  B751,  B752,  B753,  B754)
  4000SRM1250
for lift truck models

• H6.0FT,  H7.0FT  (H135FT,  H155FT)

(H006, J006, K006)

Mast  Repair  (S/N  A513,  A514,  A613,  A614,
A643, A644, A683, A684)
 4000SRM1406 for lift
truck models

• H8.0FT,  H8.0FT9,  H9.0FT  (H170FT,

H175FT36, H190FT) (A299, B299)

.

Mast  Repair  (S/N  A613,  A614,  A643,  A644,
A683, A684)
 4000SRM1956for lift truck models

• H6.0FT,  H7.0FT  (H135FT,  H155FT)

(L006)

Mast  Repair  (S/N  A613,  A614,  A643,  A644,
A683, A684)
 4000SRM1956 for lift truck models

• H8.0FT,  H8.0FT9,  H9.0FT  (H170FT,

H175FT36, H190FT) (C299)

.

  WARNING 

Completely remove air from tires before removing
them  from  lift  truck.  Air  pressure  in  tires  can
cause  tire  and  rim  parts  to  explode,  which  can
cause  serious  injury  or  death.  Never  loosen  nuts
that  hold  together  inner  and  outer  wheel  halves
when there is air pressure in tire.

4. 

Remove  the  air  from  the  tires  and  remove  the
wheels.

NOTE:   

Perform  Step  5  through  Step  23  for  lift

truck  models  H6.0FT,  H7.0FT  (H135FT,  H155FT)
(H006, J006, K006, L006), .

5. 

Remove the drive axle main housing center fill/
level plug and O-ring. See Figure 2.

6. 

Remove  the  oil  fill  plugs  and  O-rings  on  both
sides of the drive axle. See Figure 2.

7. 

Remove the oil drain plugs on both sides of the
drive  axle.  Drain  the  oil  into  a  suitable  con-
tainer. See Figure 2.

8. 

Remove  the  drive  axle  main  housing  center
drain  plug.  Drain  the  oil  into  a  suitable  con-
tainer. See Figure 2.

Drive Axle Removal

1400 SRM 1344

2

Summary of Contents for H135FT

Page 1: ...Hyster J006 H135FT H155FT Forklift Service Repair Manual ...

Page 2: ...DRIVE AXLE AND DIFFERENTIAL ASSEMBLY REPAIR WET BRAKE H6 0FT H7 0FT H135FT H155FT H006 J006 K006 L006 H8 0FT H8 0FT9 H9 0FT H170FT H175FT36 H190FT A299 B299 C299 PART NO 1661537 1400 SRM 1344 ...

Page 3: ...odic Maintenance section Keep the unit clean and the working area clean and orderly Use the correct tools for the job Keep the tools clean and in good condition Always use HYSTER APPROVED parts when making repairs Replacement parts must meet or ex ceed the specifications of the original equipment manufacturer Make sure all nuts bolts snap rings and other fastening devices are removed before using ...

Page 4: ...Inspect 42 Assemble and Install 42 Differential Repair 52 Remove 52 Disassemble 57 Clean and Inspect 63 Assemble 63 Install 70 Bevel Pinion 75 Remove and Disassemble 75 Clean and Inspect 79 Assemble and Install 80 Drive Axle Installation 89 Special Tools 101 Torque Specifications 102 This section is for the following models H6 0FT H7 0FT H135FT H155FT H006 J006 K006 L006 H8 0FT H8 0FT9 H9 0FT H170...

Page 5: ... THE QUALITY KEEPERS HYSTER APPROVED PARTS ...

Page 6: ...more information Please click here Then get the complete manual NOTE If there is no response to click on the link above please download the PDF document first and then click on it Have any questions please write to me admin servicemanualperfect com ...

Page 7: ... repair of the drive axle differential and the wet disc brakes IDENTIFICATION PLATE See Figure 1 1 DANA PART NUMBER 2 DANA SERIAL NUMBER 3 HYSTER PART NUMBER 4 AXLE OVERALL RATIO Figure 1 Identification Plate 1400 SRM 1344 General 1 ...

Page 8: ... A613 A614 A643 A644 A683 A684 4000SRM1956for lift truck models H6 0FT H7 0FT H135FT H155FT L006 Mast Repair S N A613 A614 A643 A644 A683 A684 4000SRM1956 for lift truck models H8 0FT H8 0FT9 H9 0FT H170FT H175FT36 H190FT C299 WARNING Completely remove air from tires before removing them from lift truck Air pressure in tires can cause tire and rim parts to explode which can cause serious injury or...

Page 9: ...4 OIL FILL PLUG LEFT SIDE 5 OIL DRAIN PLUG LEFT SIDE 6 DRIVE AXLE MAIN HOUSING CENTER FILL LEVEL PLUG 7 OIL DRAIN PLUG RIGHT SIDE Figure 2 Drive Axle Drain and Fill Level Plugs for Lift Truck Models H6 0FT H7 0FT H135FT H155FT H006 J006 K006 L006 1400 SRM 1344 Drive Axle Removal 3 ...

Page 10: ...onnect the brake supply line from the brake line cross fitting on the drive axle See Figure 3 11 Disconnect the accumulator brake booster sup ply line from the manifold on the drive axle See Figure 3 12 Disconnect the brake booster return line from the manifold on the drive axle See Figure 3 NOTE Note placement of hose clamps prior to re moval of hoses to aid in installation 13 Disconnect the driv...

Page 11: ...Figure 3 Drive Axle and Brake Cooling Lines and Brake Lines for Lift Truck Models H6 0FT H7 0FT H135FT H155FT H006 J006 K006 L006 1400 SRM 1344 Drive Axle Removal 5 ...

Page 12: ...four mounting capscrews and washers from the drive axle See Figure 4 18 Remove blocks and lower the drive axle assem bly Pull axle forward and away from frame 19 Place blocks under the differential assembly 20 Disconnect the cooling hoses from the manifold and drive axle Remove the cooling hoses See Figure 5 21 Disconnect the brake cooling lines from the manifold and the drive axle Remove the brak...

Page 13: ...E LEFT SIDE 5 SOCKET HEAD SCREWS 6 CROSS FITTING 7 BRAKE COOLING LINE RIGHT SIDE 8 BRAKE LINE RIGHT SIDE 9 DRIVE AXLE COOLING RETURN HOSE RIGHT SIDE Figure 5 Manifold and Cooling Hoses Removal for Lift Truck Models H6 0FT H7 0FT H135FT H155FT H006 J006 K006 L006 1400 SRM 1344 Drive Axle Removal 7 ...

Page 14: ... Brake System 1800SRM1247 for lift truck mod els H8 0FT H8 0FT9 H9 0FT H170FT H175FT36 H190FT A299 B299 Wet Brake System 1800SRM1977 for lift truck models H6 0FT H7 0FT H135FT H155FT L006 Wet Brake System 1800SRM1977 for lift truck models H8 0FT H8 0FT9 H9 0FT H170FT H175FT36 H190FT C299 NOTE Note placement of hose clamps prior to re moval of hoses to aid in installation 28 Disconnect load sense i...

Page 15: ...2 DRIVE AXLE MAIN HOUSING CENTER FILL PLUG 3 RIGHT SIDE DRAIN PLUG 4 LEFT SIDE DRAIN PLUG Figure 6 Drive Axle Drain and Fill Plugs for Lift Truck Model H8 0FT H8 0FT9 H9 0FT H170FT H175FT36 H190FT A299 B299 C299 1400 SRM 1344 Drive Axle Removal 9 ...

Page 16: ...Figure 7 Drive Axle Manifold Cooling Hoses and Brake Lines for Lift Truck Model H8 0FT H8 0FT9 H9 0FT H170FT H175FT36 H190FT A299 B299 C299 Drive Axle Removal 1400 SRM 1344 10 ...

Page 17: ...E ASSEMBLY 5 ACCUMULATOR CHARGE VALVE 6 HYDRAULIC PRESSURE SUPPLY HOSE 7 HYDRAULIC RETURN HOSE 8 COOLING RETURN HOSE 9 MANIFOLD 10 DRIVE AXLE 11 COOLING RETURN TO TRANSMISSION HOSE 12 COOLING SUPPLY FROM TRANSMISSION HOSE 13 AXLE VENT LINE 14 COOLING SUPPLY LINES 15 SOCKET HEAD SCREW 16 BRAKE LINE 1400 SRM 1344 Drive Axle Removal 11 ...

Page 18: ...ransmission hose from manifold See Figure 7 39 Disconnect cooling supply from transmission hose from manifold See Figure 7 40 Disconnect axle vent line from drive axle See Figure 7 41 Remove cooling supply lines from manifold and drive axle See Figure 7 42 Remove two socket head screws and manifold from drive axle See Figure 7 43 Disconnect brake lines from drive axle Remove brake lines with cross...

Page 19: ...STUD 13 BEARING 14 WHEEL HUB 15 BEARING 16 SEAL 17 CAPSCREW 18 OUTER AXLE SHAFT 19 O RING 20 PLANETARY GEAR CARRIER 21 CENTERING RING 22 RETAINING SCREW 23 SUN GEAR 24 DRAIN PLUG 25 RETAINING RING 26 PLANETARY GEAR Figure 9 Planetary Reduction Gear Assembly for Lift Truck Models H6 0FT H7 0FT H135FT H155FT H006 J006 K006 L006 1400 SRM 1344 Planetary Reduction Gear Repair 13 ...

Page 20: ...NG RING 15 PLANETARY GEAR 16 SUN GEAR 17 CENTERING RING 18 PLANETARY GEAR CARRIER 19 PLUG 20 MAGNET PLUG 21 HALF SHAFT SHORT OR LONG 22 AXLE CASE RH 23 SOCKET HEAD SCREW 24 RETAINING SCREW 25 CAPSCREW 26 OUTER BEARING Figure 10 Planetary Reduction Gear Assembly for Lift Truck Model H8 0FT H8 0FT9 H9 0FT H170FT H175FT36 H190FT A299 B299 C299 Planetary Reduction Gear Repair 1400 SRM 1344 14 ...

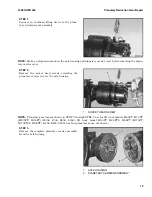
Page 21: ... carrier cover to the axle housing 1 SOCKET HEAD SCREW NOTE Planetary gear images shown in STEP 3 through STEP 9 are for lift truck models H6 0FT H7 0FT H135FT H155FT H006 J006 K006 L006 lift truck model H8 0FT H8 0FT9 H9 0FT H170FT H175FT36 H190FT A299 B299 C299 has four planetary gears not shown STEP 3 Remove the complete planetary carrier assembly from the axle housing 1 AXLE HOUSING 2 PLANETAR...

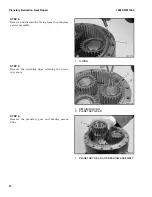
Page 22: ...er assembly 1 O RING STEP 5 Remove the retaining rings retaining the plane tary gears 1 RETAINING RING 2 PLANETARY GEAR STEP 6 Remove the planetary gear and bearing assem blies 1 PLANETARY GEAR AND BEARING ASSEMBLY Planetary Reduction Gear Repair 1400 SRM 1344 16 ...

Page 23: ...ng gear 1 RING GEAR STEP 8 Remove the retaining screw and centering ring 1 RETAINING SCREW 2 CENTERING RING STEP 9 Remove the planetary gear carrier 1 PLANETARY GEAR CARRIER 1400 SRM 1344 Planetary Reduction Gear Repair 17 ...

Page 24: ...he outer axle shaft to the wheel hub 1 CAPSCREW STEP 11 Using a plastic hammer tap the outer axle shaft out of the wheel hub support and wheel hub 1 OUTER AXLE SHAFT STEP 12 Remove and discard the O ring from the outer axle shaft 1 O RING Planetary Reduction Gear Repair 1400 SRM 1344 18 ...

Page 25: ... with a minimum outside diameter of 99 mm 3 90 in and maximum outside diameter of 118 mm 4 65 in for the puller to push against the end of the wheel hub support STEP 15 Using a suitable puller and cylindrical block dis engage the wheel hub support from the wheel hub 1 WHEEL HUB 2 WHEEL HUB SUPPORT 1400 SRM 1344 Planetary Reduction Gear Repair 19 ...

Reviews: