


You can use other cooking utensils, but they must
be heat and flame resistant. You can also use
glass dishes, cake molds, special oven trays that
are appropriate for use in oven. Pay attention to
the using instructions by the manufacturer of
those accessories.
In case small size dishes are used, place the dish
onto the chrome grid, it will completely be on the
middle part of the grid.
Do not
leave an oven tray or dish in a cold
environment right after cooking.
Do not
put onto
cold and wet surfaces. Place on a dry kitchen
cloth or dish cross, ensure it to cools slowly,
otherwise the glass tray or dish may be broken.
If you will grill in your oven; we recommend you
use the grill that was given in the tray provided (If
your product includes this material). If you use the
big wire grill; put a tray onto one of the lower
shelves for oils to be collected. Also put some
water into it for ease of cleaning.
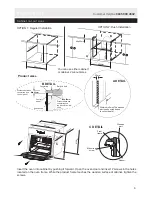
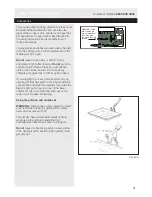
Using the grill pan and handle set
WARNING
-
Always use an oven glove to protect
your hand when using the grill as all the metal
parts can become very hot!
The grill pan has a detachable handle. Ensure
when using the grill pan handle that it is
centralized and secure as shown in the figure.
Do not
leave the handle in position when grilling.
If the handle is left in position when grilling, it will
get very hot.
14
Customer Helpline
0845 600 4632
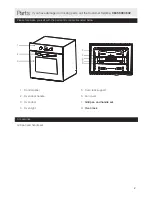
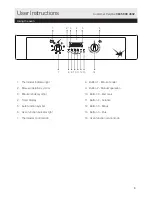
User Instructions
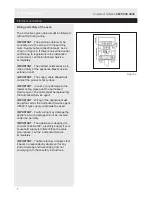
Accessories
Figure 6
WARNING- Fit the
grid correctly into
any correspondent
rack in the oven
cavity and push it to
the end.
Summary of Contents for AE6BSMP
Page 19: ...52093022 01 13...


