

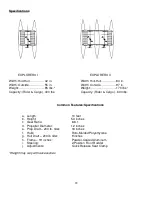


19
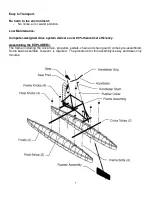
Drive Train & Friction Lock (FL) Replacement Instructions
Miscellaneous
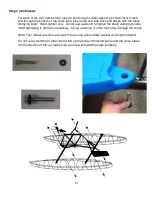
1. For best working conditions, place the
HYDROBIKE
(frame & floats) on a workbench so that
the DT can be rotated easily during assembly.
2. The left side of the bike is the left side when riding the bike.
3. Tools required: Phillips Screwdriver, pliers and crescent wrench.
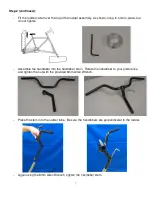
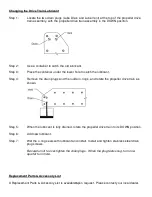
To Remove the Drive Train (DT)
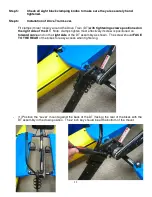
1.
Remove the chain by rotating to the up position
2.
Remove the chain-guard screws on the left side of the bike using pliers to hold the spacers
from turning.
3.
Remove four Philips head screws next to the 16-tooth sprocket.
4.
By pushing with the heal of your hand, push in on the sprocket to loosen the Friction Lock (FL),
or rubber-like bushing, assembly.
5.
Pull the FL over the 16-tooth sprocket. The FL is not centered over the sprocket, so pull on the
appropriate side of the FL. (Do NOT attempt to remove the 16-tooth sprocket.)
6.
Remove the drive train from the left side of the bike frame.
7.
All the old DT parts must be returned to
ShoreMaster
to complete the warranty.
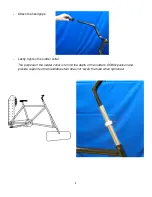
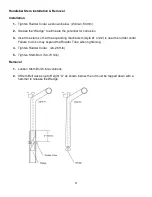
To Install the Replacement Drive Train (DT)
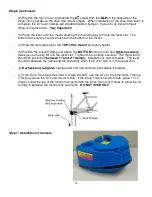
1.
Mark the orientation of the FL to DT before completing step 2 so that the four screws go back
in the same holes in the DT for proper alignment.
2.
Remove the four screws next to the 16-tooth bike sprocket and remove the FL.
3.
Place a thin film of your
HYDROBIKE
chain lubricant in the inside of the FL to aid in the
installation.
4.
Place the DT through the frame from the left side of the bike.
5.
Place the FL over the 16-tooth sprocket and push in from the right side.
6.
Push on the FL with a “flat” tool (or handle of crescent wrench) and rotate the DT at the same
time to fully seat the FL.
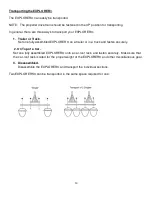
7.
If it is too difficult to press the FL in, remove two inches of tape at a time (if too loose, add two
inches) and repeat steps 4-7.


