Hydro-Force Olympus M500H, Operating Manual
The Hydro-Force Olympus M500H is a powerful, high-pressure cleaning machine designed to tackle the toughest cleaning tasks. To ensure optimal performance and usage, it is essential to refer to the comprehensive Operating Manual. Easily download the user manual for free from manualshive.com and unlock the full potential of this exceptional cleaning equipment.
Share
Download


Reviews:
No comments
Related manuals for Olympus M500H

HD2200
Brand: Janome Pages: 48

Ellisimo BLSO
Brand: Baby Lock Pages: 364

3030
Brand: Janome Pages: 80

B 60 W Bp
Brand: Kärcher Pages: 312

OF5700
Brand: Oki Pages: 16

FURY 1500P
Brand: Pacific Pages: 8

GOV-1004-24
Brand: Garudan Pages: 79

VN1715
Brand: Viper Pages: 9

BD 44 180
Brand: Kärcher Pages: 54

HD9
Brand: Janome Pages: 52

WAE24367UK
Brand: Bosch Pages: 36

Stratagy ES48
Brand: Toshiba Pages: 2

Stratagy iES16
Brand: Toshiba Pages: 12

FT-9005
Brand: Toshiba Pages: 40

FT-9003
Brand: Toshiba Pages: 40
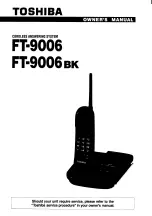
FT-9006
Brand: Toshiba Pages: 44

FT-8981
Brand: Toshiba Pages: 50

FT-8981
Brand: Toshiba Pages: 52


