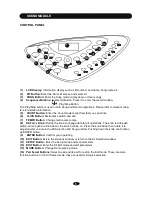
BACK PANEL
SOUND MODULE
1
2
3
4
6
7
8
5
9
10
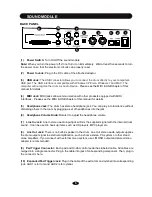
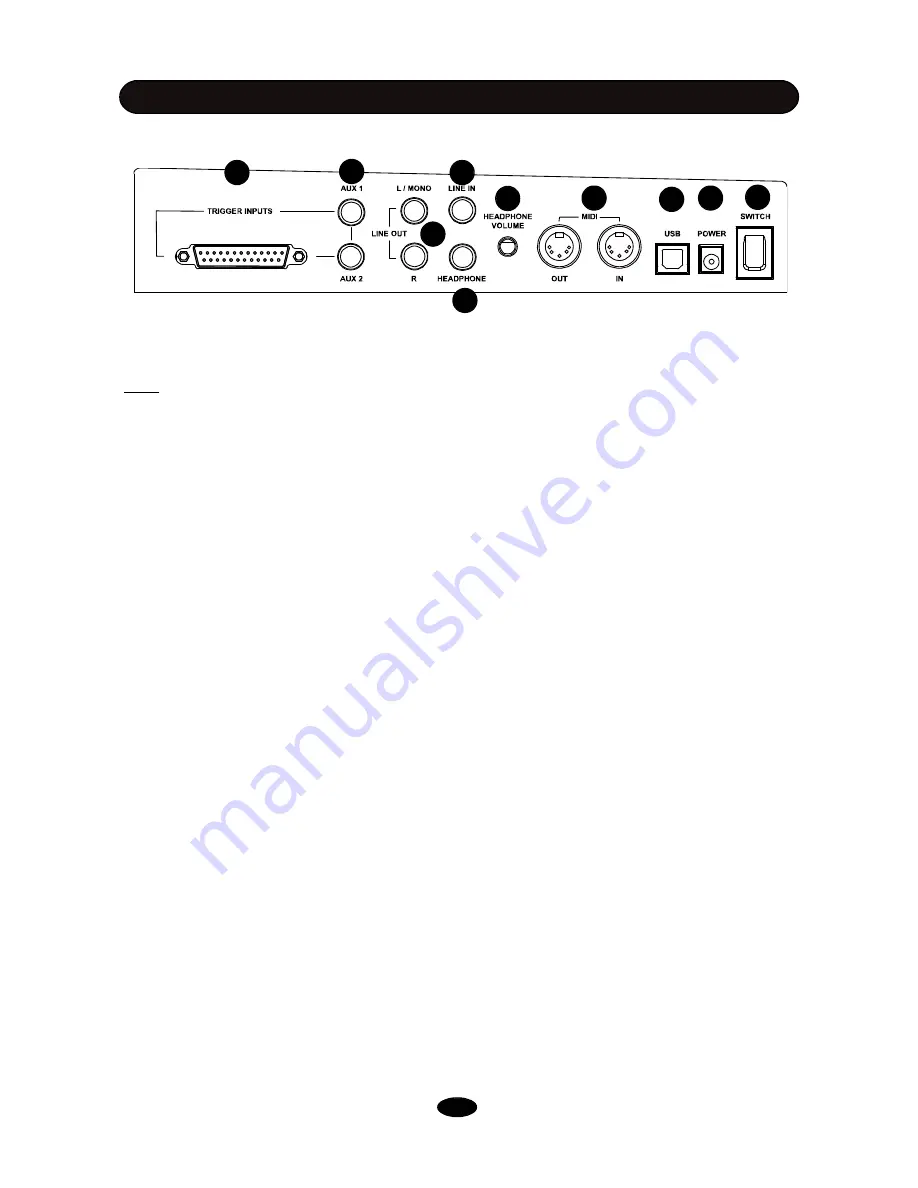
(1) Power Switch:
Turn On/Off the sound module
Note
:
When you turn the power off, do not turn it on immediately. Wait at least five seconds to turn
the power on so that the electronic circuits can properly reset.
(2) Power In Jack:
Plug in the DC cable of the attached adaptor
(3) USB Jack:
The USB connector allows you to connect the drum directly to your computer
’
s
USB port. The USB interface is compatible with Windows XP/Vista, Windows 7 and MAC. The
computer will recognize the drum as Audio Device.
Please see the MIDI & USB chapter of this
manual for details
(4) MIDI Jack:
MIDI jacks allow communication with other products equipped with MIDI
interfaces. Please see the MIDI & USB chapter of this manual for details
(5) Headphone Jack:
The drum has stereo headphone jack. You can play in total silence without
disturbing others in the room by plugging a set of headphones into the jack.
(6) Headphone Volume Knob:
Rotate it to adjust the headphone volume
(7) Line In Jack:
Line In stereo audio input jack will mix the supplied signal with the internal drum
sound. It can be used to hook up items such as CD players, MP3 player etc.
(8) Line Out Jack:
There is no built-in speaker in the drum. Line Out stereo audio output supplies
the drum output signal to external amplification, such as home stereo, PA system or other stand
alone amplifiers. If you connect with external mono system, use L/MONO output and stereo/mono
adapter is recommended.
(9) Pad Trigger Connector:
Each pad and Hi-Hat control pedal has labeled cable. All cables are
merged into a single connector. Plug in the cable into jack of corresponding component, Then, plug in
the connector here.
(10) Expanded Pad Trigger Jack:
Plug in the cable of the extra tom and cymbal into corresponding
jack. AUX1 is for tom and AUX2 is for cymbal.
6


