background image

37

La operación de cualquier tractor puede hacer que salten objetos extraños dentro de sus ojos, lo 

que puede producir daños graves en éstos. Siempre use anteojos de seguridad o pro tec cio nes para 

los ojos mientras opere su tractor o cuando haga ajustes o reparaciones. Recomendamos gafas de 

seguridad o una máscara de visión amplia de seguridad usada sobre las gafas.

COMO USAR SU TRACTOR

PARA AJUSTAR EL FRENO DE ES TA CIO NA MIEN TO 

(Vea Fig. 4)

Su tractor viene equipado con un interruptor sen sor que exige la 

presencia del operador. Cuando el motor está funcionando, si el 

operador trata de bajarse del asiento sin primero aplicar el freno 

de estacionamiento, se apagará el motor.
• 

Presione el pedal (C) del freno/embrague completamente y 

sostengalo. 

• 

Jale hacia arriba la palanca del freno de mano (C) y man-

téngala en esa posición; suelte  gradualmente el pedal del 

embrague/freno (B), y luego suelte la palanca del freno de 

mano. El pedal tiene que quedar en la posición de freno. 

Asegúrese que el freno de estacionamiento va a sujetar el 

tractor en forma segura.

Fig. 4

Fig. 6

Fig. 5

PARA USAR EL CONTROL DE LA ACELERACIÓN (D) 

(Vea Fig. 6)

Siempre opere el motor a una aceleración completa.
• 

Si el motor funciona a una velocidad inferior a la máxima 

(rápida), su rendimiento disminuye.

• 

El rendimiento óptimo se obtiene a la velocidad máxima 

(rápida).

B

C

OPERACIÓN

(


)


INTERRUPTOR 

EMBRAGUE DEL 

ACCESORIO

 “DESENGANCHADO”

(


)


INTERRUPTOR 

EMBRAGUE DEL 

ACCESORIO 

“ENGANCHAR”

MOVERSE HACIA ADELANTE Y HACIA ATRÁS 

(Vea Fig. 7)

La dirección y la velocidad de movimientos están controlados 

por los pedales de marcha adelante y atrás. 
•  Poner en marcha el tractor y quitar el freno de mano. 
• 

Apretar lentamente el pedal marcha adelante (K) y atrás (L) 

para iniciar el movimiento. Más se aprieta el pedal y mayor 

es la velocidad.

D

F

N

PARA USAR EL CONTROL DE ESTRANGULACIÓN 

(N) (Vea Fig. 6)

Use el control de estrangulación cuando esté haciendo arrancar 

un motor frío.  No lo use para hacer arrancar un motor caliente.
• 

Para enganchar el control de estrangulación (N), tire la 

manilla hacia afuera.  Lentamente, empuje la manilla hacia 

adentro para desengancharlo.

PARADA 

(Vea Fig. 5)

CUCHILLAS DE LA SEGADORA -
• 

Mueva el control del embrague del accesorio a la posición 

"DESENGANCHADO" (

).

IMPULSIÓN DE RECORRIDO -
• 

Para parar el mecanismo impulsor, presione el pedal del 

freno/embrague completamente.

IMPORTANTE

: LOS PEDALES DE MARCHA ADELANTE Y 

ATRÁS VUELVEN A LA POSICIÓN NEUTRA CUANDO NO 

ESTÁN APRETADOS. 
MOTOR -
•   Mueva el control de aceleración (D) a la posición lenta. 

AVISO: 

No mover el control de aceleración a la posición lenta y 

permitir que el motor esté inactivo antes de parar puede causar 

que el motor tenga un "pistoneo".

• 

Gire la llave de ignición (F) a la posición de apagado “STOP” 

y remueva la llave al abandonar el tractor para evitar el uso 

no autorizado.

• 

Nunca use la estrangulación para parar el motor.

IMPORTANTE

: DEJANDO EL INTERRUPTOR DE LA IGNICIÓN EN 

CUALQUIER POSICIÓN OTRA QUE “STOP” CAUSAR I QUE LA BATERÍA 
SE DESCARGUE (MUERTA).

AVISO:

 Bajo ciertas condiciones, cuando el trac tor está parado 

con el motor andando en vacío, los gases de escape del mo-

tor caliente pueden hacer que el césped se ponga “café.” Para 

eliminar esta posibilidad, siempre pare el motor cuando pare el 

tractor en áreas con césped.

PRECAUCIÓN: Siempre pare el tractor 

completamente, según se ha descrito ante-

riormente, antes de abandonar la posición 

del operador.

Summary of Contents for TS 248XD

Page 1: ...voidtheproductwarranty Estamáquinapuedeutilizargasolinaconuncontenido dehastael10 deetanol E10 Elusodeunagasolina que supere el 10 de etanol E10 anulará la garantía del producto the product warranty Please read the operator s manual carefully and make sure you understand the instructions before using the machine Por favor lea cuidadosamente y comprenda estas intrucciones antes de usar esta maquina...

Page 2: ...rate the machine while under the influence of alcohol or drugs Watchfortrafficwhenoperatingnearorcrossingroadways Use extreme caution when loading or unloading the ma chine into a trailer or truck Always wear eye protection when operating machine Use ear protectors to avoid damage to hearing Data indicates that operators age 60 years and above are involved in a large percentage of riding mower rel...

Page 3: ...G OF GASOLINE To avoid personal injury or property damage use extreme care in handling gasoline Gasoline is extremely flammable and the vapors are explosive Extinguish all cigarettes cigars pipes and other sources of ignition Use only approved gasoline container Neverremovegascaporaddfuelwiththeenginerunning Allow engine to cool before refueling Never fuel the machine indoors Never store the machi...

Page 4: ...rts and or open toed footwear Always let someone know you are outside mowing WARNING This tractor is equipped with an internal combustion engine and should not be used on or near any unimproved forest covered brush covered or grass covered land unless the engine s exhaust system is equipped with a spark arrester meeting applicable local or state laws if any If a spark arrester is used it should be...

Page 5: ...be connected first to prevent sparking from accidental grounding NOTE If this battery is put into service after month and year indicated on label label is located between terminals charge battery for minimum of one hour at 6 10 amps See BATTERY in the Maintenance section of this manual for charging instructions Determine battery location Battery location will be under the seat or the hood Lift sea...

Page 6: ...intheServiceandAdjustmentssec tionofthismanual Verifythatthebeltsareroutedcorrectly CHECK BRAKE SYSTEM Afteryoulearnhowtooperateyourtractor checktoseethat the brake is operating properly See TO CHECK BRAKE in the Service and Adjustments section of this manual CHECKLIST BEFORE YOU OPERATE YOUR NEW TRACTOR WE WISH TO ENSURE THAT YOU RECEIVE THE BEST PERFORMANCE AND SATISFACTION FROM THIS QUALITY PRO...

Page 7: ...tes a hazard which if not avoided will result in death or serious injury WARNING indicates a hazard which if not avoided could result in death or serious injury CAUTION indicates a hazard which if not avoided might result in minor or moderate injury CAUTION when used without the alert symbol indicates a situation that could result in damage to the tractor and or engine FIRE indicates a hazard whic...

Page 8: ...to engage the mower blades or other attachments mounted to your tractor F IGNITION SWITCH Used for starting and stopping the engine G REVERSE OPERATION SYSTEM ROS ON POSITION Allows operation of mower or other powered attachment while in reverse H LIGHT SWITCH Turns the headlights on and off J CRUISE CONTROL LEVER Used to set forward movement of tractor at desired speed without holding the forward...

Page 9: ...rm engine To engage choke control N pull knob out Slowly push knob in to disengage D F N GROUND DRIVE To stop ground drive depress brake pedal into full BRAKE position IMPORTANT FORWARD AND REVERSE DRIVE PEDALS RETURN TO NEUTRAL POSITION WHEN NOT DEPRESSED ENGINE Move throttle control D to slow position NOTE Failure to move throttle control to slow position and allowing engine to idle before stopp...

Page 10: ...derate growth For best cutting performance grass over 6 152 4 mm in height should be mowed twice Make the first cut relatively high the second to desired height TO OPERATE MOWER Your tractor is equipped with an operator presence sensing switch Any attempt by the operator to leave the seat with the engine running and the attachment clutch engaged will shut off the engine You must remain fully and c...

Page 11: ...ngaged Do not mow in reverse unless absolutely necessary USING THE REVERSE OPERATION SYSTEM Only use if you are certain no children or other bystanders will enter the mowing area Depress brake pedal all the way down Withenginerunning turnignitionkeycounterclockwise to ROS ON position Look down and behind before and while backing Slowly depress reverse drive pedal to start movement When use of the ...

Page 12: ...slow position Disengage parking brake CAUTION At any time during step 4 there may be movement of the drive wheels TO START ENGINE See Fig 3 When starting the engine for the first time or if the engine has run out of fuel it will take extra cranking time to move fuel from the tank to the engine Ensurefreewheelcontrolisinthetransmissionengaged position Sit on seat in operating position depress brake...

Page 13: ...and leave undesirable clumps Allow grass to dry before mowing 4 Depress forward drive pedal to full forward position hold for five 5 seconds and release pedal Depress reverse drive pedal to full reverse position hold for five 5 seconds and release pedal Repeat this procedure three 3 times 5 Shut off engine and set parking brake 6 Engage transmission by placing freewheel control in engaged position...

Page 14: ...02501 MANDREL ZERKS ENGINE FRONT WHEEL BEARING ZERK STEERING SECTOR GEAR TEETH FRONT WHEEL BEARING ZERK SPINDLE ZERK SPINDLE ZERK MAINTENANCE T R A C T O R E N G I N E 3 2 2 6 1 2 2 2 1 2 4 5 1 2 BEFORE EACH USE EVERY 25 HOURS EVERY 8 HOURS EVERY 100 HOURS EVERY SEASON BEFORE STORAGE EVERY 50 HOURS 1 Change more often when operating under a heavy load or in high ambient temperatures 2 Service more...

Page 15: ...the engine is running with the ignition switch in the ROS ON position and the attachment clutch engaged any attempt by the operator to shift into reverse should NOT shut off the engine BLADE CARE Forbestresultsmowerbladesmustbekeptsharp Replace bent or damaged blades BATTERY Yourtractorhasabatterychargingsystemwhichissufficient for normal use However periodic charging of the battery with an automo...

Page 16: ...il Install the drain tube onto the valve Open drain valve by using a 10mm wrench turning counterclockwise ENGINE OIL FILTER Replace the engine oil filter every season or every other oil change if the tractor is used more than 100 hours in one year NOTE If needed remove lower dash covers using steps from Lower dash cover removal section of this manual TEMPERATURE RANGE ANTICIPATED BEFORE NEXT OIL C...

Page 17: ...on or after every 100 hours of operation whichever occurs first Spark plug type and gap setting are shown in PRODUCT SPECIFICATIONS section of this manual AIR FILTER Your engine will not run properly using a dirty air filter Service air cleaner more often under dusty conditions See engine manual CLEAN AIR SCREEN The air screen is over the air intake blower located on top of engine The air screen m...

Page 18: ...itting in the operator s position on the tractor re start the engine and place the throttle lever in the Fast position IMPORTANT Rechecktheareatoensuretheareaisclear Ensure no children are in the area while cleaning the deck 7 Move the tractor s attachment clutch control to the ENGAGED position Remainintheoperator sposition with the cutting deck engaged until the deck is cleaned 8 Move the tractor...

Page 19: ... from under right side of tractor TO INSTALL MOWER See Fig 22 29 Ensuretractorisonlevelsurfaceandengageparkingbrake Lower attachment lift lever to its lowest position CAUTION Lift lever is spring loaded Have a tight grip on lift lever lower it slowly and engage in lowest position NOTE Ensure mower side suspension arms A are point ing forward before sliding mower under tractor Slide mower under tra...

Page 20: ... BELT in this section of the manual D C Fromrightsideofmower firstinsert90 endofanti sway bar S into hole in transaxle bracket T located near left rear tire in front of transaxle NOTE Flashlight may be helpful NOTE Depending on model bracket T may be differ ent than shown but hole for anti sway bar will be in same position location ANTI SWAY BAR S LOCATION TRANSAXLE BRACKET T LOCATED BETWEEN REAR ...

Page 21: ...djustment is necessary see steps in Visual Adjust ment instructions above Recheck measurements adjust if necessary until both sides are equal NOTE Each full turn of the adjustment nut will change mower height about 1 8 3 1 mm Recheck measurements adjust if necessary until front tip of blade is 1 8 to 1 2 3 1 to 12 7 mm lower than the rear tip Hold adjustment nut in position with wrench and tighten...

Page 22: ...35 36 NOTE For ease in installing the deck belt refer to the routing decal on the cutting deck Place the belt around all pulleys Double check belt routing to make sure it matches the routing decal and that the belt does not have any twist Correct if needed Connect spring to eyebolt Adjust belt tension until spring is extended to a length of 5 75 14 6 cm Loosen inner adjustment nut Turn outer adjus...

Page 23: ...t lose Repair tire and reassemble On rear wheels only align grooves in rear wheel hub and axle Insert square key Replace washers and snap retaining ring securely in axle groove Replace axle cover NOTE Tosealtirepuncturesandpreventflattiresduetoslow leaks tire sealant may be purchased from your local parts dealer Tire sealant also prevents tire dry rot and corrosion Fig 38 RETAINING RING WASHERS SQ...

Page 24: ...s etc Positive terminal must be connected first to prevent sparking from accidental grounding Lift hood to raised position Remove terminal cover Disconnect BLACK battery cable then RED battery cable and carefully remove battery from tractor Install new battery with terminals in same position as old battery Reinstall terminal cover Fig 40 POSITIVE RED CABLE TERMINAL COVER NEGATIVE BLACK CABLE TRANS...

Page 25: ...D AND GRILL ASSEMBLY See Fig 41 Raise hood Unsnap headlight wire connector Stand in front of tractor Grasp hood at sides tilt toward engine and lift off of tractor To replace reverse above procedure Fig 41 07002 HEADLIGHT WIRE CONNECTOR HOOD ...

Page 26: ...astic cannot breathe which allows condensation to form and will cause your tractor to rust IMPORTANT NEVER COVER TRACTOR WHILE ENGINE AND EXHAUST AREAS ARE STILL WARM Immediately prepare your tractor for storage at the end of the season or if the tractor will not be used for 30 days or more WARNING Neverstorethetractorwith gasoline in the tank inside a building where fumes may reach an open flame ...

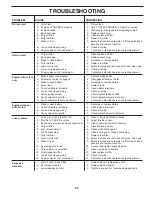
Page 27: ...heck replace ignition switch 8 Faulty solenoid or starter 8 Check replace solenoid or starter 9 Faulty operator presence switch es 9 Contact an authorized service center department Engine clicks but will not start 1 Weak or dead battery 1 Recharge or replace battery 2 Corroded battery terminals 2 Clean battery terminals 3 Loose or damaged wiring 3 Check all wiring 4 Faulty solenoid or starter 4 Ch...

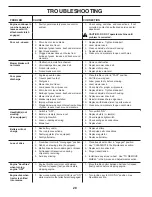
Page 28: ...e mower drive belt 9 Blades improperly installed 9 Reinstall blades sharp edge down 10 Improper blades used 10 Replace with blades listed in parts manual 11 Cloggedmowerdeckventholesfrombuildup of grass leaves trash around mandrels 11 Clean around mandrels to open vent holes Headlight s not working if so equipped 1 Switch is OFF 1 Turn switch ON 2 Bulb s or lamp s burned out 2 Replace bulb s or la...

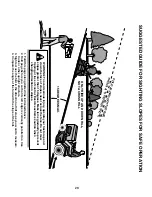
Page 29: ... never across the face Do not mow slopes greater than 15 degrees Make turns gradually to prevent tipping or loss of control Exercise extreme caution when changing direction on slopes 1 Fold this page along dotted line indicated above 2 Hold page before you so that its left edge is vertically parallel to a tree trunk or other upright structure 3 Sight across the fold in the direction of hill slope ...

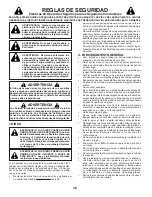
Page 30: ...jo de la máquina Mantener siempre limpia la abertura de descarga Permitir el funcionamiento de la máquina sólo a adultos que tengan familiaridad con las instrucciones Limpiar el área de objetos como piedras juguetes cables etc quepuedenserrecogidosydisparadosconlascuchillas Asegurarse de que el área esté libre de otras personas antes de ponerla en marcha Parar la máquina si alguien entra en el áre...

Page 31: ...rrectoconregularidad NUNCA utilice una máquina con un dispositivo de seguridad que no está funcionando correctamente Mantener la máquina libre de hierba hojas u otros re siduos acumulados Limpiar las salpicaduras de aceite o carburante y quitar cualquier cosa mojada con carbu rante Dejar que la máquina se enfríe antes de guardarla Si se golpea un objeto ajeno hay que pararse e inspeccionar lamáqui...

Page 32: ... calzado abierto cuando corte la hierba Informe siempre a alguien de que se dispone a cortar la hierba en el exterior ADVERTENCIA Este tractor viene equipado con un motor de combustión interna y no se debe usar sobre o cerca de un terreno no desarrollado cubierto de bosques de arbustos o de césped o menos que el sistema de escape del motor venga equipado con un amortiguador de chispas que cumpla c...

Page 33: ...ermine la ubicación de la batería La batería estará bajo el asiento o la cubierta Levantelabasedelasientoocapuchaaunaposiciónelevada Remueva las dos tapas protectoras de los terminales y descártelas Primero conecte el cable de la batería ROJO al terminal positivo con el perno y la tuerca como se muestra debajo Apriételos seguramente Deslice la tapa del terminal sobre el terminal ADVERTENCIA No hag...

Page 34: ...trucciones de montaje No quedan partes sueltas en la caja de cartón La batería está preparada y cargada en forma adecuada El asiento ha sido ajustado en forma cómoda y apretado en forma segura Todas las llantas han sido infladas en forma adecuada Para fines de envío las llantas se inflaron demasiado en la fábrica Asegúrese que el conjunto segador esté nivelado en forma adecuada de lado a lado y de...

Page 35: ...años a la máquina PELIGRO indica un peligro que si no se evita provoca muerte o lesiones graves ADVERTENCIA indica un peligro que si no se evita puede provocar muerte o lesiones graves PRECAUCIÓN indica un peligro que si no se evita puede provocar lesiones ligeras o moderadas PRECAUCIÓN cuando se utiliza sin el símbolo de aviso indica una situación que puede provocar daños al tractor y o al motor ...

Page 36: ...o accionado mientras que en revés H INTERRUPTOR DE LA LUZ Enciende y apaga las luces delanteras J PALANCA DE MANDO CRUCERO Se utiliza para fijar el movimiento hacia adelante del tractor a la velocidad deseada sin apretar el pedal de marcha atrás K PEDAL DE MARCHA ADELANTE Se utiliza para el movimiento del tractor hacia adelante L PEDAL DE MARCHA ATRÁS Se utiliza para el movimiento del tractor haci...

Page 37: ...lante y atrás Poner en marcha el tractor y quitar el freno de mano Apretar lentamente el pedal marcha adelante K y atrás L para iniciar el movimiento Más se aprieta el pedal y mayor es la velocidad D F N PARAUSARELCONTROLDEESTRANGULACIÓN N Vea Fig 6 Use el control de estrangulación cuando esté haciendo arrancar un motor frío No lo use para hacer arrancar un motor caliente Para enganchar el control...

Page 38: ...oco a distancia del terreno al mismo tiempo que la segadora esté a la altura de corte deseada Entonces las ruedas calibradoras mantienen el conjunto segador en posición para prevenir el corte raspeo en casi todos los terrenos AVISO Ajuste las ruedas calibradoras con el tractor en una superficie nivelada plana 1 Ajuste la segadora a la altura de corte deseada con la manilla de ajuste de altura Vea ...

Page 39: ...verso al de las agujas del reloj hasta la posición ON Mire hacia abajo y hacia atrás no sólo antes de ir marcha atrás sino mientras esté yendo marcha atrás Presione lentamente el pedal reverso de la impulsión para comenzar el movimiento Cuando el uso del ROS es más necesario dé vuelta a la llave de ignición en el sentido de las agujas del reloj hasta la posición ON 02828 POSICIÓN ROS ON MOTOR EN P...

Page 40: ...VeaFig 3 Al hacer arrancar el motor por la primera vez o si se ha acabado el combustible del motor se necesitará tiempo para el arranque extraparamoverelcombustibledesdeelestanquehastaelmotor Asegúrese que el control de rueda libre este en la posición enganchada Siéntase en el sillón en la posición de operación suelte el pedal del freno y ponga el freno de estacionamiento Mueva el embrague del acc...

Page 41: ...dequedeprontoseponganenmovimiento las ruedas 4 Apretarelpedaldemarchaadelantehastaelfondo mantener por cinco 5 segundos y soltar el pedal Apretar el pedal de marchaatráshastaelfondo mantenerporcinco 5 segundos y soltar el pedal Repetir el procedimiento tres 3 veces 5 Apague el motor y embrague el freno de estacionamiento 6 Enganche la transmisión poniendo el control de rueda libre en la posición d...

Page 42: ...a del operado y ROS funcionen adecuatamente Revise si hay sujetadores sueltos TABLA DE LUBRICACIÓN 3 2 2 1 2 2 2 1 2 4 5 1 2 ANTES DE CADA USO CADA 25 HORAS CADA 8 HORAS CADA 100 HORAS CADA TEMP ORADA ALMACEN AMIENTO CADA 50 HORAS Limpiar el filtro de aire Cambiar el aceite del motor Modelos con filtro de aceite Limpiar las aletas de enfriamiento Limpiar la rejilla de aire Cambiar el filtro de ace...

Page 43: ...o cualquier tentativa del operador de viajar marcha atrás NO apagará el motor 02828 POSICIÓN ROS ON MOTOR EN POSICIÓN ON OPERACIÓN NORMAL BATERÍA Su tractor cuenta con un sistema de carga de la batería que es suficiente para el uso normal Sin embargo si se carga la batería periódicamente con un cargador de automóviles se prolongará su duración Mantenga la batería y los terminales limpios Mantenga ...

Page 44: ... se usan en temperaturas sobre 32 F 0 C Revise el nivel del aceite del motor más a menudo para evitar un posible daño en el motor debido a que no tiene suficiente aceite Cambie el aceite después de 50 horas de operación o por lo me nos una vez al año si el tractor se utiliza menos 50 horas el año Revise el nivel del aceite del cárter antes de arrancar el mo tor y después de cada ocho 8 horas de us...

Page 45: ... bujía y el ajuste de la abertura aparecen en ESPECI FICACIONES DEL PRODUCTO sección de este manual FILTRO DE COMBUSTIBLE Vea Fig 19 El filtro de combustible debe cambiarse una vez cada temporada Si el filtro de combustible se tapona obstruyendo el flujo del combustible hacia el carburador es necesario cambiarlo Con el motor frío remueva el filtro y tapone las secciones de la línea de combustible ...

Page 46: ...uestos a que la hoja les lance aquellos objetos con los que entre en contacto Sustituya inmediatamente el accesorio de lavado roto o que falta antes de volver a usar la segadora Tape todos los orificios de la segadora con pernos y tuercas de seguridad Fig 21 PUERTO DE LAVADO DE LA CUBIERTA Vea Fig 21 La plataforma del tractor está equipada con un puerto de lavado como parte del sistema de lavado d...

Page 47: ...ala descender lentamente y tránquela en la posición más baja AVISO Cerciórese de que los brazos de suspensión de los lados de la segadora A estén dirigidos hacia adelante antes de deslizarla por debajo del tractor PARA DESMONTAR LA CORTADORA DE CÉSPED Vea Fig 22 Suelte el embrague poniéndolo en la posición DISEN GAGED DESACTIVADO Baje la palanca elevadora de montaje a la posición de más abajo Reti...

Page 48: ...ndola por encima de la polea del motor M Fig 26 Fig 27 COLOQUE EL ESLABÓN FRONTAL E Trabaje desde el lado izquierdo de la cortadora de césped Inserte el extremo de la varilla roscada del ensamblaje del eslabón a través del orificio frontal de la abrazadera de suspensión de la cortadora de césped F Instale el manguito O e instale sin apretar la tuerca P y la contratuerca Q Inserte los extremos acam...

Page 49: ...erior diríjase a la parte de adelante del tractor Con una llave inglesa de 11 16 o de calibre regulable afloje la tuerca A dándole varias vueltas para despejar la tuerca de ajuste B Con una llave ajustable de 3 4 gire la tuerca de ajuste de eslabón frontal B hacia la derecha apriete para elevar el frente de la cortadora de césped o hacia la izquierda afloje para bajar el frente de la cortadora de ...

Page 50: ...l freno de mano Baje la palanca elevadora a la posición de más abajo Retire las cubiertas del mandril Retire cualquier suciedad y recortes de césped que se hayan podido acumular alrededor de los mandriles y en toda la superficie de la plataforma superior Quite el resorte del cáncamo Quite las correas de todas las poleas Retire la correa del rededor de polea del embrague eléctrico INSTALACIÓN DE LA...

Page 51: ...la alrededor del embrague y por sobre la polea del motor G 3 Jale la correa hacia la parte de atrás del tractor Con mucho cuidado pase la correa de arriba a abajo alrededor del ven tilador de transmisión y por sobre la polea de entrada F Asegúrese de que la correa esté dentro del guardacorrea 4 Monte la correa en el piñón central E 5 Pásela a través del piñón estacionario C y del piñón del embragu...

Page 52: ...ro para evitar las chispas debido a la conexión a tierra por accidente Levantamos la capota a la posición levantada Desconecte el cable de la batería NEGRO primero y luego el cable de la batería ROJO y remueva la batería del tractor Instale la nueva batería con los términos en misma posición como la batería vieja Reemplazamos cubierta terminal CUBIERTA TERMINAL CABLE ROJO POSITIVO CABLE NEGRO NEGA...

Page 53: ...ector del alambre de las luces delanteras 3 Párese delante del tractor Agarre el capó en los lados in clínelo un poco hacia el motor y sáquelo del tractor 4 Para volver a instalar el capó asegúrese de volver a conectar el conector del alambre de las luces Fig 41 CAPOTA CONECTOR DEL ALAMBRE DE LAS LUCES DELANTERAS 07002 ...

Page 54: ...dor conectado MOTOR SISTEMA DE COMBUSTIBLE IMPORTANTE Es important evitar que se forman depositos de goma en partes fundamentales del sistema de combus tible tales como el carburador el filtro del combustible la manguera del combustiblesmezcladosconalcohol conocidocomogasohol o que tienen etanol o metanol pueden atraer humedad lo que conduce a la separación y a la formación de acudos durante elalm...

Page 55: ...fallados 8 Revise cambie el solenoide o arrancador 9 Interruptor es que exige n la presencia del operador fallado 9 Póngase en contacto con un centro de servicio cuali ficado El motor suena pero no arranca 1 Batería baja o descargada 1 Vuelva a cargar o cambie la batería 2 Terminales de la batería corroídos 2 Limpie los terminales de la batería 3 Alambrado suelto o dañado 3 Revise todo el alambrad...

Page 56: ... la cajade la segadora 8 La correa de impulsión de la segadora está des gastada o desajustada 8 Cambie ajuste la correa de impulsión de la segadora 9 Las cuchillas están mal coninstaladas 9 Vuelva a instalar las cuchillas elborde afilado hacia abajo 10 Cuchillas inadecuadas en uso 10 Cambie por las cuchillas enumeradas en este manual 11 Los agujeros de ventilación del conjunto agujeros segador tap...

Page 57: ...nunca transversalmente con respecto a las pendientes No cortar pendientes mayores de 15 grados Haga los virajes gradualmente para evitar volcarse o la pérdida de control Tenga mucho cuidado cuando cambie de dirección en las pendientes 1 Plegar esta página a lo largo de la línea punteada arriba indicada 2 Tener la página ante de sí mismos de modo que su borde izquierdo sea vertical paralelo al tron...

Page 58: ...58 SERVICE NOTES AVISO ...

Page 59: ...59 SERVICE NOTES AVISO ...

Page 60: ...09 09 2020 CL Printed in U S A ...

Reviews: