27
Changing the Needle
A 134R needle (size 18) will be installed on your Platinum
TM
3000
from the factory. The needle should be changed after every 8 hours
of use. It is very important to only use a 134R needle in your
machine.
1. Loosen the screw just above the thread guide on the needle
bar; the needle should fall out as you loosen the screw.
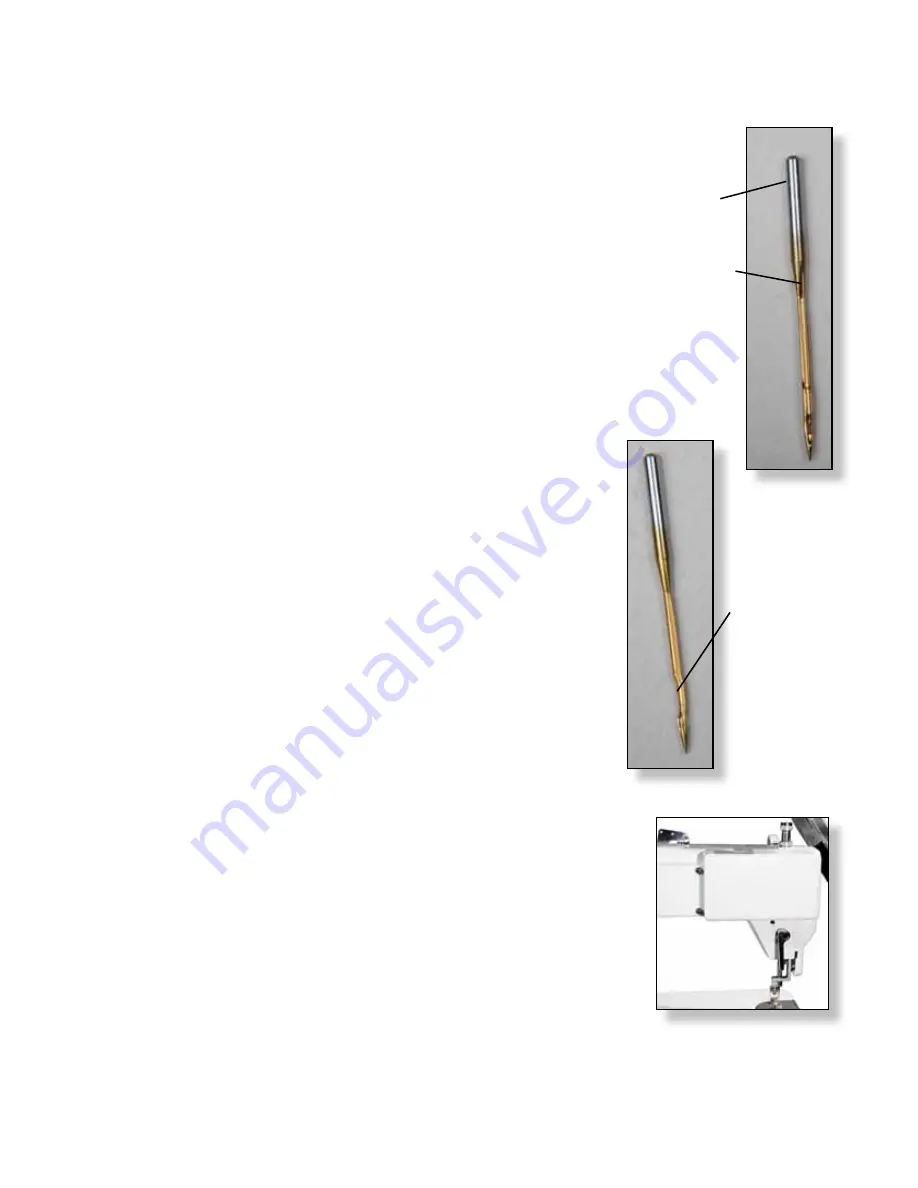
Look closely at the needle. Your home sewing machine
needle shank (top of the needle) has a flat side. The top
of the long arm machine needle is round. On the point
end of the needle there is a scarf, or notch, in one side.
The scarf must face the back of your machine.
The long groove at the eye of the needle faces you as
you insert the needle.
2. Place the new needle up in the slot, making sure the needle is
up in the needle bar as far as it will go. Make sure the scarf is
facing the back of your machine and the long groove above the
needle eye is facing you. Tighten the screw on the needle bar
while holding the needle in place.
3. Before you turn your machine on go to the back of the ma-
chine and turn the hand wheel a complete turn making sure the
needle goes down in the center of the throat plate and rotates
thru a full stitch smoothly.
TIP: Use the old needle to hold the new needle in place while
you tighten the screw. By placing the point of
the old needle into the eye of the new needle you can see how
straight you are placing the scarf of the needle.
Tension Release Lever
The tension release lever raises the hopping foot and releases the
tension on the thread.
You can watch the tension disc plates open as you lift the lever.
NEVER start sewing with the lever up. Because there is no tension
on the thread the bottom stitches will create huge loops.
Top of needle is
round. Not flat
like on your home
needles.
Long groove goes to
the front. This is a
path for the thread to
follow.
Back of needle
has a scarf. This
is where the hook
passes and picks
up the top thread to
create the stitch.
Fig. 48
Fig. 49
Fig. 50


