Husqvarna 966805003 Owner'S Manual Download Page 3

3

SAFE OPERATION PRACTICES FOR RIDE-ON MOWERS

SAFETY RULES

GENERAL OPERATION

•  Read, understand and follow all instructions in the 

manual and on the machine before starting.

•  Only allow responsible adults, who are familiar 

with the instructions, to operate the machine.

•  Clear the area of objects such as rocks, stones, 

toys, wire etc., which could be picked up and 

thrown by the blades.

•  Be sure the area is clear of all people and pets 

before mowing. Stop the machine if anyone enters 

the area.

•  Never carry passengers or children even with 

blades off.

•  Do not  mow in reverse unless absolutely 

necessary. Always look down and behind before 

and while backing.

•  Do not operate the mower without either the entire 

grass catcher or the guard in place.

•  Slow down before turning.
•  Stop engine before removing grass catcher or 

unclogging chute.

•  Mow only in daylight or good artificial light.
•  Do not operate the machine while under the 

influence of alcohol or drugs.

•  If the collection system has front weights included, 

DO NOT operate mower with the grass catcher 

unless the front weights are installed.

•  Keep machine free of grass, leaves or other debris 

buildup which can touch hot exhaust/engine parts 

and burn. Do not allow the mower deck to plow 

leaves or other debris which can cause buildup to 

occur.

•  Allow machine to cool before storage.

SLOPE OPERATION

Slopes are a major factor related to loss-of-control and 

tip-over accidents, which can result in severe injury or 

death. All slopes require extra caution. If you cannot 

back up the slope or if you feel uneasy on it, do not 

mow it.

DO

•  Use extra care with grass catchers or other 

attachments. These can change the stability of the 

machine.

•  Mow up and down slopes (10° Max.), not across.
•  Remove obstacles such as rocks, tree limbs, etc.

•  Watch for holes, ruts, or bumps. Uneven terrain 

could overturn the machine. Tall grass can hide 

obstacles.

•  Use slow speed. Choose a low speed so that you 

will not have to stop while on the slope.

•  Keep all movement on the slopes slow and 

gradual. Do not make sudden changes in speed or 

direction.

•  Avoid starting or stopping on a slope. If tires lose 

traction, disengage the blades and proceed slowly 

straight down the slope.

DO NOT

•  Do not turn on slopes unless necessary, and then, 

turn slowly and gradually downhill, if possible.

•  Do not mow near drop-off, ditches, or 

embankments. The mower could suddenly turn 

over if a wheel is over the edge of a cliff or ditch, 

or if an edge caves in.

•  Do not mow on wet grass. Reduced traction  could 

cause sliding.

•  Do not try to stabilize the machine by putting your 

foot on the ground.

SERVICE

•  The operation of any mower can result in foreign 

objects thrown into the eyes, which can result in 

severe eye damage. Always wear safety glasses 

or eye shields while operating the mower or 

performing any adjustments or repairs. Wide vision 

safety mask over spectacles or standard safety 

glasses are recommended.

•  Keep nuts and bolts, especially blade attachment 

bolts, tight and keep equipment in good condition.

•  Never tamper with safety devices. Check there 

proper operation regularly.

•  Grass catcher components are subject to wear, 

damage, and deterioration, which could expose 

moving parts or allow objects to be thrown. 

Frequently check components and replace 

with manufacturer’s recommended parts, when 

necessary.

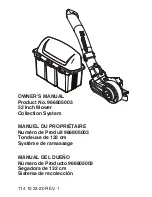
Summary of Contents for 966805003

Page 1: ...003 52 Inch Mower Collection System MANUEL DU PROPRIÉTAIRE Numéro de Produit 966805003 Tondeuse de 132 cm Système de ramassage MANUAL DEL DUEÑO Número de Producto 966805003 Segadora de 132 cm Sistema de recolección 114 10 23 20 REV 1 ...

Page 2: ...jects thrown into the eyes which can result in severe eye damage ALWAYS wear safety glasses or eye shields before starting the mower and while mowing Standard safety glasses are recommended or a wide vision safety mask for over spectacles CAUTION BEFORE ASSEMBLING GRASS CATCHER TO MOWER Set parking brake Place motion control levers in NEUTRAL position Turn ignition key OFF and remove key Make sure...

Page 3: ...sy on it do not mow it DO Use extra care with grass catchers or other attachments These can change the stability of the machine Mow up and down slopes 10 Max not across Remove obstacles such as rocks tree limbs etc Watch for holes ruts or bumps Uneven terrain could overturn the machine Tall grass can hide obstacles Use slow speed Choose a low speed so that you will not have to stop while on the sl...

Page 4: ...mer Drill and 3 8 drill bit NOTE When the terms RH right hand or LH left hand are used it refers to when the operator is seated on the mower CONTAINER CONTENTS Blower Bagger Assembly Belt Seal Fastening Kit Bag of Hardware Mounting Brackets SAFETY RULES 3 ASSEMBLY 5 OPERATION 9 REPAIR PARTS BLOWER ASSEMBLY 10 BAGGER 12 CHUTES MOUNTS BELTS 14 ...

Page 5: ...deck 2 Lower deck to the lowest cutting position 3 Remove the right hand discharge side belt cover from the deck 4 Position blower over the discharge tabs on the deck and set blower onto the deck 5 Be sure the blower is sitting flush against the outside of the deck Rear Mount Bracket Contact Area 1 Locate the rear adjustment nut on the discharge side of the deck To assure the right tighteness mark...

Page 6: ...eck belt shield on the deck over the drive pulley and secure with hardware removed from steel belt shield 2 Place retainer on the outer pulley cover 3 Align the tab end of the belt cover into the slot on the deck belt shield and the other end over the end of the outer pulley cover 4 Secure with knob Retainer Outer Pulley Cover Deck Belt Shield Belt Cover Tab 1 Position upper chute support against ...

Page 7: ...he top end of the blower assembly lining up the blower latch and the acorn nut on the middle chute 3 Stretch bungee latch up onto acorn nut to secure Slide the upper chute discharge end into the hood inlet and fit the lower end over middle chute Secure middle chute to upper as in Step 1 4 Rotate the chute so the opening is facing downwards toward the container bags Middle Chute Chute Latch 1 Slide...

Page 8: ...opening in the cover assembly Cover Inlet 1 Install containers on support frame overlapping containers at center tube 2 Close cover and lock latch handle over support tubes NOTE One container should always overlap the other container at the center tube CONTAINER INSTALLATION ...

Page 9: ... e Tip the container on its side and slide the filled bag from the container f Install a new plastic lawn bag with the edges of the bag draped over upper lip of the container g Repeat for all containers h Reinstall containers making sure center containers overlap at center supports i Close cover and secure latches over center support tubes Avoid cutting wet grass or in the morning while the dew is...

Page 10: ... 1 2 3 6 8 7 23 9 10 11 12 13 14 15 16 17 18 19 20 21 22 5 24 26 27 28 25 29 30 31 32 31 34 35 36 37 39 40 41 42 43 44 45 46 44 48 50 51 52 53 55 56 57 54 55 49 53 38 15 53 44 48 48 48 5 54 52 33 42 47 58 59 REPAIR PARTS ...

Page 11: ...13 21 22 1 PLATE BACKING 29 539 11 56 67 1 KEY 3 16 x 30 539 12 52 29 1 KEY 3 16 x 1 31 539 13 03 17 1 PIN ITEM PART NO QTY DESCRIPTION ITEM PART NO QTY DESCRIPTION 32 539 13 03 15 6 HCS 5 16 18 x 33 539 11 03 21 2 HCS 3 8 24 x 1 Gr 8 34 539 99 02 09 1 HCS 5 16 18 x 1 35 539 99 06 55 1 HCS 3 8 16 x 1 36 539 97 69 49 1 HCS 3 8 16 x 1 37 539 10 84 61 3 HCS 20 x 38 539 99 06 43 1 HCS 20 x 7 8 39 539 ...

Page 12: ...12 BAGGER 1 6 8 3 2 11 7 7 4 5 9 10 16 17 15 14 15 18 17 13 REPAIR PARTS ...

Page 13: ...R 5 532 19 26 03 1 GASKET COVER 6 532 40 02 26 3 CONTAINER SOFT BAG 7 532 19 27 86 2 PIN HINGE 8 532 13 08 95 2 HANDLE BAGGER COVER 9 539 11 02 34 1 SUPPORT HOSE 10 539 11 22 94 1 FLEX TRIM BLACK 11 539 10 80 97 4 PLUG TUBING END 13 539 99 01 88 4 WASHER 5 16 SAE FLAT 14 539 99 06 27 2 HCS 5 16 18 x 1 15 539 97 69 52 6 SCREW 10 24 x 5 8 16 539 10 80 96 2 HAIR PIN 17 539 97 69 77 67 NUT 10 24 CROWN...

Page 14: ...14 5 16 4 15 3 6 1 2 7 12 8 6 9 10 13 14 12 12 13 10 11 REPAIR PARTS CHUTES MOUNTS BELTS ...

Page 15: ...DUMP 4 575 46 76 01 1 SHIELD BELT 5 532 19 81 28 1 SUPPORT TUBE ASSY 6 539 10 80 85 2 SPACER SPLIT 7 539 10 80 88 1 LATCH CHUTE 8 539 97 69 52 1 SCREW 10 24 x 625 MACH 9 539 10 80 81 1 SCREW 10 14 x SPEC 10 539 10 80 83 2 SCREW 10 24 x 11 8 11 539 10 95 52 2 WASHER 3 16 LOCK 12 539 10 80 84 3 WASHER 3 16 x 13 539 10 80 86 2 NUT 10 24 ACORN 14 539 10 80 89 1 WELD NUT PLATED 15 539 97 69 89 1 HAIRPI...

Page 16: ...orter une visière écran ou des lunettes de protection standard MISE EN GARDE AVANT DE MONTER LE COLLECTEUR D HERBE SUR LA TONDEUSE Engager le frein de stationnement Mettez les leviers de commande de la transmission au POINT MORT Tournez la clé de contact en position d arrêt OFF et enlevez la clé Veillez à ce que les lames et toutes les pièces mobiles soient complètement arrêtées MISE EN GARDE N ut...

Page 17: ... effectuer la tonte À FAIRE Soyez particulièrement prudent avec le ramasse herbe et les autres accessoires Ceux ci peuvent changer la stabilité de la machine Tondez les pentes en montant ou en descendant max 10 mais jamais perpendiculairement à la déclivité Enlevez les obstacles tels que pierres branches d arbres etc Faites attention aux trous aux ornières ou aux bosses Un terrain irrégulier peut ...

Page 18: ...ille de 7 16 po Clé ou crochet et douille de 1 2 po Clé ou crochet et douille de 3 4 po Clé dynamométrique Scie à métaux Marteau Mèche et foret de 3 8 po CONTENU DU CARTON Souffleur ensacheur Courroie Kit de fixation de joint Sac des pièces Supports de montage MONTAGE 19 UTILISATION 23 PIÈCES DE RECHANGE MONTAGE DU SOUFFLEUR 24 MONTAGE DU BACS 26 GOULOTTE SUPPORTS COURROIE 28 ...

Page 19: ...aissez le châssis sur la position de coupe la plus basse 3 Enlevez le protège courroie côté droit côté éjection du châssis 4 Placez le souffleur sur les taquets d éjection du châssis et fixez le souffleur sur le châssis 5 Veillez à ce que le souffleur repose tout contre l extérieur du châssis 1 Repérez l écrou de réglage arrière sur le côté d éjection du châssis Pour veiller à ce qu il soit bien s...

Page 20: ... COURROIES 1 Placez le protège courroie châssis au dessus de la poulie d entraînement et fixez avec les pièces retirées du protège courroie en acier 2 Placez le dispositif de retenue sur l enveloppe de poulie externe 3 Alignez le taquet d extrémité du protège courroie dans la fente sur le protège courroie châssis et l autre extrémité sur l extrémité de l enveloppe poulie externe 4 Fixez avec un bo...

Page 21: ...leur et l écrou borgne sur la glissière intermédiaire 3 Étirez le verrou élastique jusqu à l écrou borgne puis engagez le Faites glisser l extrémité d éjection de la glissière supérieure dans l entrée du capot et installez l extrémité inférieure sur la glissière intermédiaire Fixez la glissière intermédiaire à la glissière supérieure comme indiqué à l Étape 1 4 Faites tourner la glissière pour que...

Page 22: ... le couvercle et verrouillez les poignées de loquet au dessus des tubes supports REMARQUE Un bac doit toujours chevaucher l autre bac sur le tube central INSTALLATION DES BACS INSTALLATION DE LA GOULOTTE SUR LE COUVERCLE Insérer la goulotte supérieure dans l ouverture du couvercle Entrée du couvercle ...

Page 23: ...le e Basculez le bac sur son côté et faites glisser le sac poubelle plein hors du bac f Mettez en place un nouveau sac poubelle avec les bords du sac drapés sur le bord supérieur du bac g Répéter les instructions ci dessus pour tous les bacs h Remettez en place les bacs mais veillez à faire chevaucher le bac de droite et le bac de gauche sur le support central i Fermez le couvercle et fixez les lo...

Page 24: ...NTAGE DU SOUFFLEUR 1 2 3 6 8 7 23 9 10 11 12 13 14 15 16 17 18 19 20 21 22 5 24 26 27 28 25 29 30 31 32 31 34 35 36 37 39 40 41 42 43 44 45 46 44 48 50 51 52 53 55 56 57 54 55 49 53 38 15 53 44 48 48 48 5 54 52 33 42 47 58 59 ...

Page 25: ...UE DE RENFORT 28 539 13 21 22 1 PLAQUE DE RENFORT 29 539 11 56 67 1 CLÉ 3 16 x 1 2 30 539 12 52 29 1 CLÉ 3 16 x 1 1 2 31 539 13 03 17 1 GOUPILLE 32 539 13 03 15 6 BOULON 5 16 18 x 1 2 HEX 33 539 11 03 21 2 BOULON3 8 24 x 1 1 4 HEX 34 539 99 02 09 1 BOULON 5 16 18 x 1 HEX 35 539 99 06 55 1 BOULON 3 8 16 x 1 1 2 HEX 36 539 97 69 49 1 BOULON 3 8 16 x 1 3 4HEX 37 539 10 84 61 3 BOULON 20 x 1 2 HEX 38 ...

Page 26: ...26 PIÈCES DE RECHANGE MONTAGE DU BACS 1 6 8 3 2 11 7 7 4 5 9 10 16 17 15 14 15 18 17 13 ...

Page 27: ...VERCLE 5 532 19 26 03 1 JOINT DE COUVERCLE 6 532 40 02 26 3 BAC SAC SOUPLE 7 532 19 27 86 2 GOUPILLE BRIDE 8 532 13 08 95 2 POIGNÉE DE COUVERCLE DE L ENSACHEUR 9 539 11 02 34 1 SUPPORT GOULOTT 10 539 11 22 94 1 GARNITURE SOUPLE 11 539 10 80 97 4 BOUCHON CADRE 13 539 99 01 88 4 RONDELLE 5 16 SAE FLAT 14 539 99 06 27 2 VIS HCS 5 16 18 x 1 15 539 97 69 52 6 VIS 10 24 x 5 8 16 539 10 80 96 2 GOUPILLE ...

Page 28: ...28 PIÈCES DE RECHANGE 5 16 4 15 3 6 1 2 7 12 8 6 9 10 13 14 12 12 13 10 11 GOULOTTE SUPPORTS COURROIE ...

Page 29: ...AC DE DÉCHARGEMENT 4 575 46 76 01 1 PROTÈGE COURROIE 5 532 19 81 28 1 ENSEMBLE DE TUBE DE SUPPORT 6 539 10 80 85 2 ENTRETOISE FENDUE 7 539 10 80 88 1 LATCH CHUTE 8 539 97 69 52 1 VIS 10 24 x 625 MACH 9 539 10 80 81 1 VIS 10 14 x SPEC 10 539 10 80 83 2 VIS 10 24 x 11 8 11 539 10 95 52 2 RONDELLE 3 16 LOCK 12 539 10 80 84 3 RONDELLE 3 16 x 13 539 10 80 86 2 ÉCROU 10 24 ACORN 14 539 10 80 89 1 ÉCROU ...

Page 30: ...d y durante el corte del césped Se recomiendan gafas de seguridad estándares o una máscara de seguridad de visión amplia sobre los anteojos PRECAUCIÓN ANTES DEL MONTAJE DEL RECOGEDOR DE CÉSPED EN EL CORTACÉSPED Accione el freno de estacionamiento Coloque las palancas de control de movimiento en la posición NEUTRA Gire la llave de encendido a la posición APAGADO y saque la llave Asegúrese de que la...

Page 31: ...ACER Tenga mucho cuidado con los recogedores de césped o con otros accesorios Estos pueden afectar la estabilidad de la máquina Pode las pendientes hacia arriba y hacia abajo a 10 como máximo no de un lado a otro Retire los obstáculos como rocas ramas etc Tenga cuidado con los huecos surcos o irregularidades El terreno disparejo podría volcar la máquina El césped alto puede ocultar obstáculos Util...

Page 32: ...y dado de 7 16 Llave o trinquete y dado de 1 2 Llave o trinquete y dado de 3 4 Llave de par de apriete Sierra para metal Martillo Taladro y broca de 3 8 CONTENIDO DEL CONTENEDOR Montaje de sopladora y recogedor Kit de cierre de sello Soportes de montaje Correa Bolsa de tornillería MONTAJE 33 OPERACIÓN 37 PARTES DE REPARACIÓN MONTAJE DE SOPLADORA 38 MONTAJE DE RECOGEDOR 40 CONDUCTO SOPORTES CORREA ...

Page 33: ...po a la posición de corte más baja 3 Retire la cubierta de la correa del lado derecho lado de descarga del equipo 4 Coloque la sopladora sobre las lengüetas de descarga del equipo y ponga la sopladora sobre el equipo 5 Asegúrese de que la sopladora esté apoyada al ras de la parte exterior del equipo Soporte de montaje trasero Área de contacto 1 Localice la tuerca de ajuste trasera en el lado de de...

Page 34: ...ensión a la parte trasera y acóplelo en el pestillo INSTALACIÓN DE LA CORREA DE TRANSMISIÓN Parte trasera del equipo Poleas guía Polea exterior Correa Brazo de liberación de tensión INSTALACIÓN DE LAS CUBIERTAS DE LA CORREA 1 Coloque la protección de la correa del equipo en el equipo encima de la polea de transmisión y asegúrela con la tornillería que se quitó de la protección de acero de la corre...

Page 35: ...a de la parte media 3 Expanda la correa elástica que se engancha en la tuerca ciega para asegurar Deslice el extremo superior del conducto de expulsión hacia la entrada de la cubierta y coloque el extremo inferior sobre el conducto de la parte media Asegure el conducto de la parte media a la parte superior como se describe en el paso 1 4 Gire el conducto para que la apertura quede hacia abajo en d...

Page 36: ...Cubierta de la admisión 1 Instale los contenedores en el bastidor de soporte traslapando los contenedores en el tubo central 2 Cierre la cubierta y asegure el manillar con pestillo sobre los tubos de soporte NOTA Uno de los contenedores siempre debe traslaparse con el otro contenedor en el tubo central INSTALACIÓN DEL CONTENEDOR ...

Page 37: ...llena del contenedor f Instale una nueva bolsa de plástico para césped con los bordes de la bolsa envueltos sobre el labio superior del contenedor g Repita el proceso para todos los contenedores h Vuelva a instalar los contenedores asegurándose de que el contenedor derecho se traslapa con el contenedor izquierdo en los soportes centrales i Cierre la tapa y asegure los enganches sobre los tubos de ...

Page 38: ...ONTAJE DE SOPLADORA 1 2 3 6 8 7 23 9 10 11 12 13 14 15 16 17 18 19 20 21 22 5 24 26 27 28 25 29 30 31 32 31 34 35 36 37 39 40 41 42 43 44 45 46 44 48 50 51 52 53 55 56 57 54 55 49 53 38 15 53 44 48 48 48 5 54 52 33 42 47 58 59 ...

Page 39: ...CA EXTERIOR 27 539 13 21 24 1 PLACA RESPALDO 28 539 13 21 22 1 PLACA RESPALDO 29 539 11 56 67 1 LLAVE 3 16 x 1 2 30 539 12 52 29 1 LLAVE 3 16 x 1 1 2 31 539 13 03 17 1 PASADOR 32 539 13 03 15 6 HCS 5 16 18 x 1 2 33 539 11 03 21 2 HCS 3 8 24 x 1 1 4 Gr 8 34 539 99 02 09 1 HCS 5 16 18 x 1 35 539 99 06 55 1 HCS 3 8 16 x 1 1 2 36 539 97 69 49 1 HCS 3 8 16 x 1 3 4 37 539 10 84 61 3 HCS 20 x 1 2 38 539 ...

Page 40: ...40 PARTES DE REPARACIÓN MONTAJE DE RECOGEDOR 1 6 8 3 2 11 7 7 4 5 9 10 16 17 15 14 15 18 17 13 ...

Page 41: ...19 25 50 1 SELLO CUBIERTA 5 532 19 26 03 1 JUNTA CUBIERTA 6 532 40 02 26 3 CONTENEDOR BOLSA BLANDA 7 532 19 27 86 2 PASADOR BISAGRA 8 532 13 08 95 2 HANDLE BAGGER COVER 9 539 11 02 34 1 SUPPORT HOSE 10 539 11 22 94 1 FLEX TRIM 11 539 10 80 97 4 TAPA BASTIDOR 13 539 99 01 88 4 ARANDELA 5 16 SAE FLAT 14 539 99 06 27 2 HCS 5 16 18 x 1 15 539 97 69 52 6 TORNILLO 10 24 x 5 8 16 539 10 80 96 2 HORQUILLA...

Page 42: ...42 PARTES DE REPARACIÓN 5 16 4 15 3 6 1 2 7 12 8 6 9 10 13 14 12 12 13 10 11 CONDUCTO SOPORTES CORREA ...

Page 43: ...OR BOLSA DE DESECHO 4 575 46 76 01 1 PROTECCIÓN CORREA 5 532 19 81 28 1 MONTAJE DE TUBO DE SOPORTE 6 539 10 80 85 2 SEPARADOR DIVIDIDO 7 539 10 80 88 1 SEGURO CONDUCTO 8 539 97 69 52 1 TORNILLO10 24 x 625 9 539 10 80 81 1 TORNILLO 10 14 x 10 539 10 80 83 2 TORNILLO 10 24 x 11 8 11 539 10 95 52 2 ARANDELA 3 16 LOCK 12 539 10 80 84 3 ARANDELA 3 16 x 13 539 10 80 86 2 TUERCA 10 24 ACORN 14 539 10 80 ...

Page 44: ...05 29 19 CL ...

Reviews: