background image

19

21

23

22

20


Functions and InfoDisplay 


26

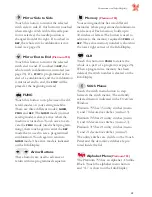
Buttonhole Icons 

(Platinum 715/735)


19

 Recommends a corded buttonhole.

20

 When sewing step by step buttonholes, 

Á

 ashing icon indicates that you need 

to touch 

REVERSE


to move between the 

different parts of  the buttonhole.

When the Sensor Buttonhole Foot is 

connected 

(Platinum 735)

.

21

 Indicates that the Sensor Buttonhole 

Foot is connected. If  the icon 

Á

 ashes, 

line up the white range on the wheel 
with the white mark on the foot.

22

 Set 

BUTTON


SIZE

, by touching the stitch 

length (+) or (-) button. By touching 

CLR

,

 you can step between setting the 

buttonhole size and buttonhole density. 

23

 The button symbol indicates that the 

button size is shown on 22.

Summary of Contents for Platinum 715

Page 1: ...K E E P I N G T H E W O R L D S E W I N G User s Guide ...

Page 2: ...eturn the sewing machine to the nearest authorized dealer or service center for examination repair electrical or mechanical adjustment Never operate the sewing machine with any air openings blocked Keep ventilation openings of the sewing machine and foot controller free from the accumulation of lint dust and loose cloth Keep fingers away from all moving parts Special care is required around the sew...

Page 3: ...hine 10 Winding from the Needle 11 Needles 12 Changing the Needle 12 Presser Feet 13 Changing the Presser Foot 14 Presser Foot Pressure 14 Presser Foot Lever 14 Thread Tension 15 Lowering the Feed Teeth 16 Functions and Infodisplay 17 The Touch Panel 18 Stitch Selection 20 Alphabet Platinum 755 21 Sewing Advisor Platinum 715 735 22 Icons on the InfoDisplay Platinum 715 735 25 Icons on the InfoDisp...

Page 4: ...bar 11 Presser foot 12 Free arm 13 Bobbin cover 14 Base plate 15 Feed teeth up down dial 16 Presser foot bar and presser foot ankle 17 Needle clamp screw 18 Thread tension disk for bobbin winding 19 Main spool pin 20 Spool holders 21 Bobbin winding guides 22 Auxilary spool pin 23 Bobbin winder spindle 24 Bobbin stop 25 Thread cutter for bobbin winding 26 Handwheel 27 InfoDisplay and Touch Panel 28...

Page 5: ... for presser feet 36 Space for bobbins Accessories Needles Thread spools Presser feet A B C D E J Presser foot H only Platinum 715 735 Quilter s 1 4 Piecing Foot P only Platinum 755 Sensor Buttonhole Foot only Platinum 735 755 37 Brush 38 Stitch plate opener to be attached to the brush 39 Screwdriver 40 Seam ripper 41 Clearance plate 42 Bobbins 43 Felt pad 44 Light bulb remover 45 Spool holders 3 ...

Page 6: ...plugging in the foot control check to ensure that it is of type FR4 see underside of foot control 1 Take out the cord from the foot con trol Connect the foot control cord to the front socket on the bottom right side of the machine 2 Connect the power cord to the rear socket on the bottom right side of the machine 3 When you press the power switch to ON both the machine and the light are switched o...

Page 7: ...arm 6 Place the foot control with the under side towards you Àtting into the recess of the accessory tray at the rear side of the machine AccessoryTray In the accessory tray there are special places for presser feet and bobbins plus space for needles and other accessories Store the accessories in the tray so they are easily accessible Remove the AccessoryTray To use the free arm remove the acces s...

Page 8: ...hread spool and the large holder a in front of it The Áat side of the spool holder shall be pressed Àrmly against the spool There shall be no space between spool holder and thread spool Vertical Position To use the spool pin in its vertical position fold the spool pin out towards the right Slide on the large spool holder and place a felt pad under the thread spool This is to prevent the thread fro...

Page 9: ...vious page The thread shall reel clockwise Push the spool pin back in Hold the thread near the spool using your right hand Use your left hand to bring the end of the thread in the direc tion of the arrow on the machine 2 Bring the thread into the pre tension thread guide a Bring the thread down between the thread tension discs b 3 Continue threading in the direction indi cated by the arrows Bring ...

Page 10: ...et the needle threader gently swing back The hook pulls the thread through the needle eye and forms a loop behind the needle Pull the thread loop out behind the needle 5 Place the thread under the presser foot and cut the thread Note The needle threader is designed to be used for size 70 120 needles You cannot use the needle threader for size 60 needles or smaller the wing needle twin needle tripl...

Page 11: ...page 7 and check to ensure that the thread lies between the inner thread tension discs and inside the last thread guide Thread the left needle 4 RIGHT NEEDLE Pull up the auxilary spool pin Place the large spool holder and a felt pad on the spool pin 5 Place the thread spool or the bobbin with the second thread on the spool pin 6 Thread the machine as before but this thread should lie between the o...

Page 12: ...o the thread cutter c Replace the cover 1 Pull the thread to the left to cut it 2 Bobbin Winding 1 Place an empty bobbin on the bobbin spindle at the front of the machine the markafacing up Push the bobbin spindle down 2 Place the large spool holder and a felt pad under the spool on the auxilary spool pin 3 Bring the thread into the thread tension guide a and under thread guide b then over thread ...

Page 13: ... a metal presser foot when bobbin winding from the needle To wind follow the instructions for Bobbin winding The difference is that the thread is brought up from the needle under the presser foot and to the right over thread guide c Note We do not recommend winding specialty threads such as invisible or other stretchy threads through the needle Instead see Bobbin Wind ing 11 ...

Page 14: ... needles are used for sewing in all woven fabrics The needle point is designed to penetrate between the threads of the fabric so the fabric will not be damaged B Stretch Needles These needles are used for sewing in knit and stretch fabrics The stretch needle is marked yellow and has a rounded point C Jeans Needles These needles are used for sewing woven heavy fabrics for example denim and canvas f...

Page 15: ...hole columns Blind Hem Foot D This foot is used for blind hem stitches The inner edge of this foot guides the fabric The bottom of the foot is designed to ride along the hem edge Zipper Foot E This is the zipper foot and can be snapped on either to the right or to the left of the needle This makes it easy to sew on both sides of the zipper Presser Foot H Platinum 715 735 This foot with a glide pla...

Page 16: ...hest position Pull the presser foot towards you 2 Line up the cross pin on the foot with the gap in the presser foot ankle Press back until the foot snaps into place Presser Foot Pressure a The presser foot pressure is adjusted with the dial found under the lid on your sewing machine Normal setting is around four The higher the number the more pressure the foot puts on the fabric Knit and soft fab...

Page 17: ... to 7 9 Correct and incorrect thread tension To understand the correct thread tension sew a few sample zigzag stitches at different settings 1 Begin with a tension that is too loose i e set at the lowest number The bobbin thread will lie straight and the top thread will be drawn to the under side of the fabric 2 If you set the tension at the highest number the top thread might break and the seam m...

Page 18: ...lowered when you turn the dial on the front of the free arm to the left Turn the dial to the right if you wish to raise the feed teeth The feed teeth will raise as you begin to sew The feed teeth should be lowered when sewing on buttons and for free motion work 16 ...

Page 19: ...FUNCTIONS AND INFODISPLAY ...

Page 20: ...on The width can be adjusted between 0 and 6 mm If straight stitch is selected the width button is used to adjust the needle position TheTouch Panel Needle Stop Up Down Platinum 755 NEEDLE STOP POSITION is used to set the needle stop position up or down Stop STOP is used to conclude a stitch Your sewing machine fastens the thread and stops automatically when a stitch or stitch sequence has been co...

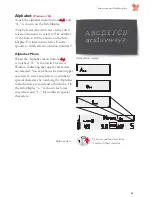
Page 21: ...Platinum 755 has an alphabet Outline Block Touch the alphabet menu button and A is shown on the InfoDisplay Mirror Side to Side Touch this button to mirror the selected stitch side to side If this button is touched when straight stitch with left needle posi tion is selected the needle position is changed from left to right If touched in REP the whole stitch combination is mir rored see page 26 Mir...

Page 22: ...ed stitch is shown on the InfoDisplay When the stitch is shown as 1 02 in the User s Guide Handbook 1 indicates the stitch menu 1 and 02 the selected stitch Likewise 2 20 is stitch number 20 on stitch menu 2 Your sewing machine sets the speed stitch length and width The recommended presser foot and thread tension are also shown on the InfoDisplay Platinum 715 735 also shows the recommended needle ...

Page 23: ...election button number 5 Alphabet Menu When the Alphabet menu button is touched A is shown in Overview Window indicating that upper case letters are selected You can choose between upper case letters lower case letters or numbers special characters by touching the Alphabet menu button a second and a third time On the InfoDisplay a is shown for lower case letters and 1 for numbers special character...

Page 24: ...nique Fabric Selection Woven or Knit The difference between woven and knit fabric is the way the threads are put together Woven fabrics are made of two thread systems warp lengthwise and weft crosswise that intersect at straight angles A knit fabric is made of one thread system with interlaced stitches A knit fabric usually has stretch As a general rule enter Woven for stable fabrics that have no ...

Page 25: ...bric together OVERCAST overcast fabric edges to prevent them from fraying and to help them lay Áat SEAM OVERCAST sews the seam and overcasts the edge all at one time BASTE a temporary stitching for Àt ting garments gathering and marking BLIND HEM creates an invisible hem on garments Is not recommended for light weight fabric or for leather vinyl but your Platinum 715 735 selects the best stitch po...

Page 26: ...ponding to that fabric appears in the Overview Window indicating the selection After you have selected the desired fabric select the technique of your choice You can then view the stitch number and all the default recommendations The settings made on the SEWING ADVI SOR are always visible in the Overview Window The letter indicates the fabric and the number the technique If another stitch than the...

Page 27: ...the STOP function is active 5 Indicates that the FIX function is active 6 Indicates that STABILIZER should be used 7 The recommended THREAD TENSION Overview Window 8 Indicates that the STITCH MENU is active 9 Indicates the selected STITCH MENU 10 Indicates that the sewing machine has a SEWING ADVISOR 11 12 SEWING ADVISOR The selected fabric letter and sewing technique number are shown next to the ...

Page 28: ...arts of the buttonhole When the Sensor Buttonhole Foot is connected Platinum 735 21 Indicates that the Sensor Buttonhole Foot is connected If the icon Áashes line up the white range on the wheel with the white mark on the foot 22 Set BUTTON SIZE by touching the stitch length or button By touching CLR you can step between setting the buttonhole size and buttonhole density 23 The button symbol indic...

Page 29: ...U is active 10 Indicates the selected STITCH MENU Icons on the InfoDisplay Platinum 755 On the InfoDisplay there are always icons that give you all information you need to obtain the best sewing result possible Some icons are always active and some will change depend ing on your selections The icons visible on the InfoDisplay are listed and explained below 11 The set SPEED 12 Indicates to lower th...

Page 30: ...ons Platinum 755 20 When sewing step by step buttonholes a Áashing icon indicates that you need to touch REVERSE to move between the different parts of the buttonhole When the Sensor Buttonhole Foot is connected 21 SENSOR BUTTONHOLE FOOT is con nected 22 Set BUTTON SIZE by touching the stitch length or button By touching CLR you can step between setting the buttonhole size and button hole density ...

Page 31: ...memory There are two different memories M1 and M2 Each memory holds up to 30 stitches which means that you can program and save up to 60 stitches and or letters When activating PROG the memory previously used is active To save your programmed combination in the other memory select it by touching M before pro gramming new stitches Move between programmed stitches Use the arrow buttons to move betwe...

Page 32: ...n Touch FUNC to activate PROG Select stitch 2 03 Platinum 715 2 05 Platinum 735 The number appears on the InfoDisplay To enter the stitch touch the right arrow button to move to the next stitch position Other wise the stitch selected next will replace the stitch already entered Select 2 03 Platinum 715 2 05 Plati num 735 again Touch Move for ward with the right arrow button To sew the stitch progr...

Page 33: ...t E The number 5 appears on the InfoDisplay Move forward with the right arrow button To program rika in lower case letters select lower case letters with the Alphabet menu button When the lower case menu is active a is visible in the Overview Window Touch r the number 18 appears on the InfoDisplay Move forward with the right arrow button Continue to enter the let ters i k and a in the same manner ...

Page 34: ...o adjust letters You can adjust the stitch length and width or mirror image a stitch letter The adjustments will automatically be stored in the permanent memory Sew your Program To sew your program touch FUNC to bring up the REP mode Presser foot B is recom mended A stop is indicated by a stop sign symbol To check your stitch sequence use the arrow buttons to move forward backward in the sequence ...

Page 35: ...SEWING ...

Page 36: ...ne This discoloring may be very difficult or impossi ble to remove Fleece and denim fabric in especially red and blue often contain a lot of excess dye If you suspect that your fabric ready to wear garment contains a lot of excess dye always pre wash it before sewing embroidering to avoid the discoloring Sewing 34 ...

Page 37: ...sition under the presser foot Line up the edge with the 5 8 15 mm seam guide Lower the presser foot and step on the foot control Sew a seam Cut the threads when Àn ished Seams in stretch fabric must stretch with the fabric The Lightning Stitch Stretch Stitch makes a stretchy seam that is suitable for sewing together pieces of light stretch fabric Fabric Stretch light cut in two 755 715 735 1 04 Se...

Page 38: ...presser foot and step on the foot control Touch on the stitch width button to move the needle 12 steps into the left needle position Touch to move needle 24 steps into the right needle position Touch stitch width to move the needle back to center position Each touch on stitch width or cor responds to a 0 25 mm adjustment of the needle position To get the maximum feed when edge stitch ing close to ...

Page 39: ...5 735 1 07 Seam allowance 5 8 15 mm Sew Lower the presser foot and step on the foot control Stitch along the seam line Cut the threads when Ànished Pull bobbin thread to remove the stitch ing Gathering Use a slightly longer stitch than normal straight stitch 3 5 5 0 Always sew two gathering threads next to each other Place a single thickness of fabric under the presser foot and stitch Stitch a sec...

Page 40: ...755 715 735 1 03 1 06 Sew Put the fabric in position under the presser foot Lower the presser foot and step on the foot control Stitch 5 8 15 mm from the edge Three Step ZigZag Stitches The multiple zigzag stitches look like a zigzag stitch with short stitches in the zig and the zag of the stitch The three step zigzag is up to 1 4 6 mm wide and suitable for all types of fabrics Use this stitch for...

Page 41: ...light cut in two 755 715 735 1 13 Sew Place fabric pieces right sides together Put the fabric in position under the presser foot aligning pin on the foot with the edge of the fabric Lower the presser foot and step on the foot control Sew along one edge Cut the threads when Ànished The overcast stitch is also suitable for woven light and medium fabrics For heavy stretch fabric select Overlock stitc...

Page 42: ...e touch Continue sewing The machine sews back and forth across the hole twelve times and then stops To repeat the stitch with the same size touch Reposition your fabric then step on the foot control to sew again The stitch will now repeat the same size darning square in succession and the machine will stop automatically when the stitch is completed Blind Hem The blind hem creates an invisible hem ...

Page 43: ...er seams in extra heavy fabric or a blue jeans hem the foot can tip as the machine climbs over the seam The needle can hit the tipped foot and break Use the clearance plate to balance the height of the hem as you sew Fabric Jeans fabric 755 715 735 1 02 One side of the plate is thicker than the other Use the side that suits the thickness of the seam best Stretch Hem Fabric Stretch medium 755 715 7...

Page 44: ... Lower the feed teeth by turning the dial on the free arm to Move the fabric to stitch a series of bartacks over the zipper to hold it in place Turn the feed teeth dial to sewing position and the feed teeth will come up auto matically when you start sewing Sew On Platinum 715 735 select straight stitch and adjust stitch width to 6 0 for left needle position straight stitch On Platinum 755 select s...

Page 45: ...f the zipper in the same direction Snap on the zipper foot to the left of the needle Touch for right needle posi tion straight stitch Begin stitching across the bottom pivot the fabric and stitch the left side of the zipper sewing from the bottom to the top Remove bartacks and basting stitches Note To adjust the position of the stitching line adjust the needle position Touch stitch width minus to ...

Page 46: ... of the sewing head a Line up the white area on the side of the wheel with the white marking on the foot On the InfoDisplay b a symbol indicates that the Sensor Buttonhole Foot is connected Select the desired size c for your button using the stitch length buttons Average button sizes are 16 mm 5 8 20 mm 3 4 and 24 mm 1 Maximum button size when using the Buttonhole Sensor Foot is 50 mm 2 When sewin...

Page 47: ...e to the but tonhole Lower the Sensor Buttonhole Foot and step on the foot control A straight stitch is sewn backwards indicating the left but tonhole column then the satin column is sewn forwards This is repeated for the right column The bartacks are automatic see illustration 1 Your sewing machine stops when the buttonhole is completed Note When sewing buttonholes without satin stitches or when ...

Page 48: ...tie off Keep the foot control depressed until the machine ties off and stops sewing To repeat more buttonholes with the same size press STOP to save the settings Buttonhole Density To change the stitch density of both but tonhole columns increase stitch length to make stitch columns less dense Decrease stitch length to make stitch columns more dense Both columns will be adjusted Corded Buttonhole ...

Page 49: ...rge sewing needle pull to the wrong side and knot the ends before cutting excess cord Cutting Buttonholes Cut the buttonhole open with the seam ripper Start from any side cutting towards the center of the buttonhole then proceed from the other side again cutting towards the center This way you avoid damaging the bartacks Button Sew buttons snaps hook and eyes quickly with your Platinum Fabric Wove...

Page 50: ... ankle with the holes in the button lined up with the swing of the needle Check the swing of the needle by touching the mirror side to side button to be sure the needle will not hit the button Bring the needle down into the hole of the button with the hand wheel to verify Zigzag button in place with six to eight stitches Touch to tie off Touch to repeat for the next button Raise feed teeth when bu...

Page 51: ...CARE OFYOUR PLATINUM ...

Page 52: ...lable at your authorized Husq varna Viking dealer 1 Place the light bulb remover with the deep hole marked OUT around the bulb Do not turn the bulb just pull it out to remove it 2 When inserting a new light bulb place the light bulb remover with the shallow hole marked IN around the new bulb Insert it by pushing it up 1 2 Care of your Platinum ...

Page 53: ... then in the recess at the rear of the stitch plate Turn toward you to pop off the stitch plate Clean the feed teeth with the brush Cleaning Under the Bobbin Area When lint builds up the area under the bobbin case must be cleaned Remove the bobbin case holder 1 cover ing the front part of the bobbin case 2 Remove the bobbin case by lifting it up Clean with the brush Replace the bobbin case and the...

Page 54: ...clamp Rethread top and bobbin threads Use recommended presser foot Turn machine off and on to reset Consult your dealer for service Needle Breaks Use care not to pull fabric when sewing Insert new needle size and type as recommended on the InfoDisplay Insert needle correctly as page 12 explains PoorTension Rethread top and bobbin use quality thread Insert new needle size and type as recommended on...

Page 55: ...oth arrow buttons at the same time until the balance icon is visble on the InfoDisplay Use the stitch length buttons to adjust the balance will make the stitches in the right column closer together more dense will make the stitches further apart less dense By touching the CLR button the machine returns to stitch length button size mode The balance setting will remain until your sewing machine is t...

Page 56: ...oot control 4 the machine 4 Corded buttonhole 46 Correct thread tension 15 Cutting buttonhole 47 Darning 40 Delete stitches or programs 30 Fault Ànding 52 53 Feed teeth lowering 16 FIX 18 Foot control 4 5 FUNC 19 Function FUNC 19 NORM 19 PROG 19 REP 19 Function buttons 18 Gathering 37 Icons on the InfoDisplay 25 27 Incorrect thread tension 15 Knit fabric 22 Leather 23 Lightning Stitch 35 Lowering ...

Page 57: ...18 zipper 42 Spool holders 6 Spool pin Main spool pin 6 Auxilary spool pin 7 Step by step buttonhole 46 Stitch length 18 Stitch plate 51 Stitch selection menus 19 Stitch selection 20 utility and decorative 20 alphabets 21 alphabet sub menu 21 Stitch width 18 STOP 18 30 Straight Stitch 35 Stretch Stitch 35 Table of contents 1 Thread tension 15 Threading bobbin 10 needle 8 top thread 7 twin needle 9...

Page 58: ......

Page 59: ...ons to the performance or design Such modifications however will always be to the benefit of the user and the product Please note that on disposal this product must be safely recycled in accordance with relevant National legislation relating to electrical electronic products If in doubt please contact your retailer for guidance ...

Page 60: ...VSM Group AB SE 561 84 Huskvarna Sweden www husqvarnaviking com 412 99 26 26C InHouse 2006 VSM Group AB All rights reserved Printed in Sweden on environmentally friendly paper ...

Reviews: