

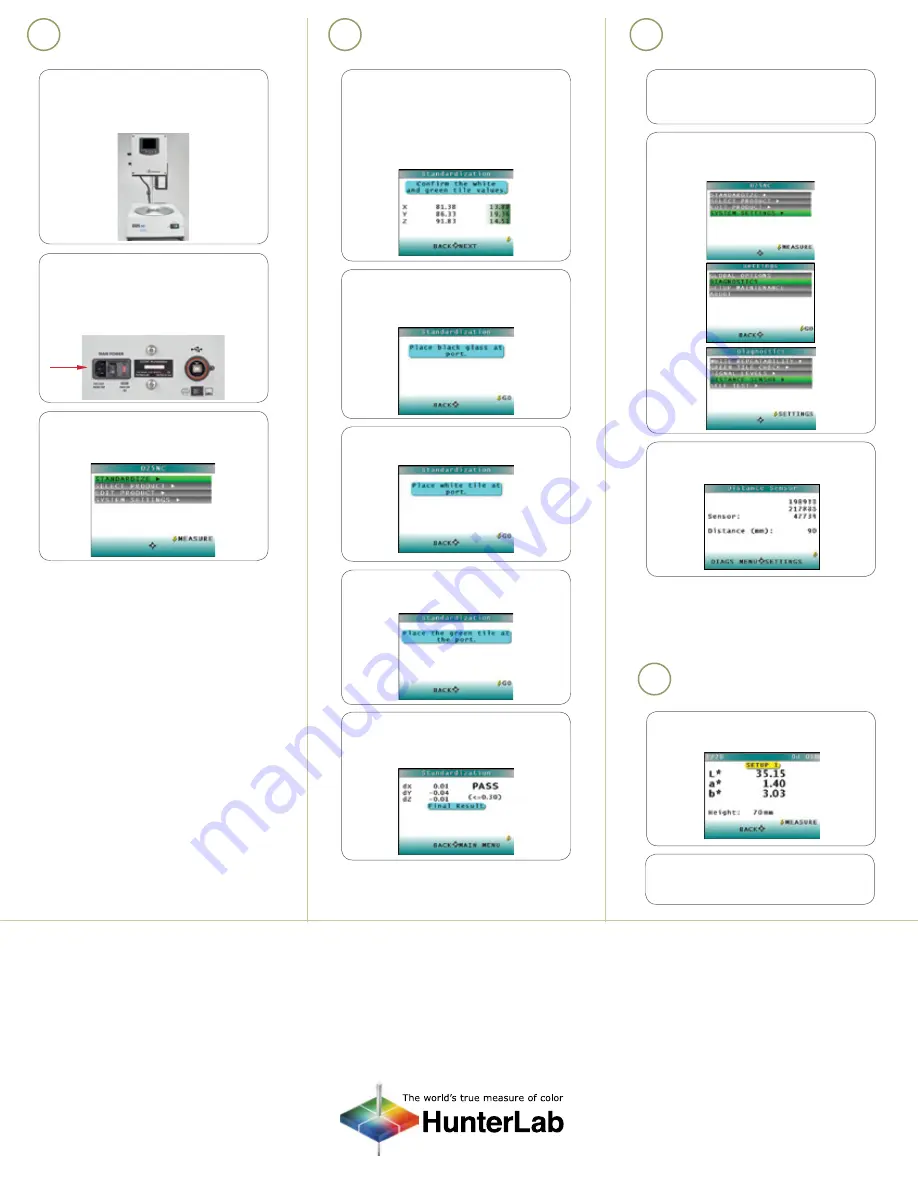
SETTING UP THE INSTRUMENT
STANDARDIZATION
1.
In
MAIN MENU, press the RIGHT
ARROW to select STANDARDIZE.
Current values of the white and
green tiles are displayed, matching
the calibration box. Press NEXT
(right arrow) to continue.
2.
Slide the calibration box onto the
track under the sensor. Line up the
black glass and press GO.
3.
Slide the white tile into view —> GO.
4.
Place green check tile into view —>
GO.
5.
The result of the green check tile is
displayed. If PASS, press the RIGHT
ARROW to return to the MAIN MENU.
Now your instrument is ready
for standardization.
Now your instrument is ready
to read samples.
SET DISTANCE FROM
SENSOR TO PRODUCT
For more detailed instructions on using the instrument, please refer to the D25
®
NC User’s Manual.
Visit www.hunterlab.com for information on all our products.
1.
Place sample in the dish and press
MEASURE.
2.
(Option) Press the DOWN arrow to
PRINT the reading to a USB printer.
1.
Select a sample dish to use with the
turntable and place the product in
the dish on the turntable
.
3.
Raise and lower sensor height until
distance sensor reads close to 90 mm.
2.
From the MAIN MENU go to SYSTEM
SETTINGS > DIAGNOSTICS —> GO —>
DISTANCE SENSOR >.
A
B
C
READING SAMPLES
D
1.
Unpack the D25 NC sensor and
place the unit on the bench.
Save the shipping box in case
of service.
2.
Connect the power cord to the
back of the turntable and
an electrical outlet.
(Option) Connect the USB cable
from the instrument to a printer.
3.
Turn the power on using the switch
on the back of the turntable.
The
MAIN MENU will display.
A60-1016-531 ver 1.1
Electrical
outlet


