background image

15 


Customer Service Guide             


IV) Gearbox Replacement 


Step (9) 


Slide the gearbox out from axle             


Step (10) 


Replace the whole gearbox 
sub-assembly with a good one 

Reverse above other procedures to re-assemble back the vehicle


Summary of Contents for Rollplay Aria Child W487

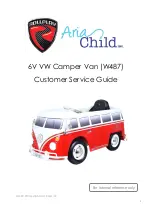
Page 1: ...1 6V VW Camper Van W487 Customer Service Guide MMXV Copyright Aria Child Inc For internal reference only...

Page 2: ...Wiring Condition 6 III Check Foot Pedal 9 IV Gearbox Replacement 11 V Power Control Board Replacement 16 VI Warning Stickers 18 VII Schematic diagram 21 VIII Exploded View 22 CAUTION Disconnect the ba...

Page 3: ...Operation Use a Flat head screwdriver unlock and remove the seat Locate the battery harness unplug the connector then use a volt meter to check battery condition at battery side Step 1 Turn and unlock...

Page 4: ...4 Customer Service Guide I Check Battery Unplug the battery connector RED underneath seat Step 3 Step 4...

Page 5: ...p 5 Reading Judgment 6 0 V 6 6 V Good condition 5 6 V 5 9 V Proceed to Recharge 5 5 V Battery to be recharged if after the stipulated recharging time voltage has not increased the Battery needs replac...

Page 6: ...Connection Operation There are totally three positions of connections should be checked A Motor Gearbox Follow above Point I to remove the seat locate the Gearbox harness underneath Check the white c...

Page 7: ...Check Wiring Connection B Steering Wheel Access the connector of Steering Wheel per below procedures Step 1 Use phillips screwdriver to remove the Steering wheel Step 2 Slide it out from steering colu...

Page 8: ...stomer Service Guide II Check Wiring Connection C Dashboard Access the connectors of Dashboard at the underneath of vehicle Three sets of connectors located underneath the right front wheel Step 3 Ste...

Page 9: ...Customer Service Guide III Check Foot Pedal Operation Follow below procedures to check the Foot Pedal connection Step 1 Tip over the vehicle and pull out the Foot Pedal cover by flat head screwdriver...

Page 10: ...10 Customer Service Guide III Check Foot Pedal Step 3 Slide in the Foot Pedal into Chassis from right side 2 Snap back in place 1...

Page 11: ...earbox Replacement Operation Remove the seat first and then follow below steps to take apart the whole gearbox subassembly and replace Step 1 Unscrew the wiring clip as showed Unscrew the locking scre...

Page 12: ...12 Customer Service Guide IV Gearbox Replacement Step 3 Unplug the gearbox connector white color Step 4 Use flat head screwdriver to detach the rim cover latches Right rear wheel only...

Page 13: ...13 Customer Service Guide IV Gearbox Replacement Step 5 There are four latches as showed Step 6 Use a flat head screwdriver to remove the snap pin from axle...

Page 14: ...14 Customer Service Guide IV Gearbox Replacement Step 7 Slide the rear axle a bit away from the right wheel Step 8 Take the rear wheel off from axle...

Page 15: ...omer Service Guide IV Gearbox Replacement Step 9 Slide the gearbox out from axle Step 10 Replace the whole gearbox sub assembly with a good one Reverse above other procedures to re assemble back the v...

Page 16: ...Guide V Power Control Board Replacement Operation Remove the seat and access the power control board underneath Step 1 Unscrew these two screws to release the power control board Step 2 Unplug these t...

Page 17: ...er Service Guide V Power Control Board Replacement Step 3 Unplug the gearbox connector Step 4 Replace the whole power control board with good one Reverse above other procedures to re assemble back the...

Page 18: ...18 Customer Service Guide VI Warning Stickers Operation Check and re put the damaged warning stickers after problem fixed 1 Behind the seat...

Page 19: ...19 Customer Service Guide VI Warning Stickers 2 Below the seat...

Page 20: ...20 Customer Service Guide VI Warning Stickers 3 Battery harness...

Page 21: ...22 Customer Service Guide VIII Exploded View...

Reviews: