The Platinum ID Portable battery compartments have been designed to accept commercially
available batteries with an overall height within industry tolerance. However, some batteries may
be slightly shorter, preventing the spring terminals from contacting the brass terminal strips in the
lower case. Should this occur, stretch the spring terminals slightly so that they contact the brass
terminal strips in the lower case.
Assembling the Portable Sensor
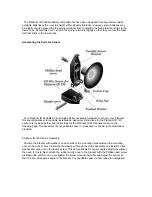
Your Platinum ID Portable Case includes all the necessary hardware to convert your Platinum
ID sensor/transducer for portable installations. Assembly instructions for the Platinum ID 120
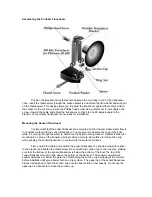
sensor are included below, and instructions for the Platinum ID 600 transducer are on the
following page. The assembly of your portable sensor or transducer is shown in the illustrations
provided.
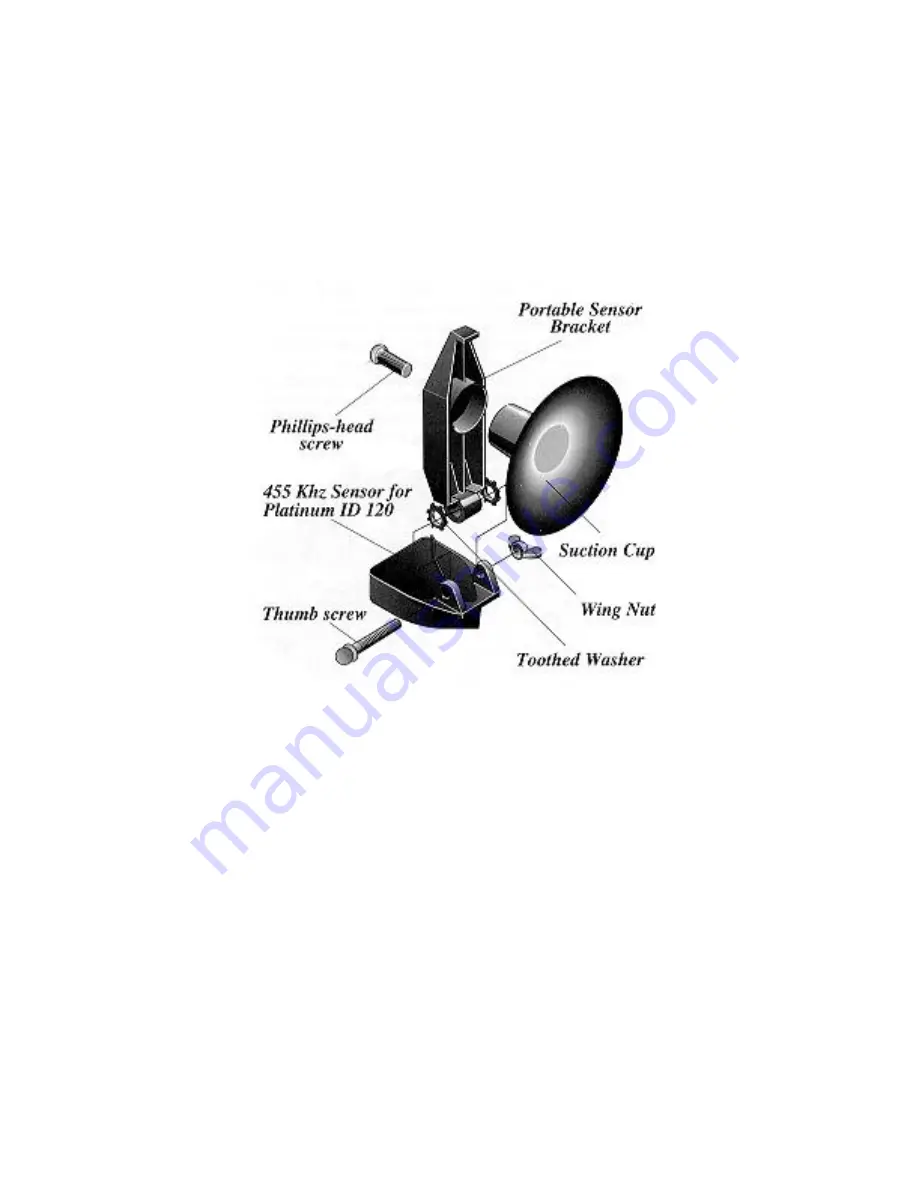
Platinum ID 120 Sensor Assembly
Position the bracket with washers on each side of the mounting holes between the mounting
ears on the sensor. Next, insert the thumbscrew through the entire assembly and install the flat
washer and wing nut on the thumb screw. This design allows for sensor angle adjustment without
the need for tools. Next, attach the rubber suction cup to the bracket with the Phillips head screw
as shown. Be careful not to over-tighten the screw. Unwind the cable and adjust the sensor so
that it is at a 90-degeree angle to the bracket. Your portable sensor is now ready for installation.
Summary of Contents for Platinum ID PORTABLE
Page 1: ......


