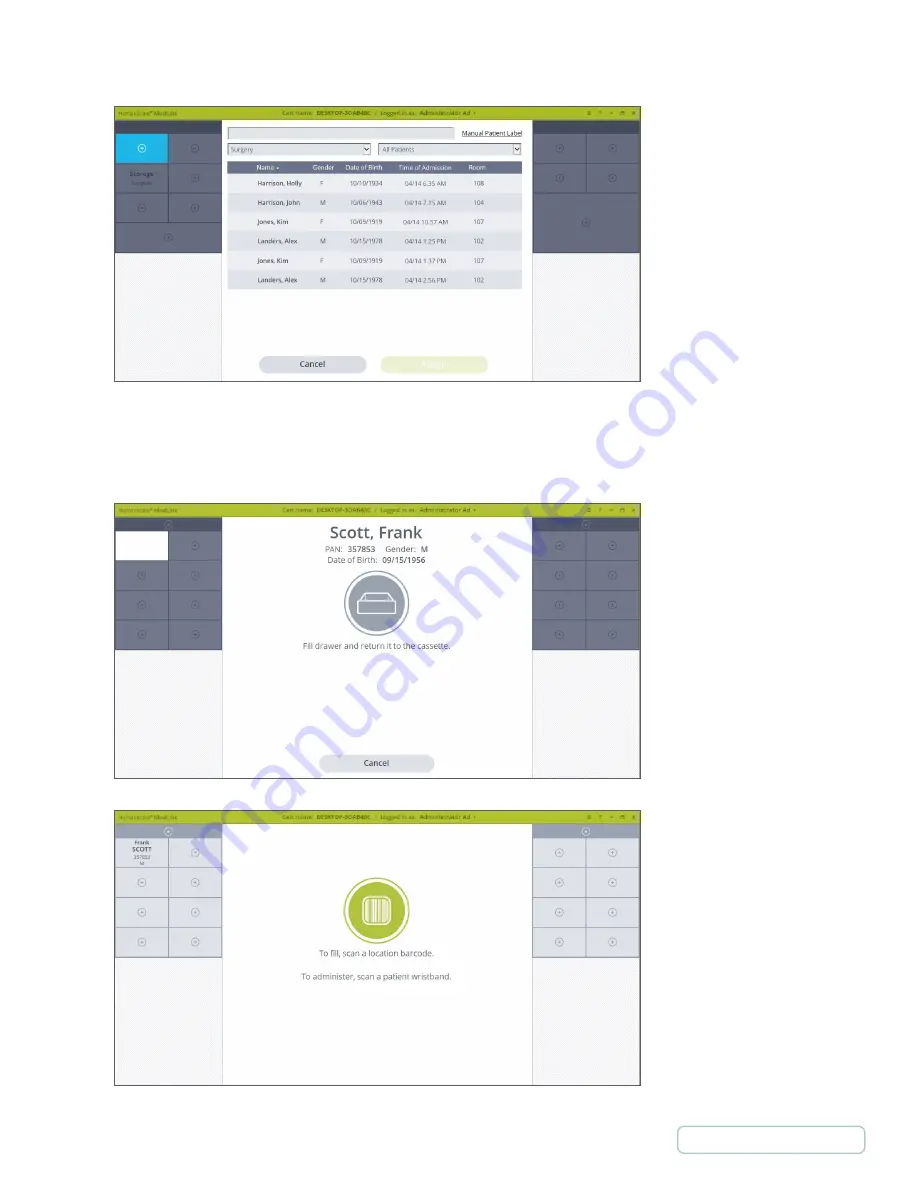
7. Select your chosen patient and then click the Assign button. Clicking Cancel will exit the reassign process and will leave the
drawer assigned as it was previously.
8. Fill the drawer with that patient’s medication and return the drawer to the cassette as prompted, ensuring it locks into place.
9. You will be returned to the home screen, and the selected drawer will now show the details of the patient you chose. The
assigning and filling process is now complete.
Figure 34 - Patient List
Figure 36 - Home Screen with Assigned Patient
Figure 35 – Drawer is out to be filled
41


