Operation:
Precautions:
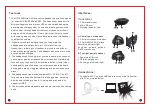
2. Connect with PS3: Use RCA cable to connect with TV and
transmitter: plug 3.5mm jack into 3.5mm hole of the transmitter,
the white/red RCA plugs are connected with the corresponding
interface of TV; Use the USB cable to connect with the
transmitter and USB port of PS3 as pictured below:
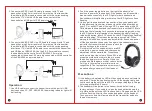
3. Connect with X BOX 360: Use RCA cable to connect with TV and
transmitter: plug 3.5mm jack into 3.5mm hole of the transmitter,
the white/red RCA plugs are connected with the corresponding
interface of TV; Use the USB cable to connect with the transmitter
and USB port of XBOX360; Use the 2.5-3.5mm cable to connect
the headset with the controller of XBOX360, 3.5mm plug
connected with headset, 2.5mm plug connected with the controller
of the XBOX360 as pictured below:
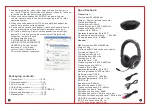
1. Use USB cable to connect the transmitter with the port of USB
device such as PC, PS3, XBOX360, the working indicator light will
be flashing.
2. Push the power toggle button on the right of headset to "on"
position to power on the headset. If the headset and transmitter
was paired successfully, the LED lights for both headset and
transmitter will stop flashing; otherwise, the LED lights continue
flashing.
3. How to pair the headset and transmitter: when you need to pair
the headset and transmitter, please close the all applications on
your PC, or exit MIC mode if using a PS3; please keep within 50
CM between the headset and the transmitter, press the MIC "Mute"
button on the left earlap for 5 seconds to enter pairing mode, when
the LED light on the left earlap of the headset is quickly flashing,
release the button, after 5-10 seconds, the LED light stops flashing
and stop flashing. This means the pairing is successful. When
pairing is finished, don't press any keys wait for 6 seconds,power
off the headset and then power it on again, the headset will auto
pair with the transmitter and also auto save the
pairing settings in the memory..
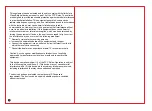
4. On the left side of the headset, there are MIC
mute button, game sounds and chat sounds
adjustment buttons available. Press these
buttons to adjust the volume. When MIC is on,
press the mute button to mute the mic, press
the button again to turn off mute. When you
press and hold the game or chat volume button,
it will go to the maximum or minimum level
respectively. The last operation memory will
be saved after you power off the Headset.
1.If the battery is depleted no LED will be shown when you attempt to
power on. Charge the headset using the USB charging cable and
continue charging until the red LED is no longer displayed. Charge
time is approximately 3 hours..
2.The headset will be paired to the transmitter as default using
factory settings. If you need to re-pair the headset hold down the
Mic Mute button until the LED flashes quickly. Once paired the LED
will stop flashing. Wait for 6 seconds and power off the headset.
Then power on and it will auto pair with the transmitter and save
the pair to memory.


