background image

The primary mirror must be supported in the sling and not by the side pins. Point 
UL16 about 15º above the horizon, an angle from which your can comfortably reach 
and adjust the collimation screws.

You will need to use two wrenches to adjust the sling. Make sure that the sling is 
hung through the slot on the left (or right) split bolt. Just wrap one or two turns on this 
side. To do this, rotate the head of the bolt with one wrench and hold the opposing nut 
with other wrench. Lock it tight.  

Now go to the sling bolt on the other side. Hold the bolt head with one wrench and 
loosen the opposing nut. Turn the bolt to wrap the sling until the mirror lifts off the 
two lower pins. Raise the mirror until it almost touches the upper side pin. 

Lock the bolt in this position by tightening the lock nuts. Check to make sure that the 
mirror is indeed suspended on the sling by pushing on the back of the mirror with 
your fingertips. With UL16 in a nearly horizontal position, you should be able to 
move the mirror off the floatation cell support bars easily.

If the mirror tilts against one of the side pins, loosen the retaining nuts and rotate that 
pin away from mirror until there is a few mm gap between the mirror and the pin.

The mirror must be supported be the sling and not be the side pins.  

3. Collimate the Optics.

Keep the primary mirror covered during step 1.  Point the telescope at 45° altitude 
during the collimation step 1-3.

You need to make sure that UL16’s collimation will not shift when it is pointed at 
different altitudes by tightening all locking nuts and screws properly along the entire 
optical path:

Make sure the focuser is tightly locked in its square base

Make sure the focuser square base is tightly locked onto the focuser L bracket 

Make sure the focuser L bracket is tightly locked onto the upper ring

Make sure all three spider vanes are tightly locked onto the spider hub and the 
upper ring

The three collimation screws for the secondary mirror need to be properly 
tightened after collimation

All knob screws for all the truss tubes need to be tightened properly

The three primary mirror lock screws need to be tightened properly

Two positions have been provided to mount the focuser for the convenience. 

However, for the maximum collimation stability, and in particular for heavy 
loads, the focuser should be installed directly on the top side of the Truss Tubes.

Step 1:

 Center the secondary mirror on the axis of the focuser drawtube.

28

Summary of Contents for Ultra Light UL 16

Page 1: ...tional Finder Scope 26 2 5 Adjust the Sling 27 3 Collimate the Optics 28 4 Care and Maintenance 31 4 1 Mirror Storage 31 4 2 Mirror Cleaning 32 5 Specifications 33 6 Limited Warranty 34 7 Technical Su...

Page 2: ...spider hub and the diagonal secondary mirror holder 1 Mirror Box Rocker and Ground Board 1 Focuser L bracket with 2 M5 x 16 screws 1 Secondary mirror 1 2 10 1 dual speed focuser 3 Plastic feet with wi...

Page 3: ...Figure 1 Mirror Box Figure 2 Upper Ring 3...

Page 4: ...Figure 3 Spider Vanes 4...

Page 5: ...Figure 4 Secondary Spider Hub Diagonal Support Figure 5 Focuser L Bracket Figure 6 14 Knob Screws 5...

Page 6: ...Box 2 The primary mirror Qty Description 1 Primary Mirror 6...

Page 7: ...amiliarized yourself with all of the parts in front of you it s time to begin assembly You ll need a regular screwdriver a Phillips screwdriver a set of metric hex keys 1 5 2 2 5 3 4 and 5mm two 6 inc...

Page 8: ...lightly and carefully slide the secondary mirror into the baffle from the back let the mirror lightly held by the baffle s rim Then place the fiber fill behind the secondary mirror to support the mirr...

Page 9: ...econdary holder until the secondary mirror is centered by being viewed from the focuser draw tube Adjust and tighten the three collimation screws When installing the holder into the spider you should...

Page 10: ...Figure 8 Attach the three spider wings to the spider hub Figure 9 Attach the three spider wings to the upper ring 10...

Page 11: ...Figure 10 Attach the focuser L bracket to the upper ring Figure 11 Attach the focuser to the L bracket 11...

Page 12: ...Figure 12 3 collimation screws evenly between the vanes Figure 13 Attach the secondary holder with the secondary mirror 12...

Page 13: ...Figure 14 Center the secondary in the focuser drawtube 13...

Page 14: ...f the Dobsonian Rocker The UL16 base is shipped assembled The only thing you need to do is to install the three plastic feet Make sure to use the wing nuts to lock the three feets 2 3 Assembly of the...

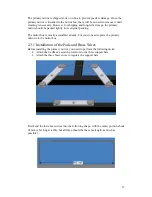
Page 15: ...is mostly assembled already but you do need to place the primary mirror into the mirror box 2 3 1 Installation of the Pads and Brass Wires Before installing the primary mirror you need to perform the...

Page 16: ...oles on the support bars and then bend the head portions to lock the brass wires in the position Push the brass wires outward into a slight curve to keep the support bars in position 2 3 2 Installatio...

Page 17: ...that 3 collimation knobs and 3 locking screws are installed then rest the Mirror Box on its side Place the two spacers around the ALT bearing installation holes Please note that the spacers are alrea...

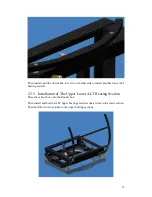
Page 18: ...r lower ALT bearing section 2 3 3 Installation of The Upper Lower ALT Bearing Section Place the mirror box onto the Rocker box Then install and bolt the ALT upper bearings sections one at time to the...

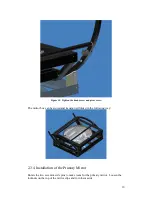
Page 19: ...irror box can be stored and transported folded in the following way 2 3 4 Installation of the Primary Mirror Rotate the two eccentric side pins to make room for the primary mirror Loosen the locknuts...

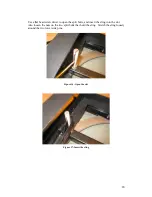
Page 20: ...open the split bolts and insert the sling into the slot Also loosen the nuts on the two split bolts that hold the sling Stretch the sling loosely around the two lower side pins Figure 16 Open the slot...

Page 21: ...e side pins The mirror protecting clips should not contact the mirror at all Keep the clips about 3 6mm above the mirror surface Place the mirror clips over the mirror and tighten the top lock nuts At...

Page 22: ...ted with a mirror box cover which can be as simple as a square cut out of cardboard Connect two truss tubes with an M6 knob screw 20mm long and an M6 wing nut on the multiple hole side of the top end...

Page 23: ...Figure 19 Tighten the knob screws 23...

Page 24: ...as possible but make sure they are still fully engaged on the bolts Hold the secondary cage up and slide one of the slots on the upper ring into the top knob bolt of one truss pair Make sure you slid...

Page 25: ...Figure 20 Slide in one slot first 25...

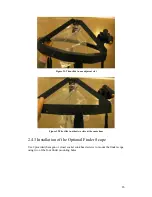
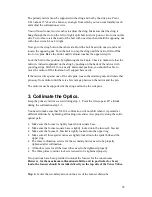
Page 26: ...slot Figure 22 The slide in other two slots at the same time 2 4 3 Installation of the Optional Finder Scope Use 2 provided hexagon or cross socket sunk head screws to mount the finder scope using two...

Page 27: ...2 5 Adjust the Sling After UL16 is fully assembled the sling must be adjusted 27...

Page 28: ...ate that pin away from mirror until there is a few mm gap between the mirror and the pin The mirror must be supported be the sling and not be the side pins 3 Collimate the Optics Keep the primary mirr...

Page 29: ...versized to allow the focuser to be adjusted to a certain degree You will have to remove the focuser to adjust the L bracket mounting screws You may have to re adjust the spider if it is still not cen...

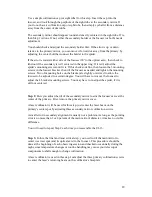
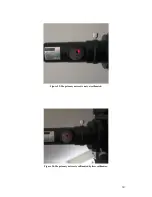
Page 30: ...Figure 23 The primary mirror is not yet collimated Figure 24 The primary mirror is collimated by laser collimator 30...

Page 31: ...he star image at the center of the eyepiece All rings and shadows should be concentric If not perform the collimation by adjusting the three primary mirror collimation screws until all rings and shado...

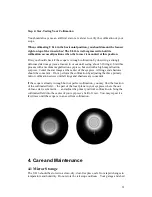
Page 32: ...osen the sling by loosening the lock nuts on the right split bolts with two wrenches Carefully loosen the three retaining clips and rotate all clips away from the mirror to clear the way for the mirro...

Page 33: ...nal rinse should be with distilled water Repeat the process with the small secondary mirror 5 Specifications Optical design Reflector Optical diameter 406mm Focal length 1829mm Focal ratio f 4 5 Optic...

Page 34: ...urchase price at Seller s sole option shall be the Buyer s exclusive remedies Seller shall not be responsible for any indirect special or consequential damages arising from use of the products This wa...

Reviews: