P.O. Box 60080 • 16555 East Gale Ave.
City of Industry, California 91716-0080
626/968-5666 • FAX 626/330-3861
Revised
7
/
16
/10 ECN 100715008 Status 11 Part No. 95540
This Kim fixture is supplied with a
K
” NPSM male mounting threads and locknut.
Tools Required
:
F
” Hex Wrench
Thread Sealant
Flat Blade Screwdriver
Phillips Screwdriver
WARNING: Fixtures must be grounded in accordance with local codes or the National Electrical Code.
Portable spear mounts using a cord and plug must be plugged into a receptacle protected by a Ground
Fault Circuit Interrupter in accordance with the National Electrical Code. Failure to do so may result in serious
personal injury.
SAFETY WARNING: To maintain light efficiency and prevent fixture overheating, lenses must be kept
clean and free of dirt, dust, leaves, trash and mineral deposits from water. For optimum performance a
regularly scheduled maintenance program should be followed. DO NOT operate luminaire with missing or
damaged lens.
SAFETY WARNING FOR QUARTZ: Fixtures can become very HOT depending on the lamp wattage used. Glass
lenses and metal areas above and around the lamp can become HOT enough to blister hands. Particular care
should be taken not to locate fixtures where small children can reach them if higher wattages are used.
CAUTION: When relamping fixture avoid touching the quartz lamp envelope with bare hands. If touching the
lamp is necessary during installation, clean the envelope with alcohol and dry with a clean, soft cloth before
burning.
NOTE: Keep the lamp free from impact while burning, as this may deform the filament and shorten the lamp
life. KEEP THIS SHEET FOR FUTURE REFERENCE.
!
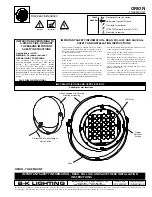
1. Coat swivel threads with thread sealant to keep
moisture from entering junction box.
3. Attach fixture ground lead to cir-cuit ground.
Attach fixture leads to circuit leads observing
polarity, i.e. white-to-common and black-to-
voltage.
4. To install lamp, loosen the two (2) captive screws
on lens frame. Install lamp of type listed on
fixture label. Replace lens frame and tighten the
screws.
2. Attach fixture to junction box and orient correctly.
Tighten locknut to insure selected orientation.
CFL
Locknut
Gasket
J-Box Top
CFL - COMPACT FLOODLIGHT
Installation Instructions
®
Captive Screws
Make certain electrical supply is
OFF
before starting fixture installation.
!
!


