


29
Fig. 57
Fig. 58
Fig. 59
Fig. 60
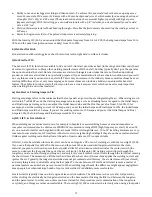
Once you let go of the momentary switch button, the arc
extinguishes and the post-gas flow timer engages (
Fig.
57
; 12.0 seconds in this instance).
PRO TIP: TIG 4T welding can be done in AC or DC, in
every wave form, and with (where applicable) or
without pulse. If you plug a foot pedal in with TIG 4T
activated, the machine deactivates the remote
control’s amperage adjustment feature (the remote
control symbol blinks in the LCD when the amperage
adjustment feature of the remote control is
deactivated). However, the on/off switch in the foot
pedal can now be used instead of a torch mounted
momentary switch.
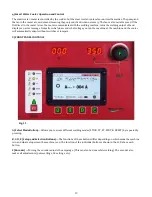
d) TIG SPOT
This is a fusion spot weld function. Use the Select Mode
button (
Fig. 11, A
) to toggle through the menu until the
LED next to SPOT illuminates. You are now in the TIG
SPOT welding mode. In the TIG Spot welding mode, all
remote control functions are unavailable. Press button
E
(
Fig. 11
) to enter the TIG Spot setup menu.
Here, you can set the pre-gas flow duration in seconds
(
Fig. 58
), the spot weld time in seconds (
Fig. 59
; spot
weld time refers to the arc on time that will create the
fusion weld), and the post-gas flow duration in seconds
(
Fig. 60
).
In order to perform the fusion spot weld, press the
momentary switch button or the foot pedal for at least
the amount of time you selected for the spot weld (in
this case 2.0 seconds). If the you depress the momentary
switch button or foot pedal for more than 5 seconds, no
harm is done to the machine. Your Invertig turns off
automatically after the spot weld timer runs out.
PRO TIP: Spot welding can be done in AC or DC, in
every wave form, and with (where applicable) or
without pulse. If you plug a foot pedal in with TIG
Spot activated, the machine deactivates the remote
control’s amperage adjustment feature (the remote
control symbol blinks in the LCD when the amperage
adjustment feature of the remote control is
deactivated). However, the on/off switch in the foot
pedal can now be used instead of a torch mounted
momentary switch.
e) TIG RESET
TIG RESET is a very popular process in Europe where
people typically use a momentary switch rather than a
foot pedal. TIG RESET is essentially a TIG 4T welding
mode with the option to toggle between two amperages
as you weld.
Use the Select Mode button (
Fig. 11, A
) to toggle through
the menu until the LED next to RESET illuminates. You
are now in the TIG RESET welding mode.
The main difference between TIG 2T and TIG RESET is
that there is no option to control the maximum
amperage while welding, other than by toggling between
your two preset amperages. If you want to weld material
and know you need about 110 amps, you can dial the
machine to 110 amps and weld. If you think that you
might have to weld out-of-position, with poor fit up, or if
the material heats up too much, you can set and select a
second amperage. With a swift press of the momentary
switch button, you can toggle between the two preset
amperages as needed.