LED Corn Lights
Instruction Guide
LED Corn Lights
Instruction Guide
HTM Lighting Solutions
- 6420 Benjamin Rd, STE 3, Tampa, FL 33634, USA
T: +1 (813)649-8899 | E: [email protected] | https://www.htm-lighting.com
HTM Lighting Solutions
- 6420 Benjamin Rd, STE 3, Tampa, FL 33634, USA
T: +1 (813)649-8899 | E: [email protected] | https://www.htm-lighting.com
To help protect the environment, please dispose of the product proper-
ly when it has reached the end of its use. Do not dispose of in house-
hold waste. Information on collection points and their opening hours
can be obtained from your local municipalities.
WARNING
CUSTOMER SUPPORT
If you may have any questions, or concerns, please call or email our lighting
specialists at:
1. Please disconnect power prior to installation
2. This model is not suitable for dimming, electronic switch, emergency exit
lights, or remote controlled system.
3. Do not use if moisture higher than 85%.
4. To use in damp locations, please use our IP64 Rated LED Corn Light
5. Do not touch the lamp body when on, or serious injuries may occur.
6. Please turn off the Corn Light if you encounter somthing unsual while oper-
ating. Please contact HTM Lighting Solutions at +1 (813) 649-8899
7. Do not stare directly at the light while oprating.
8. Added weight of the device may cause instability of a free-standing portable
luminaire.Use only with a portable luminaire that is provided with a shade.
This lamp employs light emitting diode technology and unlike tungsten-halo-
gen lamps does not require a barrier.
9. LED Corn Lights are suitable for enclosed luminaires (Check SKU#)
10. For lamps with a weight significantly higher than that of the lamps for which
they are a replacement, attention should be drawn to the fact that the
increased weight may reduce the mechanical stability of certain luminaires
and lampholders and may impair contact making and lamp retention.
T: +1 (813) 649-8899
Installation
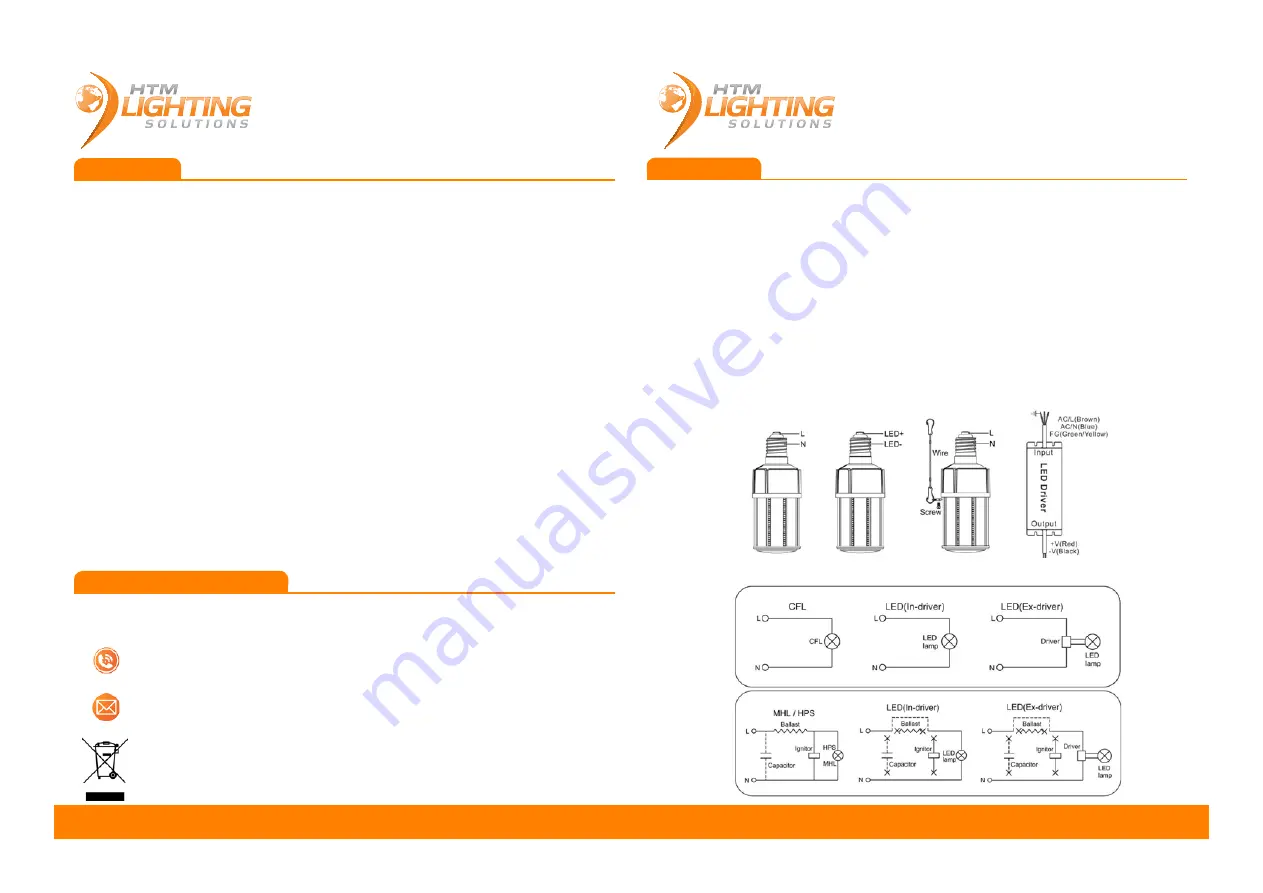
1. Disconnect Power Prior to Installation
2. Unscrew the MHL / HPS / CFL Bulb
3. Remove & Bypass the Ballast / Capacitor & Ignitor as per Figure (6)
4. Refer to Figure (1) & Figure (2) to identify the Line (L), and the Neutral (N)
5. For Corn Lights With Internal Power Supply, Follow Instructions On Figure (6).
Bypass the ballast, and rewire the Line (Black) & Neutral (White) Wire
6. For Corn Lights With External Power Supply, Follow Instructions On Figure (5)
Remove the ballast, and replace it with the provided Meanwell Power Supply from the
Corn Light
7. After rewiring the E39 or E26 Socket as per Figure (6) - LED (In Driver), verify that
everything is attached, and wired correctly
8. You may now screw in your new LED Corn Light, turn on the Power, and Enjoy your
savings
Warning: Please make sure the power is off before installation.
Figure (5)
Figure (1) Figure (2)
Figure (3)
Figure (4)
Figure (6)


