background image

HSR-BENELLI  SERIES-S  Manual | EN - 

Dear Customer,

We would like to thank you very much for your trust, and congratulate you for your new HSR-BENELLI

Series-S PWC! When we developed it, we made a point in creating a versatile and fast Series-S. We didn’t 

forget to include a revolutionary design and a low-emission engine technology either.

Our Series-S is driven by a four-stroke natural aspirated engine, with a sound that triggers excitement and 

denotes sportsmanship.

All you need to observe and know about your Series-S has been summarized in this User Manual. Observing 

the service work is also a condition for safeguarding your guarantee claims.

Please make sure that any service performed in your Series-S should be exclusively done by specialists 

trained by HSR-BENELLI.

This User Manual is also available in English and other languages on our homepage at: www.hsr-benelli.com.  

Should you require any further information, please consult our homepage at: www.hsr-benelli.com

It is also important to observe the recommended service intervals after the seller‘s warranty. This will not only 

pay off during operation, but also whenever you want to re-sell your PWC.

We wish you lots of fun with your HSR-BENELLI Series-S!

Yours truly,

HSR-BENELLI TEAM

Summary of Contents for S-series

Page 1: ......

Page 2: ......

Page 3: ...USER MANUAL SERIES S ...

Page 4: ... been summarized in this User Manual Observing the service work is also a condition for safeguarding your guarantee claims Please make sure that any service performed in your Series S should be exclusively done by specialists trained by HSR BENELLI This User Manual is also available in English and other languages on our homepage at www hsr benelli com Should you require any further information ple...

Page 5: ...amiliar with please make sure you learn how to handle and operate your new craft properly before taking control Your dealer or the national sailing association or yacht club will be pleased to provide you with information about local riding schools or experienced trainers Make sure that the expected wind and sea conditions comply with the design category of your PWC and that you are capable of han...

Page 6: ...ted by specialists The HSR BENELLI Series S builders shall not be responsible for alterations they have not agreed to In some countries a driving license or an authorization is required or particular regulations apply Always maintain your PWC in proper condition and take note of any wearing out which may occur over time as a result of frequent usage or incorrect use of the PWC Any PWC regardless o...

Page 7: ... may be compulsory in some countries Likewise some countries may request a riding license or authorization according to their national regulations Find out these details with your local dealer and keep in mind they will just add to your safety and comfort Please keep this Manual in a safe place and pass it on to the new owner when you sell the PWC ...

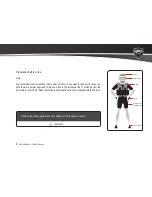
Page 8: ...or thick close woven and tight fitting clothing which offers sufficient protection Thin cycling shorts for example are not suitable If you fall into the water or come near the jet pump nozzle you can incur in severe internal injuries Normal swimwear does not provide adequate protection Shoes and gloves are also recommended It is advisable to protect the feet with light and flexible shoes This redu...

Page 9: ...you should wear a helmet approved for Series S due to the increased risk of accidents from the proximity to other riders Read the instructions and safety directions supplied with the helmet Observe the safety regulations and conditions of the respective country Eye protection Helmet Life jacket Gloves Neprene suit or neoprene shorts Foot protection ...

Page 10: ...HSR BENELLI Series S Manual EN 10 ...

Page 11: ...ries S Manual Table of Content 1 General information and safety instructions 13 2 Features and functions 27 3 Operation 47 4 Maintenance and service 63 5 Engine description 91 6 Faults and repair measures 99 7 Appendix 103 ...

Page 12: ...HSR BENELLI Series S Manual EN 12 ...

Page 13: ...3 Important warnings 15 1 4 Position of warning stickers 16 1 5 Safety instructions 17 1 6 Restrictions for operation 19 1 7 Safety rules for riding 20 1 8 Important information on watercraft helmets 23 1 9 Characteristics of the jet drive 24 1 10 Breaking in of the Series S according to your possibilities 24 1 11 Warranty Policy 25 ...

Page 14: ...nufacturer s identification the exact model description and special characteristics of your PWC to the appropriate authorities This makes it possible to identify your Series S 1 2 Engine number A non standard engine number with 18 digits for identification can be found in the crankcase housing The production date can be determined through this number BH33 Engine Type 000001 Serial Number AA808 Mod...

Page 15: ...et spare stickers from an authorized HSR BENELLI dealer Part Number HSR03_03_00_026 When riding your Series S the safety lanyard must be fastened safely to the rider at all times If there is a fall the safety lanyard will disconnect the contact to the engine and the PWC will stop If the safety lanyard is not fastened to the rider the Series S will not stop if he she falls off This can injure or da...

Page 16: ...HSR BENELLI Series S Manual EN 16 1 4 Position of warning stickers The warning stickers are placed on the inside of the steering column ...

Page 17: ...andatory in the country of use Flotation The Series S is not designed to be left in the water for a long time Strong movement of waves can cause water to get into the water draining system of the engine s interior Water in the engine compartment can cause the craft to sink Series S riders can fall into the water at any time so it is absolutely necessary to be a good swimmer Don t ride your Series ...

Page 18: ...ly or press the stop button to switch the engine off Swim to the rear of your Series S Then grip the two rear corners of the Series S with your hands and turn it clockwise Plug the safety lanyard in again and start the engine Climb in again ALWAYS turn the Series S clockwise Turning anticlockwise can let water penetrate into the exhaust system and damage the engine ...

Page 19: ...to avoid accidents Before using it pay attention to the following points Never allow anyone to ride without explanation and reading of the User Manual An explanation of the warning instructions is absolutely necessary and guarantees a safe operation This Series S is not a toy HSR BENELLI recommends a minimum age of 16 years for its use Adults are compelled to supervise the underage This watercraft...

Page 20: ... to register the craft license plate Observe the navigation regulations applicable in the region You can get the relevant information from the Coast Guard or the water protection police It is advisable to consult the local authorities on how to protect yourself against avoidable difficulties and penalties Ride defensively with a safe speed and always keep a necessary safety distance from other cra...

Page 21: ...d collision Do not forget Series S does not have brakes During a ride with the Series S the safety lanyard must always be fastened to the rider If you fall into the water pulling the line will make your Series S stop safely Therefore no alcohol for riding safely The rider should wear suitable eye protection Otherwise the water spray may jeopardize your safety Wear suitable shoes for riding the Ser...

Page 22: ...ng in the night Use it only during the daytime Avoid riding in waters with algae flotsam or other obstacles This could block the jet pump increasing the risk of injuries Stick to the minimum water depth of 60 cm Do not attempt to cross jumps with the Series S You risk major injuries and the Series S can get damaged most severely The Series S is not suitable for towing other watercraft or for water...

Page 23: ... etc While the jet pump is safer than a propeller safety measures must always be observed Keep clothing feet hands and long hair away from the jet pump intake 1 8 Important information regarding watercraft helmets The helmet protects the head in case of collisions but can also contribute to neck injuries Therefore consider the advantages and risks of using a helmet You alone must decide on the bas...

Page 24: ...sibilities Observe the following regulations and recommendations and you will have lots of fun with your HSR BENELLI Series S During the first 5 minutes of riding time do not exceed the average speed of 2500 rpm Do not run the engine during the first 5 hours with more than 3 4 acceleration on the lever and do not overstrain it Accelerate only for very short times and then ride again with average r...

Page 25: ...fter 10 hours of operation and have it serviced Failure to observe these measures may cause the loss of your warranty rights It is absolutely necessary to record the service done on your PWC in the UNIT HISTORY in your authorized Dealers B2B Platform in order to keep your warranty 1 11 Warranty Policy Please make sure you get the latest update of the Warranty Policy from your authorized HSR BENELL...

Page 26: ...HSR BENELLI Series S Manual EN 26 ...

Page 27: ... Arrangement of controls General 28 2 2 Engine start stop buttons 30 2 3 Safety lanyard 30 2 4 Throttle control 31 2 5 Trim control 32 2 6 Steering system 33 2 7 Engine hood 34 2 8 Gas cap 35 2 9 Dashboard 36 2 10 Owner s Cards 37 2 11 Registration of the Unit 39 ...

Page 28: ...nual EN 28 2 1 Arrangement of controls General A Steering B Steering column C Engine hood D Fuel tank lid inside E Water inlet intake grate F Water inlet intake grate G Riding plate H Duckbills I Towing hook F H A B C E D G I ...

Page 29: ...29 EN HSR BENELLI Series S Manual A Engine starter button stop button B Trim control C Safety lanyard D Engine hood E Hood lock F Exhaust outlet G Duckbills H Jet pump I Throttle B A C F G D E H I ...

Page 30: ...it on the left hand steering handle The starter button is green and marked START The engine s stop button is red and marked STOP Pressing the engine stop button will stop the engine 2 3 Safety lanyard The engine can also be switched off by pulling the safety lanyard ATTENTION The engine can only be started if the lanyard is plugged in ...

Page 31: ...icient clearance 2 3 mm 2 4 1 TPS setup done through the Dash The setup is only possible when the engine is not running n 10 rpm Press the blue button for 10sec TPS SETUP will be displayed on Dash To set FULL THROTTLE Press throttle lever on full throttle for at least 3 sec a constant Value 150 will be confirmed automatically If no constant value is confirmed return after 15 sec to the main screen...

Page 32: ...hen released The trim function serves to change the angle of the jet pump it pushes down the nose of the Series S into the water providing better stability and agility while operating the vehicle in turns The message PROGRAMMING will be displayed Now both new values are stored in the ECU SETUP COMPLETE Press the blue button to return to the main display Finished 5 6 7 ...

Page 33: ...teering in the direction you want to go Moving the steering will change the angle of the jet drive The water jet ejected causes the boat move in the desired direction Warning for jet drive There are physical limits to high speeds Observe turning radius Steering is only possible during throttle operation ...

Page 34: ...l the way up Unhook upwards Do not lift the engine compartment hood more than 30 This could cause fractures of the carbon cladding Lift the rear part of the engine hood see photo up to an angle of approx 30 Then pull it out carefully backwards from its hold and lift it out To lock it back repeat the operation exactly in the opposite way Make sure that the rubber seals fit exactly so that no water ...

Page 35: ...SR BENELLI Series S Manual 2 8 Gas cap Raise the gas cap Untwist counter clockwise Take off the gas cap Put the gas cap in a safe place while refueling 1 2 3 4 Do not refuel in the water Gas cap does not float ...

Page 36: ... blue mode button and turning on the ignition with the lanyard for 10 seconds Hour meter Shows within the first 10 minutes of the operation Minutes and Seconds and then changes to Hours and Minutes Defect indicator Oil pressure indicator Low fuel indicator Hour meter Mapping mode Owner s Card status Velocity KM H M H RPM indicator ...

Page 37: ...er s Cards The Owner s Card locks and unlocks the unit The locking and unlocking operations are done through the insertion of the Owner s Card on the dash The locking status is indicated on the dash screen Dash Board Owner s Card shows Unlocked ...

Page 38: ...e are 3 cards available The black one is the power mode for unlimited use The red one is the soft mode for beginners The grey one is used for rental purposes Power mode for unlimited use Soft mode for beginners use Soft mode for rental use ...

Page 39: ...o can release the ECU At the moment the authorization number is requested the unit will be registered and the warranty period will start The dealer must perform the following steps Log on to the HUDS with the laptop Read out the ECU Code Get the unit s engine number and VIN Access B2B fill in the requested data therein and read out the access code Enter the access code in the HUDS and save the inf...

Page 40: ...HSR BENELLI Series S Manual EN 40 Your HUDS File Click here to go to the next screen ...

Page 41: ...41 EN HSR BENELLI Series S Manual ECU Code ...

Page 42: ... EN 42 Your B2B File Fill in VIN i e HSRA0000C808 Fill in engine number i e BH3300000000AC0809 Fill in ECU Code available in your HUDS file it needs to be entered in the B2B Customer s information Choose your area Click Register ...

Page 43: ...43 EN HSR BENELLI Series S Manual This is the activation code for the ECU and needs to be entered in your HUDS file ...

Page 44: ...HSR BENELLI Series S Manual EN 44 Your HUDS File The activation code for the ECU needs to be entered in here Click on Set End of Line Parameters ...

Page 45: ...45 EN HSR BENELLI Series S Manual Remove the ignition key and put it back again to make the ECU read the new mapping ...

Page 46: ...HSR BENELLI Series S Manual EN 46 ...

Page 47: ...3 1 Daily checks before a ride 48 3 2 Oil level 51 3 3 Fuel 53 3 4 Fire extinguisher 56 3 5 Battery 56 3 6 Throttle 57 3 7 Steering system 57 3 8 Trim 58 3 9 Switch safety lanyard 58 3 10 Starting 59 3 11 Turning 60 3 12 Starting in deep waters 62 ...

Page 48: ...efore starting the engine and top up if necessary Check that the drainage rubbers 2 pieces on the rear of the hull are in the correct position Warm up the engine Before every ride the engine must run idle in the water for at least 5 seconds until the oil is distributed over the entire lubrication circuit Afterwards run for 2 min with max 1 2 gas 3 1 Daily checks before a ride Remove blow by hose c...

Page 49: ...ater control status for proper functioning with running engine in the water Hull damage feel the hull and check for damage Fixed screwed connections and fixing elements check bolts nuts and holders for tight fitting Tighten if necessary Check hose connections check all hose connections for tight fitting Fuel vapors collected in the engine compartment constitute a fire and explosion risk Warning ou...

Page 50: ...r for smooth and steady operation and for excessive clearance If necessary adjust the throttle cable The throttle lever must return automatically to the original position when it is released Check safety lanyard Start the engine and run for a short time Pull off the safety lanyard from the engine stop button and check if engine stops right away If the throttle lever does not return to its original...

Page 51: ...nd death Never run the engine for more than 10 seconds out of the water Overheating could severely damage the engine and the exhaust system Idle running 3 2 Oil level Oil level check Check the oil level before every ride Change oil and oil filter during 1st inspection after 10 hrs Change oil and oil filter each 25 hrs but at least once a year Use only HSR BENELLI oil Otherwise your warranty claims...

Page 52: ...low the same procedure when the engine is warm but make sure your check is done five minutes after the engine stopped to allow the remaining oil to go back to the bottom of the engine The oil level may be higher than with a cold engine since the oil volume increases when it s warm The oil may be hot Never let the engine run out of the water without cooling Caution Never allow the oil level to exce...

Page 53: ...tank will escape and the fuel will not flow back Pay attention to the maximum level Engine oil Use only HSR BENELLI engine oil If the engine oil needs to be topped up put the oil through the blow by hose in the valve cover see photo Open the hose clamp with a screwdriver and close it with a special tool ...

Page 54: ... spilled fuel immediately Never refuel in the water If petrol is ingested or splashed in the eyes consult a doctor immediately Warning Fuel tank capacity maximum 18 liters Always keep the Series S horizontal when filling the fuel tank Recommended fuel Super petrol unleaded DIN 51607 Octane between 95 and 98 ROZ 85 MOZ US premium Unleaded gasoline 91 92 93 Octane or 95 98 ROZ ISO 5146 HSR BENELLI w...

Page 55: ... the engine caused by the use of inferior or not recommended fuels will not be covered by the applicable guarantee Never fill the fuel tank up to the top edge Pay attention to maximum level Petrol will expand under the influence of heat and may leak out through the fuel tank ventilation After refueling make sure that the fuel tank lid is properly closed Fuel vapors collected in the engine compartm...

Page 56: ...etely service free and therefore it is not necessary to check the electrolyte filling level or to top it up with distillated water Regular use of your Series S will contribute to maximize its life time This will keep your battery charged Battery sulfation Sulfation is a frequent cause for battery failure Sulfation occurs when the battery remains discharged for a long time Sulfate is a normal waste...

Page 57: ...perly Always follow the instructions on the battery cover when charging service free batteries 3 6 Throttle Check several times that the throttle lever moves smoothly before you start the engine 3 7 Steering system Check the correct fixation of the steering Check the steering system by moving the steering slowly from one steering stop position to the other The jet pump should move at the same rati...

Page 58: ...witch safety lanyard Check the safety lanyard for damage cracks etc In case of damage it must be replaced immediately with a new one Check the correct functioning of the engine s start button the stop button and the lanyard Always keep hands feet clothing and long hair away from the intake grate of the jet pump Never insert objects into the jet nozzle while the engine is running This could cause m...

Page 59: ...s S Manual 3 10 Starting Exhaust gases are toxic observe 60 cm depth of water Warning Never run the engine ideling for more than 10 seconds out of the water Overheating could severely damage the engine and the exhaust system ...

Page 60: ...ary pressure will build up for changing the direction The stronger the pressure at the jet nozzle the stronger the turn To make wide turns a low jet nozzle pressure is required If you let the throttle lever go there will be hardly any drive pressure Only reduced controllability is possible Whenyoureleasethethrottlelevercompletely theSeries Swillloseitscontrollability This can lead to hitting objec...

Page 61: ...gine while you are still maneuvering or want to make fast turns The craft cannot be steered when the engine is switched off Warning Accelerate slightly before you start to turn The HSR BENELLI Series S is very sporty and versatile You could lose your hold and fall down during sharp maneuvers This could cause accidents Therefore always ride according to your personal skills and knowledge Warning ...

Page 62: ...eep waters 1 Swim to the rear of the vehicle 2 Make sure that the engine is switched off 3 Grab the handle bar with both hands 4 Activate the engine start button 5 Riding slowly pull yourself up so that your knees are resting in the tray area 6 Stand up ...

Page 63: ...63 EN HSR BENELLI Series S Manual 4 Maintenance and Service 4 1 Storage 64 4 2 Servicing and setting 67 4 3 Cleaning of vehicle 89 ...

Page 64: ...S for winterization 4 1 1 Service needed during winterization Oil Oil filter change Oil Oil filter change whenever water could contaminate the oil Rinse the engine with oil as long as necessary in order to get the entire water out of the engine It is extremely critical for saltwater The engine might suffer due to corrosion and could lead to an engine defect Change the oil filter ...

Page 65: ... plugs Fill approximately 10 cm of clean engine oil through the spark plug holes into the combustion chamber of the engine Briefly rev up the engine Screw in the spark plugs again 4 1 3 Battery clamp Remove the battery and store it in a dry nonfreezing space To avoid damage to the battery charge it once a month Completely fill the tank with fuel A full tank prevents the formation of humidity and m...

Page 66: ...ompose itself after approx 30 days Stabilizer protects against decomposition Get the water out of the exhaust system by accelerating the engine 2 3 times for a short moment 4 1 5 Battery Disconnect battery Note Use a battery charger suitable for sealed batteries Never remove the airtight battery cover to avoid battery damage ...

Page 67: ...n perform services or repairs 4 2 1 Fuel information The engine should be operated with unleaded super petrol only Unleaded fuel DIN 51607 Octane between 95 and 98 ROZ or 85 MOZ US premium Unleaded fuel 91 92 93 Octane or 95 98 ROZ ISO 5146 The fuel injected engine reduces the amount of exhaust emitted by the engine into the environment The exhaust system was carefully constructed The result an en...

Page 68: ... schedule Please ask your authorized HSR BENELLI dealer for the warranty policy suitable for your model and carefully read the guidelines for the HSR BENELLI warranty HSR BENELLI can only grant its warranty if those guidelines have been met Remember to make sure that the authorized HSR BENELLI dealer records the performed services on the B2B platform on the Unit s History This will prove that the ...

Page 69: ...ark Check cooling liquid level Level Check tighten engine mount bolts Check tighten Check steering and lanyard Free moveable stops engine Check throttle operation system Free moveable Check and clean jet pump Remove particles Check battery clamps Adjust and tighten Check and adjust TPS Functional setting Check impeller torque 80 Nm Damages torque 80 Nm Carry out a check before every ride even with...

Page 70: ...d oil filter x x Lubricate throttle housing cable connection x x Lubricate on the throttle housing x x Lubricate steering pivot dismantle x x Check and adjust valve clearance x x Check and clean flame arrestor x x Check tighten engine mount bolts x x Check valve for fuel ventilation x x Check throttle operation system x x Check and clean jet pump x x Check renew drive dampers x x Check steering an...

Page 71: ...n At 75 hours of operation At 100 hours of operation each additional 25 hours each additional 100 hours x x x x x x x x x x x x x x x x x x x x x x x x x x x x x x x x x x x x x x x x x x x x x x x x x x x x x x x x x x x x x x x x x x x x x x x x x x x x x x ...

Page 72: ...the acceleration The play should be of about 2 3 mm 4 2 5 Setting of throttle Loosen the counter nuts at the end of the throttle cable Then turn them until the required play is achieved Tighten the counter nuts again You can also adjust the throttle cable play by opening the counter nuts on the handle bar Turn them until the required free play is achieved Tighten the counter nut after 2 3 mm ...

Page 73: ...eering cable from the jet nozzle at the ball joint you must first pull the steering cable back Then pull up on the connection The cable will be free from the connection Loosen the counter nut at the end of the steering cable on the right hand side Keep the steering always in straight forward position Turn the cable connection to adjust the steering Apply a liquid glue to the nut before adjusting a...

Page 74: ...asure the distance between the jet nozzle and the jet drive outlet in the process The distance should be the same on both sides x When not adequately tightened the nuts can loosen up by themselves This may lead to risky driving conditions Warning 4 2 7 Checking of the steering cable Please have this check done by an authorized HSR BENELLI dealer If the steering is stiff or jerky please contact an ...

Page 75: ...rpm Have the setting of the idling rpm done by an official HSR BENELLI dealer If the idling rpm varies have the throttle housing checked by an official HSR BENELLI dealer Idling rpm Out of water 1700 1 min 50 1 min In water 1400 1 min 50 1 min 4 2 9 Use in high altitude location No height adjustment is required The E C U Engine Control Unit will regulate the fuel mixture automatically ...

Page 76: ...ll keep any leakage from the Series S to a minimum Have the check valve checked by an official HSR BENELLI dealer according to the maintenance schedule 4 2 11 Engine oil system Make sure that the engine oil is always at the prescribed level so that the engine can work properly Change the oil filter and the oil according to the maintenance schedule The oil looses its lubrication effect in time and ...

Page 77: ...th engine oil provokes skin cancer in cavies Brief contacts with engine oil can irritate the skin Keep new or used engine oil away from children and domestic animals Wear long sleeved clothing and gloves impermeable to water every time filling engine oil is carried out Wash with soap and water if engine oil has been in contact with the skin Recycle or dispose of used engine oil correctly 4 2 12 Oi...

Page 78: ...il out of the engine completely and place it into a suitable container Take of the old oil filter Before the installation of the new oil filter coat the O ring slightly with engine oil Install the oil filter and tighten only to the prescribed tightening torque Remove the blow by hose and open the hose clamp with a screw driver Change the engine oil only when the engine oil is warm Caution ...

Page 79: ... 2 3 change of oil filter included Oil quality HSR BENELLI oil Required torque oil filter cover 24 Nm Required torque ignition coils 10 Nm Required torque spark plugs 12 Nm The oil measurement is okay until the oil level goes slightly above the MIN mark and below the MAX mark on the dip stick Never fill with more than 2 3 l of oil into the engine Oil filter Included Caution ...

Page 80: ... valve seats will be reduced by wear and tear This will change the valve clearance Danger Do not start the engine if the oil is below the MIN reference Warning If the valve clearance is not adjusted the valve might remain partly open because of wear and tear This reduces the performance the valves and valve seats will burn and this may cause severe damage to the engine Attention ...

Page 81: ... inspections only done at an authorized HSR BENELLI dealer Valve clearance cold Intake 0 30 0 35 mm Exhaust 0 35 0 40 mm 4 2 15 Spark plugs Renew the spark plugs every 100 hrs Check the electrode gap and status after the break in period 10 hrs Only change the spark plugs with a cold or lukewarm engine otherwise the thread of the cylinder head can peel off Caution ...

Page 82: ...ition coil C 4 Unscrew spark plug To reinstall Follow the procedure exactly the opposite way NOTE The torque tightening the spark plug is 12 Nm In order to avoid damage to the engine use only the prescribed Champion RG4HC spark plugs Electrode gap spark plug 0 75 0 80 mm 0 75 0 80 mm B C A ...

Page 83: ...y is maintenance free You must however maintain the battery charged as it is intended to be in order to maximize its life and to make sure that it will supply enough current to start your Series S When used regularly the charging system helps to maintain the full charge of the battery However if your Series S is only used occasionally the battery might possibly get discharged Batteries get dischar...

Page 84: ...oltmeter If the voltage drops below 12 6 Volt the battery must be charged with a suitable charger If you don t use your Series S for more than two weeks the battery must be charged with a suitable charger Do not use a quick charger for cars This can lead to overcharging and damage the battery Charging the battery Always remove the battery from the Series S for charging Charge the battery with a su...

Page 85: ...battery from the hull Clean the battery and the battery poles Remove tough deposits with a wire brush and then rinse the battery with fresh water Rinse thoroughly with clear water Wipe the battery dry and smear the battery poles with water resistant grease Never remove the airtight battery lock The battery must not be replaced by a conventional battery otherwise the electrical system will not work...

Page 86: ...sult in serious injuries even with a fatal outcome Make sure that the bolts of the battery terminals are well tightened and that the covers over the terminals are in place Warning 4 2 16 4 Installing the battery Reverse the dismantling process for installing the battery Connect the black auxiliary cable to the negative terminal Connect the battery and smear the battery poles with water resistant g...

Page 87: ...e following lubrications are to be carried out according to the inspection table and the section Daily checks before a ride Chapter Operation The following spots are to be lubricated with deep penetrating rust protection e g WD40 Lubricate the throttle cable with cable lubricator Pic 1 Jet nozzles and water jet reverse pivots Pic 2 Pic 1 Pic 2 lubricate lubricate ...

Page 88: ...I Series S Manual EN 88 Pic 3 Pic 4 Ball joint Pic 3 Control joint Pic 4 The control shaft must be dismantled for lubrication Have this service done only at an official HSR BENELLI Dealer Attention lubricate Lube ...

Page 89: ...89 EN HSR BENELLI Series S Manual 4 3 Cleaning of vehicle Never use a high pressure cleaning equipment to clean the vehicle Warning ...

Page 90: ...HSR BENELLI Series S Manual EN 90 ...

Page 91: ...91 EN HSR BENELLI Series S Manual 5 Engine description 5 1 Engine and safety notes 92 5 2 Engine data 94 5 3 Fill up quantities 97 5 4 Environment 97 ...

Page 92: ...nual EN 92 5 1 Engine Air Filter Blow By Hose Oil Filling Valve Cover Throttle Body Thermostate Cylinder Head Cylinder Block Engine Support Ignition Housing Oil Dip Stick Starter Oil Cooler Oil Filter Oil Separator Fuel Rail ...

Page 93: ...gine If similar works need to be performed such as tightening screws and or nuts for specific dimensions the same torque sequence should be used Always use new seals if sections of the engine are to be installed or removed The highest caution is required when handling any kinds of fuels Working on the engine with lit cigarettes or burning objects is strictly forbidden This can lead to inflammation...

Page 94: ...e countershaft 4 valve cylinder head valves operated via camshaft and timing chain Mechanical valve clearance compensation through shims Crankshaft with 4 main bearings Forged conrods Forged pistons Aluminium crankcase with NIKASIL cylinder bore coating All aluminium components in copper free alloy ...

Page 95: ...ns 3 layer cylinder head gasket Triple throttle Dry weight basic engine 64 kg Bore stroke 88 62 mm Cubic capacity 1130 ccm Compression 12 13 1 142 CV 13 14 1 162 CV Lubricating system Wet Sump Oil volume Volume flow main pressure pump 45 60 l hour max Pressure valve 6 bar ...

Page 96: ...rculation Short circuit Idling rpm Out of Water 1700 1 min 50 1 min In water 1400 1 min 50 1 min Max rpm 9200 9300 1 min Valve clearance cold Intake 0 30 0 35 mm Exhaust 0 35 0 40 mm Basic bearing clearance 0 03 0 005 Conrod bearing clearance 0 03 0 005 Valve diameter Intake 33 mm Exhaust 29 mm Starter 850 Watt Gear rate transmission 1 1 19 ...

Page 97: ... Oil filter Included Oil quality HSR BENELLI Fuel Unleaded fuel DIN 51607 between 95 snd 98 ROZ US premium Unleaded gasoline 91 92 93 Octane or 95 98 ROZ ISO 5146 Fuel tank capacity 18 l 5 4 Environment Temperatures 0 C 45 C Height 0 2000m Engine compartment temperature max 65 C Tank temperature max 55 C ...

Page 98: ...HSR BENELLI Series S Manual EN 98 ...

Page 99: ...99 EN HSR BENELLI Series S Manual 6 Faults and repair measures 6 1 Fuses 100 6 2 Environmental protection 101 ...

Page 100: ... compartment There are 2 fuses If a fuse burns during operation check the electrical system to find the cause Then replace the fuse with one that has the corresponding Amperage Do not replace fuses by substitutes Replace fuses only with a new fuse with the correct capacity Warning Fuses ...

Page 101: ... against the law Do not pollute beaches coastal areas and waters with petrol and oil Take care of natural habitats and their fauna Make sure to properly dispose your Series S empty batteries accumulators engine oil and other parts Consult your authorized HSR BENELLI dealer or the competent local environmental protection authorities for proper waste disposal methods ...

Page 102: ...HSR BENELLI Series S Manual EN 102 ...

Page 103: ...103 EN HSR BENELLI Series S Manual 7 Appendix 7 1 Technical data 104 7 2 Manufacturer 105 ...

Page 104: ...der 4 stroke natural aspirated with balancing shaft Displacement 1 130cm3 Bore 88 mm Stroke 62 mm Power Output Pro Edition 142 HP Race Edition 162 HP Max Continous RPM 9200 9300 1 min Ignition System Digital electronic map ignition Engine Type BH33 Spark Plug Type CHAMPION RG4HC Electrode gap 0 75 0 80mm Hull material Fiberglass RTM Resin Transfer Molding ...

Page 105: ...380 Pöchlarn Austria www hsr benelli com Starter Electric starting Silencer Stainless steel twin pipe exhaust system Voltage supply 12 V Battery 12V 15 AH Fuel Unleaded fuel DIN 51607 between 95 and 98 ROZ US premium Unleaded gasoline 91 92 93 Octane or 95 98 ROZ ISO 5146 Fuel Tank capacity 18l ...

Page 106: ......

Page 107: ......

Page 108: ...HSR BENELLI GmbH Co KG Wiener Straße 71 3380 Pöchlarn Austria ...

Reviews: