HQ Power VDPL110WL User Manual Download Page 5


VDPL110WL 

V. 02 

 03/11/2017 

©Velleman nv 

5.2


DMX-512 connection 


When applicable, connect an XLR cable to the female 3-pin XLR output of a controller (not incl.) and 
the other side to the male 3-pin XLR input


of the 

VDPL110WL. 

Multiple 

VDPL110WL

s can be 

linked through serial linking. The linking cable should be a dual core, screened cable with XLR input 
and output connectors. 


A DMX terminator is recommended for installations where the DMX cable has to run a long distance 
or is in an electrically noisy environment (e.g. discos). The terminator prevents corruption of the 

digital control signal by electrical noise. The DMX terminator is simply an XLR plug with a 120Ω 

resistor between pins 2 and 3, which is then plugged into the XLR output socket of the last device in 
the chain. 

5.3


General 


Make sure there is no flammable material within a 50cm radius of the device and there is sufficient 
cooling. 


Have a qualified electrician carry out the electrical connection. 


Connect the device to the mains with the power plug. Do not connect it to a dimming pack. 


The installation has to be approved by an expert before the device is taken into service. 

6.


Operation 

Refer to the illustrations on page 

of this manual. 


Insert the power plug into the power input 

[4]

. Insert the other end of the power cable into the 

mains. 


The 

VDPL110WL

can operate in three modes: 

automatic mode

slave


mode

 or 

DMX controlled


mode


Automatic mode  


Set DIP switch 1 

[1]

 to ON to enable both water effect and colour changing. 


Set DIP switch 2 

[1]

 to ON to freeze the water effect. The colour still changes. 


Set DIP switch 3 

[1]

 to ON to freeze the colour. The water effect is still active. 


Set DIP switch 4 

[1]

 to ON to freeze both colour and water effect. 

Note: 

only the highest DIP switch takes effect. 

Slave mode  


Connect multiple 

VDPL110WL

’s as described in 

§6.b


Set DIP switches 1


and 10 

[1]

 to ON to enable slave mode. 

DMX controlled mode 


Set DIP switch 10 

[1]

 to the ON position to enable DMX controlled mode. 


All DMX-controlled devices need a digital start address so that the correct device responds to the 
signals. This digital start address 

is the channel number from which the device starts to “listen” to 

the DMX controller. The same starting address can be used for a whole group of devices or an 
individual address can be set for every device. 


When all devices have the same address, all the u

nits will “listen” to the control signal on one 

particular channel. In other words: changing the settings of one channel will affect all devices 

simultaneously. If you set individual addresses, each device will “listen” to a separate channel 

number. Changing the settings of one channel will only affect the device in question. 


In case of the 2-channel 

VDPL110WL

, you will have to set the start address of the first unit to 1 

(CH1~2), the second unit to 3 (1 + 2) (CH3~4), the third to 5 (3 + 2) (CH5~6), and so on. 


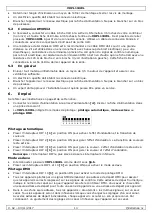
Use the DIP switches 

[1]

 to set the appropriate DMX address. 


switch 


value 


16 


32 


64 


128 


256 

Summary of Contents for VDPL110WL

Page 1: ...VDPL110WL USER MANUAL 3 GEBRUIKERSHANDLEIDING 7 MODE D EMPLOI 11 MANUAL DEL USUARIO 15 BEDIENUNGSANLEITUNG 19...

Page 2: ...oller line from 3 pins into 5 pins plug and socket Controller line van 3 pin naar 5 pin aanpassen stekker en contact Modifier la ligne du contr leur de 3 broches en 5 broches fiche et contact Modifica...

Page 3: ...Indoor use only Keep this device away from rain moisture splashing and dripping liquids Keep this device away from children and unauthorized users Caution device heats up during use There are no user...

Page 4: ...in discos theatres etc The VDPL110WL can be used indoor 35 C 75 RH with an alternating current of max 240V AC 50Hz Lighting effects are not designed for permanent operation regular operation breaks w...

Page 5: ...DMX controlled mode Automatic mode Set DIP switch 1 1 to ON to enable both water effect and colour changing Set DIP switch 2 1 to ON to freeze the water effect The colour still changes Set DIP switch...

Page 6: ...ualified technician maintain the device Regularly remove dust from the housing and the air vents using a slightly damp cloth There are no user serviceable parts inside Refer to an authorized dealer fo...

Page 7: ...toestel enkel binnenshuis Bescherm tegen regen vochtigheid en opspattende vloeistoffen Houd dit toestel uit de buurt van kinderen en onbevoegden Let op dit toestel wordt zeer warm tijdens het gebruik...

Page 8: ...enz U mag dit toestel enkel binnenshuis gebruiken 35 C 75 RH Sluit aan op 240 VAC 50 Hz Lichteffecten zijn niet ontworpen voor continue werking regelmatige onderbrekingen doen ze langer meegaan Gebrui...

Page 9: ...ek de stekker in het stopcontact De VDPL110WL beschikt over drie aanstuurfuncties automatische sturing slavefunctie of DMX sturing Automatische sturing Plaats DIP switch 1 1 op ON om het rimpeleffect...

Page 10: ...ig bewegen De voedingskabels mogen niet beschadigd zijn Laat het toestel onderhouden door een geschoolde technicus Verwijder regelmatig het stof van de behuizing en de ventilatieopeningen met een voch...

Page 11: ...appareil uniquement l int rieur Prot ger de la pluie de l humidit et des projections d eau Garder hors de la port e de personnes non qualifi es et de jeunes enfants Attention le bo tier du spot chauff...

Page 12: ...s des discoth ques des th tres etc N utiliser cet appareil qu l int rieur 35 C 75 RH Le raccorder une source de courant CA de 240 VCA 50 Hz Un effet lumineux n est pas con u pour une op ration continu...

Page 13: ...Se r f rer aux illustrations en page 2 de cette notice Connecter le cordon d alimentation la prise d alimentation 4 Ins rer la fiche d alimentation dans une prise de courant Le VDPL110WL int gre trois...

Page 14: ...alimentation ne peuvent pas tre endommag s Un technicien qualifi doit entretenir l appareil D poussi rer r guli rement le bo tier et les fentes d a ration avec un chiffon humide Il n y a aucune pi ce...

Page 15: ...s lo en interiores No exponga este equipo a lluvia humedad ni a ning n tipo de salpicadura o goteo Mantenga el aparato lejos del alcance de personas no capacitadas y ni os Ojo la caja del proyector se...

Page 16: ...e corriente CA de m x 240VCA 50Hz No ha sido dise ado para un uso ininterrumpido Introduzca frecuentemente una pausa para prolongar la vida del aparato Transporte el aparato en su embalaje original Gu...

Page 17: ...L110WL incorpora tres modos de control control autom tico modo esclavo o control DMX Control autom tico Ponga el interruptor DIP 1 1 en la posici n ON para activar el efecto de olas y el cambio de col...

Page 18: ...cte con un t cnico especializado para instalar el aparato Quite el polvo regularmente de la caja y los orificios de ventilaci n con un pa o h medo El usuario no habr de efectuar el mantenimiento de ni...

Page 19: ...er Reinigung vom Netz Fassen Sie dazu den Netzstecker an der Grifffl che an und ziehen Sie nie an der Netzleitung Verwenden Sie das Ger t nur im Innenbereich Sch tzen Sie das Ger t vor Regen und Feuch...

Page 20: ...Garantieanspruch F r daraus resultierende Folgesch den bernimmt der Hersteller keine Haftung Lassen Sie dieses Ger t von einem Fachmann installieren und warten Das Ger t bei Temperaturschwankungen nic...

Page 21: ...Elektriker anschlie en Schlie en Sie das Ger t an das Hauptnetz und nicht an einen Dimmer an Die Installation muss vor Inbetriebnahme von einem Experten genehmigt werden 6 Anwendung Siehe Abbildungen...

Page 22: ...cher in Montageb geln ver ndern Sie die Anschl sse nicht usw Mechanisch bewegende Teile d rfen keine Spuren von Abnutzung aufweisen Sorgen Sie daf r dass die Netzkabel nicht besch digt sind Lassen Sie...

Page 23: ...volledig terug te betalen In dat geval krijgt u een vervangend product of terugbetaling ter waarde van 100 van de aankoopsom bij ontdekking van een gebrek tot n jaar na aankoop en levering of een ver...

Page 24: ...de transporte de y a Velleman si el aparato ya no est cubierto por la garant a Cualquier art culo que tenga que ser reparado tendr que ser devuelto a su distribuidor Velleman Devuelva el aparato con l...

Reviews: