background image

This is an overview to demonstrate the set up and common functionality of Volumio, the 
audiophile audio player with Raspberry Pi.
Before you use this guide make sure you have a high quality DAC such as Quanghao- DAC to 
enjoy the great audio quality.

This example uses iPhone.  Setup using a computer or Android phone will be similar.
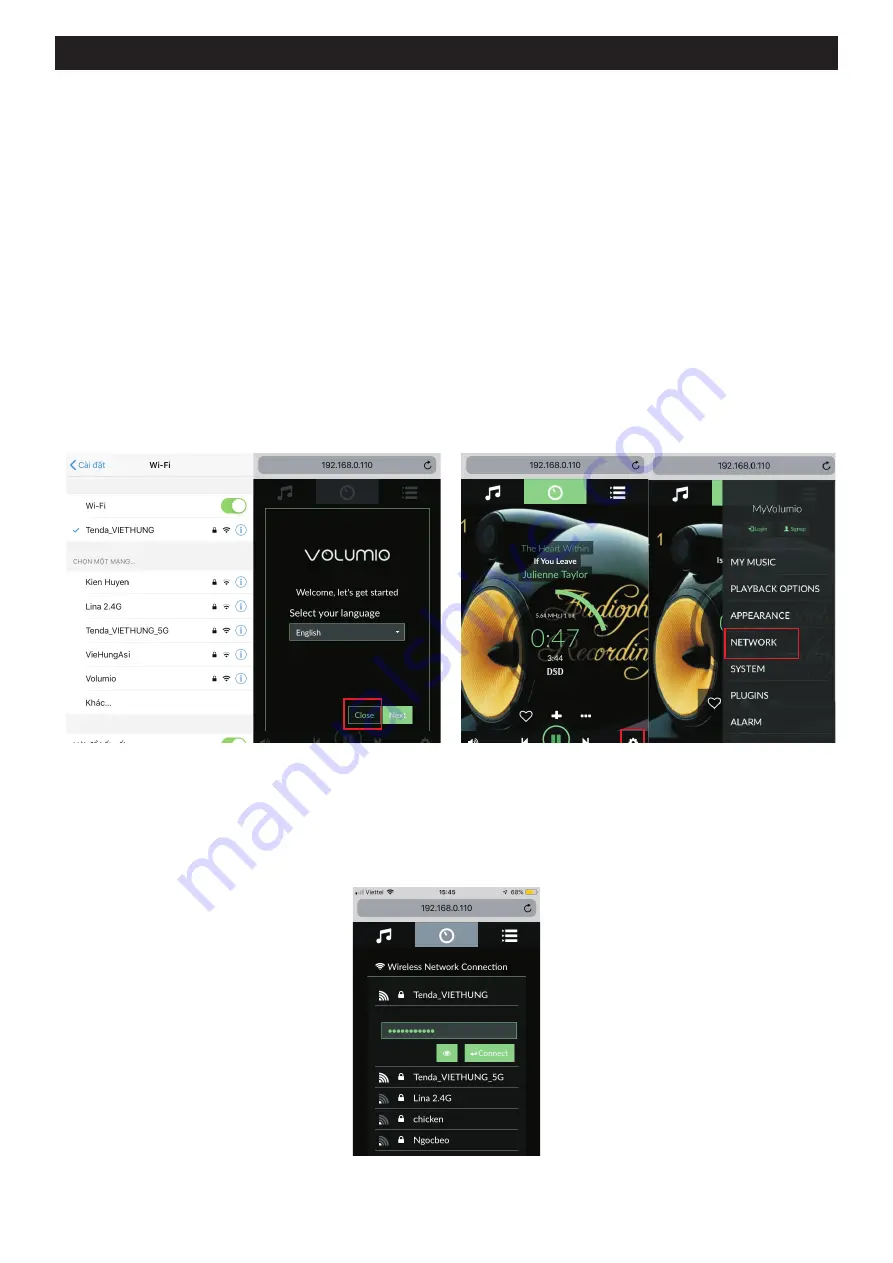
When starting up for the first time, a wifi access point called “volumio” will be available.  Connect 
to it with password “volumio2“. After connected to “volumio” wifi, below page will be shown. You 
can change the language later.

Volumio Guide

Start DAC, wait 2 minutes. Using a mobile phone or Ipad connected to the DAC of the DAC is:

14

Go to Network 
Settings

Configure Volumio to connect to your own wifi Scroll down until you see your own wifi access point.

1. Connect to Wifi

You can see the user guide here: https://volumio.org/volumio-guide/

Summary of Contents for STAR Pure DSD DAC

Page 1: ...STAR Pure DSD DAC DIGITAL ANALOG CONVERTER MUSIC SERVER DAC Music Server Volume Control Owner sManual ...

Page 2: ...ies specified by the manufacturer IMPORTANT SAFETY INSTRUCTIONS 12 Use only with the cart bracket tripod bracket or table specified by the manufacturer or sold with the device When using a shopping cart use caution when moving the cart device combination to avoid injury from the beginning 13 Unplug this device during lightning storms or when not in use for a long time 14 Refer to all services for ...

Page 3: ...nected to Music server or computer USB ROUTER NAS MUSIC FILES MUSIC FILES 220 230 VAC CD DVD HD player Computer RCA USB OPTICAL XLR Connect Music server to DAC USB B Type Music server DAC CAREFUL Turn off the power for all devices before making a connection Read the instructions of each component you plan to use with this device Be sure to plug each plug securely To prevent noise and noise avoid t...

Page 4: ...ke AD1865 PCM63 TDAC1541 This is a product combining classic and modern design Quang Hao Pavel Pogodin Andrea hopes to bring you the most comfortable relaxing moments and enjoying the highest sound with the lowest investment cost DAC incorporates Rasberry Pi4 to become a dedicated Music Server Take advantage of endless digital music sources especially DSD64 128 256 formats that are very close to S...

Page 5: ...olume up down and mute Screen display 5 B 1 3 4 5 6 7 8 9 10 11 12 13 14 2 A B C D A B C D MUSIC SERVER Digital inputs Analog Outputs Power Supply 1 3 4 5 2 Lan network USB input MS USB output to DAC Coaxial input USB input 6 7 8 9 10 Optical input XLR digital input RCA right ouput XLR right ouput XLR left ouput 11 12 13 14 RCA left ouput Switch solid state and Tube Fuse Power switch A C B D E FRO...

Page 6: ...xt restart the DAC and enjoy the music with the settings just set Important The DSD decoding modes x1 x2 x4 x8 are great options to suit your listening style and sound system Experience it and enjoy it as you like Thanks reverse L R DSDx8 save settings install and exit dB 0dB Unbalanced balanced 1 2 3 4 5 6 8 7 DSDx1 For example setting the largest volum mode 1 Return the volume to 0 dB 2 Press th...

Page 7: ...roller facing DAC press the button SET Step 2 The display switches to the setting mode as shown below Step 3 Press the CH CH back buttons to select LCD display DSDx1 DSDx2 DSDx8 look at the LCD screen to select Step 4 Press the MUTE button to save the gain setting on the Setting screen to SAVE in a few seconds Step 5 Press the SET button to exit the installation and enjoy the newly installed DSD s...

Page 8: ...DSP V V Volum up Volum down Setting menu power on off 1 Coax inout 2 Optical in 3 AES EBU in 4 USB input 5 I2S input Chang input Mute set to un balanced Amplification level set 0dB 6dB 12dB 18dB and 6dB DSD only SET PWR CH CH MUTE DSP V V Volum up Volum down exit from Setting menu swap channels L R to R L DSD1x to 8x save actual configuration volum DSD swap bal un bal and ampl Installation mode No...

Page 9: ...r cable 2 Press the front SWITCH button or press PWR button on the control 3 DAC starts after 1 minute Information display screen 1 Turn on the power switch behind the DAC Figure 1 2 Press the SELECT SWITCH button on the DAC or PWR button on the control Figure 2 DAC boots with standby mode 60s the display is full of information Figure 3 3 Turn on the amplifier and play music through DAC to enjoy t...

Page 10: ...oose Combo384 ASIO 1 03 ASIO b Settings Memory playback not zone specific to choose Load full file into memory Bitstreaming to choose Yes DSD c Setup is complete Save 3 Ok you ve set up driver installation Open music and enjoy the sound of DSD B Using Foobar2000 To use Foobar2000 much more complicated we recommend that you do not use this software You can follow the instructions on http hifiduino ...

Page 11: ...ISO download the last player https audirvana com it s best to buy a license for Audirvana A Install Audirvana on your computer After installing Audirvana on your computer you set up the settings as instructed below 11 Music player setup Audirvana on MAC OS configuration Set up the settings ...

Page 12: ...Pad And many other advanced features Connect wifi spread network things by mobile phone ipad computer MUSIC SERVER GUIDE MANUAL DAC Quang Hao product is not only pure DAC but also has a Music server feature a music player With this feature HQ Audio gives users maximum convenience in organizing managing and performing music through an optimized operating system for the device HQ uses the Raspberry ...

Page 13: ...but it is not the best optimized way for sound Tablet smartphone connect hard drive dac music server ROUTER internet NAS Music File Es9038 Music Server Hq Tube Es9038PRO Dac Hq Flagship Es9038PRO Dac Connect to the Lan network A ethernet cable Tablet smartphone DAC C B USB cable Hard drive storage music file connect hard drive dac music server 1 Way 1 Connect wifi 1 WiFi connection Do not use netw...

Page 14: ... When starting up for the first time a wifi access point called volumio will be available Connect to it with password volumio2 After connected to volumio wifi below page will be shown You can change the language later Volumio Guide Start DAC wait 2 minutes Using a mobile phone or Ipad connected to the DAC of the DAC is 14 Go to Network Settings Configure Volumio to connect to your own wifi Scroll ...

Page 15: ...Volumio Guide 15 Using browser Go to http volumio local or http volumio Using IP Address You can check your IP address With Mobile Mobile Browser iOS App Android App 2 Accessing Volumio device ...

Page 16: ...lect Media Library Artists Album and choose the songs you like to play Using browser go to http volumio local or http volumio go to plug in settings Go to Search Plugins and install the Spotify 4 Playback music files 5 Spotify Plug in Setup and Usage Under Installed Plugins enable the Spotify plug in and choose Settings and enter your Spotify username or password If you used facebook as your spoti...

Page 17: ...s 6 Using Airplay Using Airplay is extremely easy with Volumio make sure you your Volumio device and ios are on the same Wifi network then choose Volumio and airplay device https volumio github io docs Note You can see more instructions for use at the home page of Volumio ...

Page 18: ...io so that you can enjoy Spotify audio in your HiFi connected to your Volumio Here s the instructions to setup Under plug in install the Volumio Spotify Connect2 plugin Credit to balzure and ashthespy for this great work After installed enable the Volumio Spotify Connect2 plugin You might also like to change the Settings such as start up volume Using Spotify App you can now see Volumio under devic...

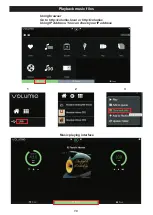
Page 19: ...19 Playback music files Using browser Go to http volumio local or http volumio Using IP Address You can check your IP address 1 2 3 Music playing interface ...

Page 20: ...05 6kHz 768kHz DSD DSD64 128 256 DoP dCS DSD64 128 256 512 ASIO Native PCM 16 32Bit 44 1kHz 48kHz 88 2kHz 96kHz 176 4kHz 192kHz 352 8kHz 384kHz 705 6kHz 768kHz DSD DSD64 128 256 DoP dCS DSD64 128 256 512 ASIO Native Music Server P34 B Interface and music player software Moodeaudio Runeaudio Volumio Wifi 802 11 b g n Wireless LAN Ethernet 802 11 b g n Wireless LAN USB 2 x USB 2 0 ports 2 x USB 3 0 ...

Reviews: