2.Press the [MODE] bu�on and the [FEED] bu�on, release the
bu�on to enter the main menu a�er the screen display "enter
the setup mode" .
3.Press the [MODE] bu�on to sw�ch op�ons, or return to the
previous menu.
4.Press the [FEED] bu�on to move the cursor, or confirm the
current se�ng.
◆
POWER lamp will always flash in green color and goes off when fully charged.
◆
Charging the printer when it is on, even if ba�ery icon on the LCD shows
fully charged, turn off the printer and let the ba�ery charge un�l the POWER
lamp goes off for fully charge.
NOTE
Ba�ery Charging
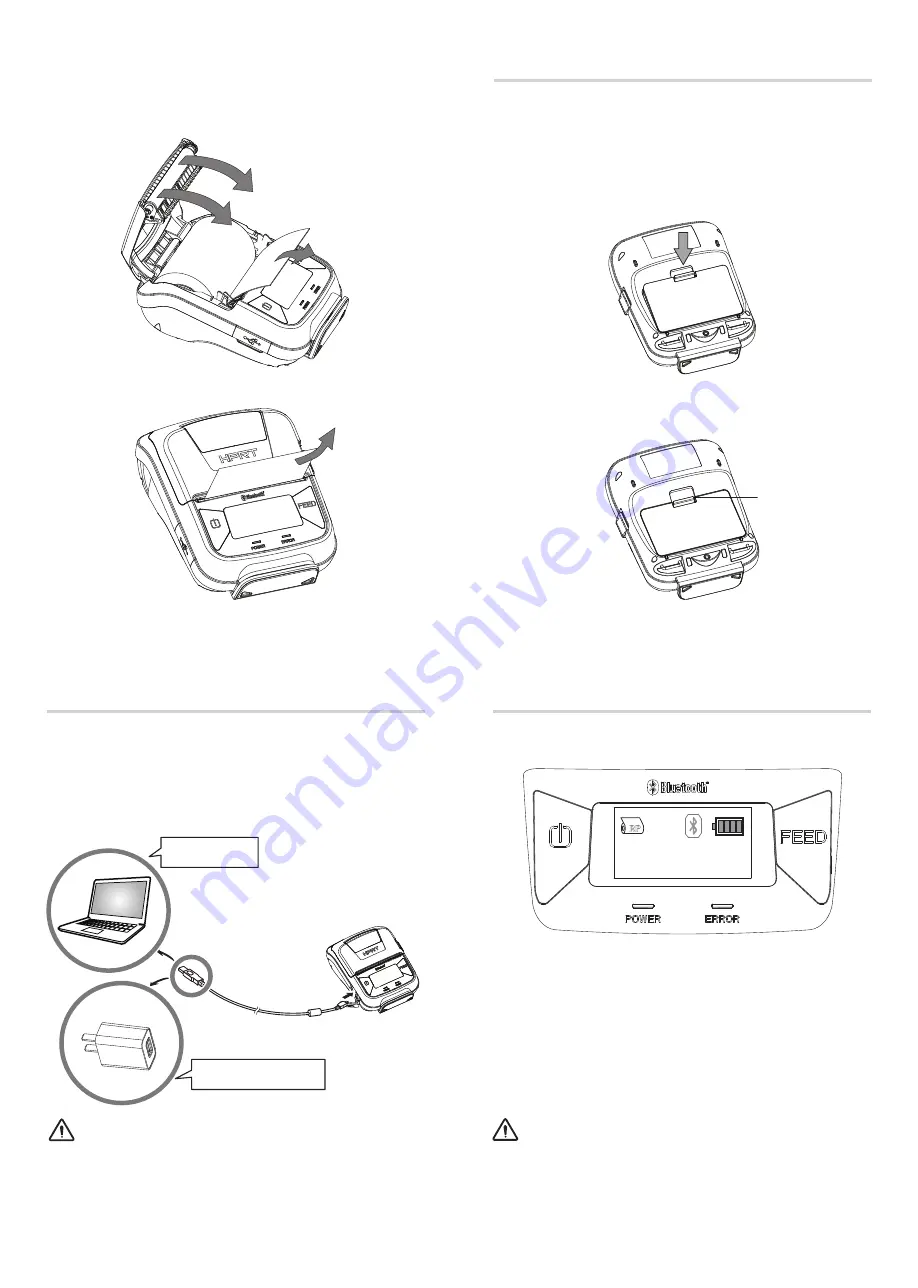
3.Pull the end of the roll straight toward you. Then press down
on both sides of the printer cover to close it firmly. When you
close the printer cover,make sure that it is closed on both sides.
4.Use the tear bar to cut the extra paper.
Ba�ery Installa�on
1.Make sure that the printer has been turned off before you
insert or remove the ba�ery pack.
2.Insert the ba�ery pack into the back of the printer as in the
figure shown below, following the direc�on of the arrow.
Press down on the ba�ery pack un�l the hooks click into place.
3.To remove the ba�ery back, pull back the hook, and use the
opposite procedure from the one you used to insert the
ba�ery pack.
Hook
Charging via AC Adapter
Charging via PC
RP
Online
Plug in socket with USB charging.
When ba�ery pack runs out of power, the ba�ery icon will
flash. It powers off automa�cally when con�nues prin�ng.
If you want to go on, please charge it.
1.Press and hold [MODE] bu�on for approx. 2 seconds, and
printer is turned on LCD display is shown as follows.
◆
Before changing the menu se�ngs, make sure that the communica�on with
a host device is disconnected.
◆
When the printer is under the Bluetooth communica�on with a host device,
it cannot enter the Menu Se�ng mode.
NOTE
Menu Se�ngs


